Setting up HubSpot CRM is quite challenging.
Especially for nonprofits as they operate differently.
Unlike usual businesses, they use different pipelines, their reports vary, their products aren’t the same and their workflows are poles apart.
Thus, it is important to have a set up manual so you can get started easily.
Therefore, we’ve created this blog post to help you set up HubSpot CRM for non profits.
Enough fluff. Let’s get to the point.
9 Steps to Set Up HubSpot for Non Profits
Here are the steps you can take to set up your HubSpot CRM for nonprofit organizations.
These steps are not in any particular order so you can begin with any step.
Jump to your favorite step using the index above.
1. Landing Page
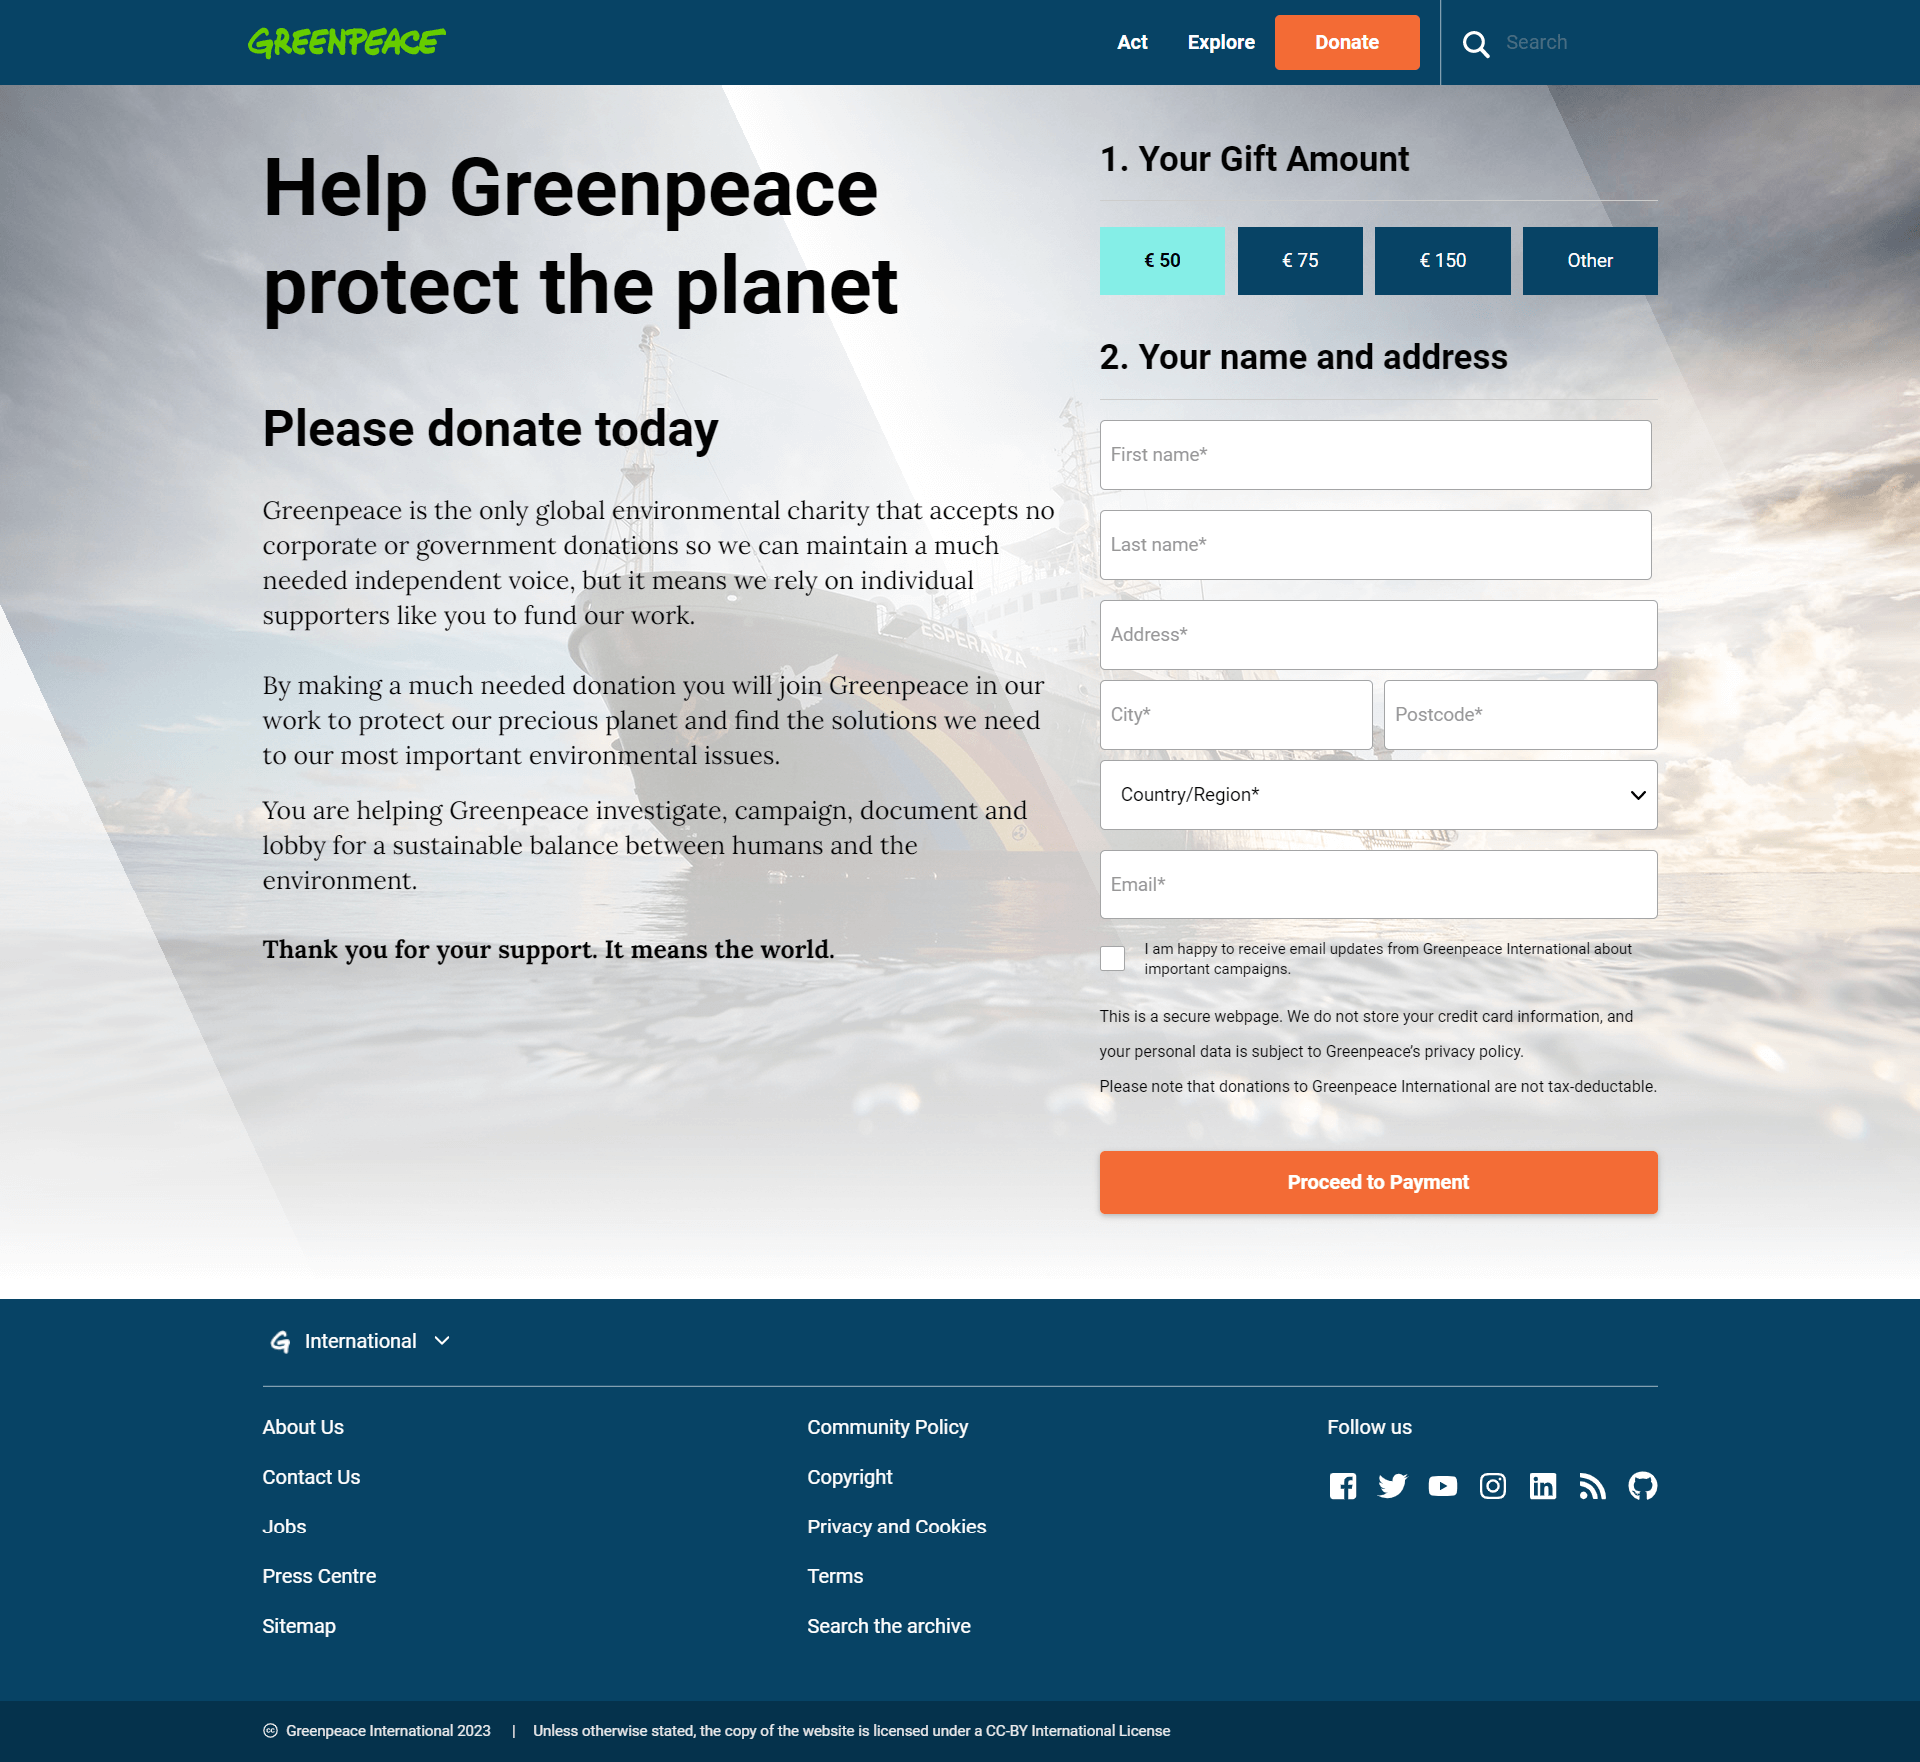
How would you accept donations on your website?
Through the donation page of course.
Therefore, you need to have a donation page for your website. Using HubSpot for non profits, you can create such fundraising pages seamlessly.
- Just go to your HubSpot account and navigate to Marketing > Landing Pages.
- Click Create button on the top-right and select Landing pages.
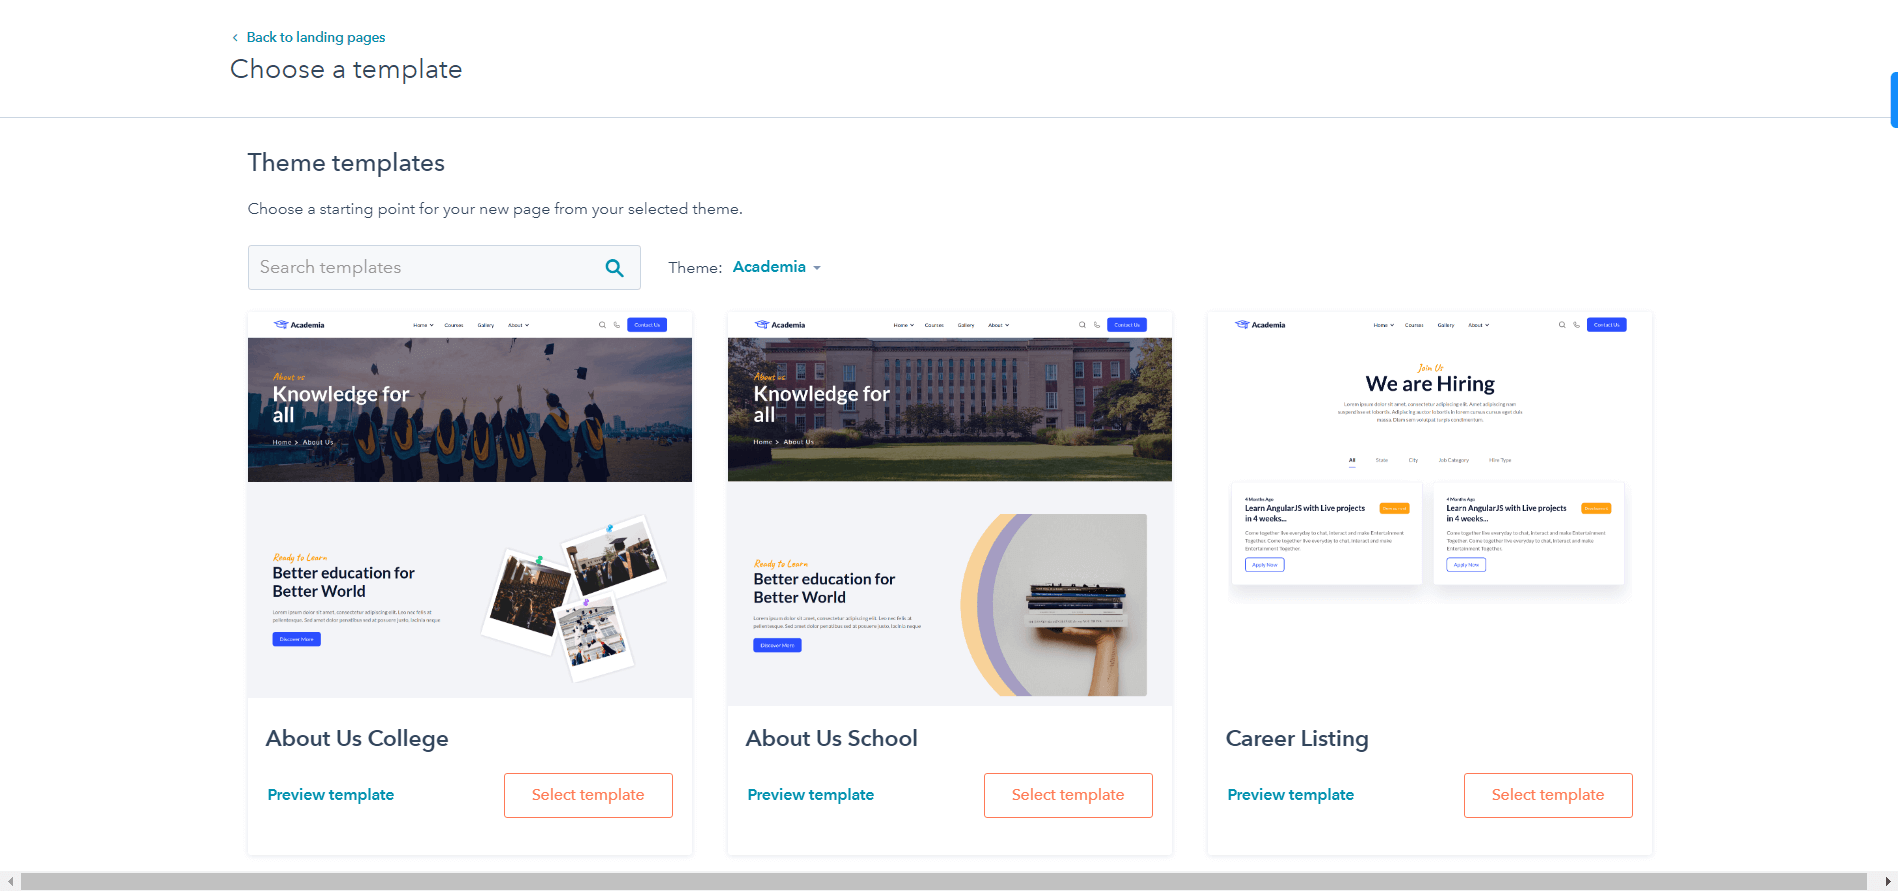
- Name your page, move forward and select a theme and template.
- Edit your landing page using HubSpot’s drag and drop editor.
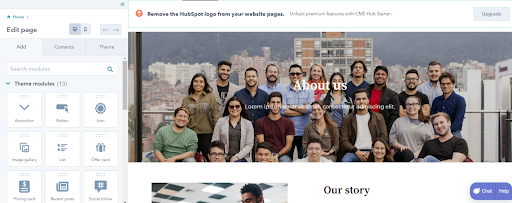
- Add the necessary details to your landing page like title, meta description, slug, etc.
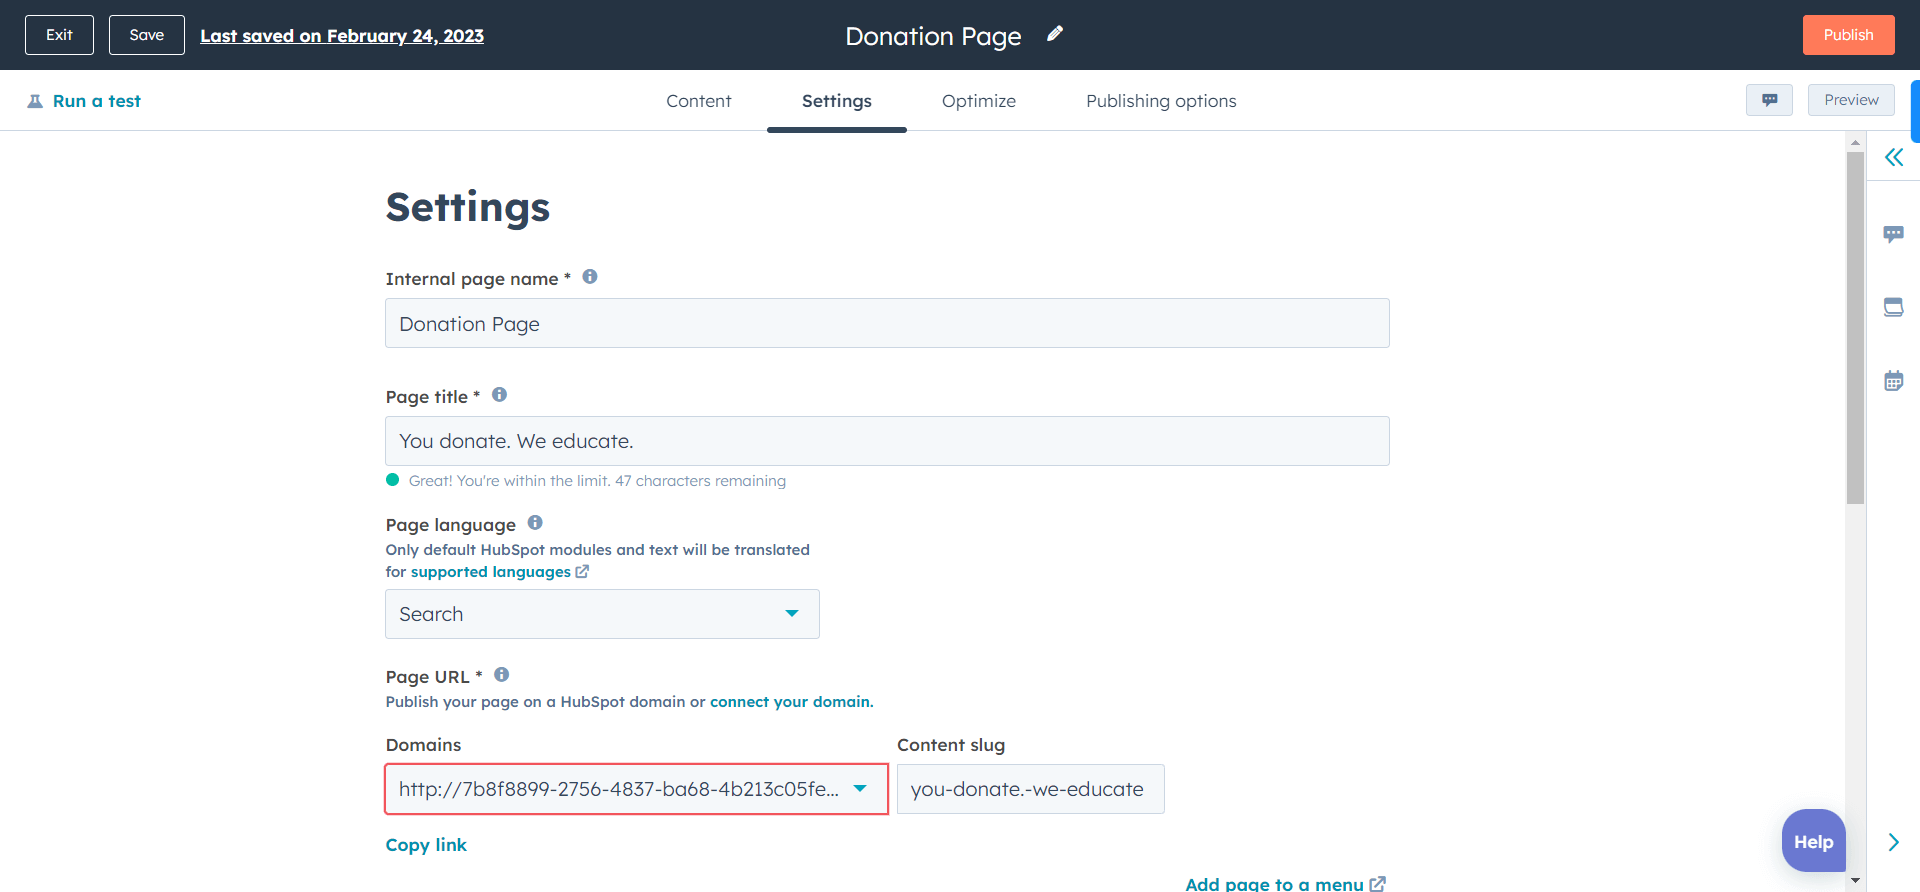
- Once you’re satisfied, you can review and publish your landing page.
If you’ve not installed any theme, you can try our free HubSpot nonprofits themes like:
We’ve created these HubSpot themes for nonprofit organizations. And since all of them are free, you can use them forever without paying a dime.
Need A Hub Specific Setup Guide for Nonprofits?
We’ve created a complete setup guide for all HubSpot hubs for nonprofits with examples.
2. Forms
To donate on your website, donors need a form.
A form where they can enter their name, donation amount, etc. and pay.
But usually, having these donation forms can be a mess. You’ll create a HubSpot fundraising form and then manage the donations through a different payment gateway. Simply put, you start using multiple platforms which you shouldn’t do. We talked about it earlier in this post as well.
To help you with it, we’ve developed a solution named Formpay.
This app converts your native HubSpot forms into payment forms. Using this app, you can collect, manage, and track your payments without going away from HubSpot CRM.
Thus, to create HubSpot fundraising forms,
- Go to the HubSpot marketplace and install Formpay.
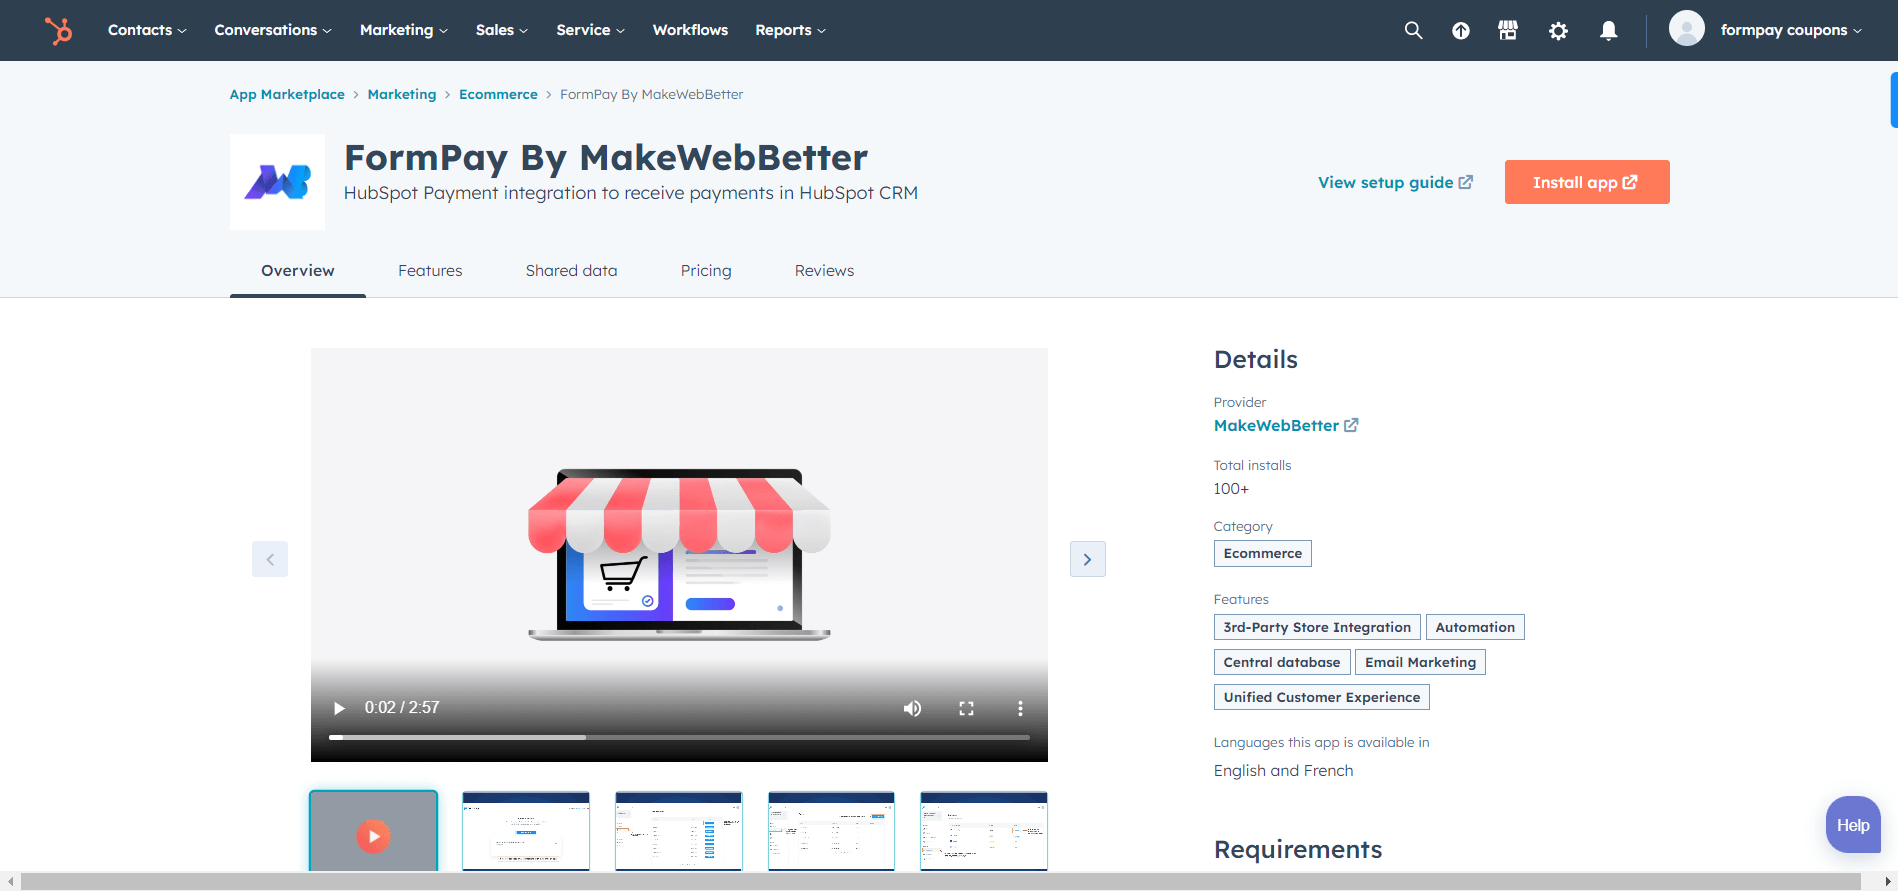
- Sign up and connect your HubSpot portal with the app.
- Once connected, go to Forms in the app and click Create New Form.
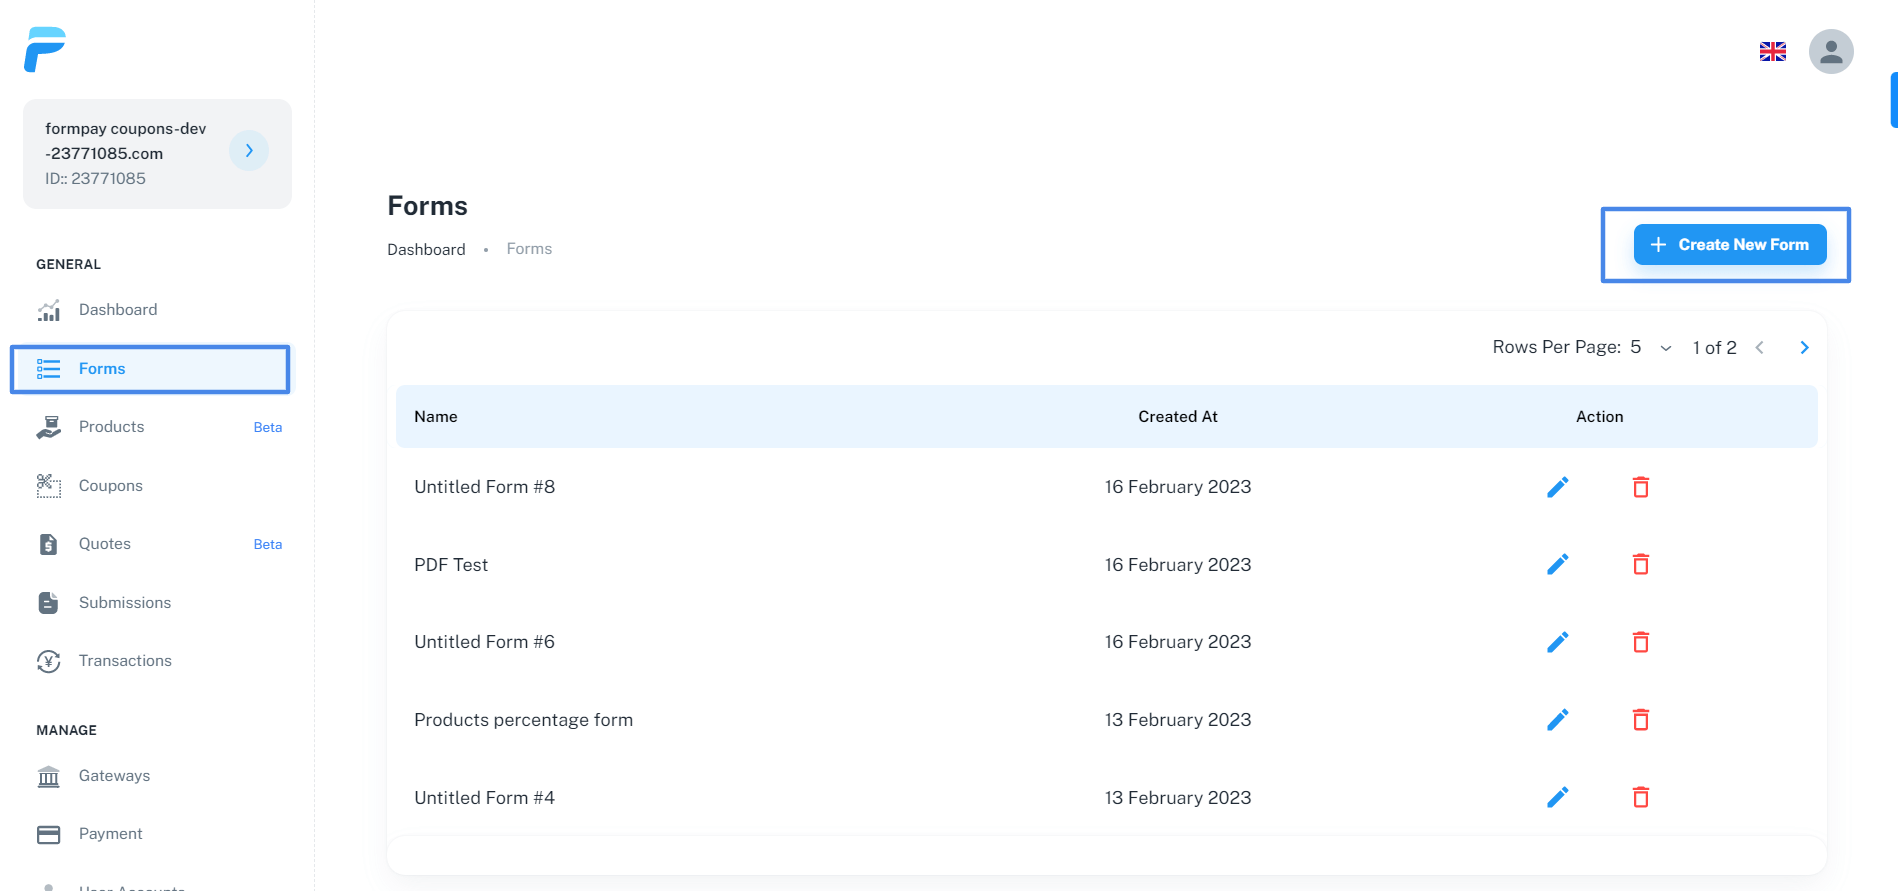
- Select the form you created in your HubSpot CRM and want to convert it into a HubSpot fundraising form.
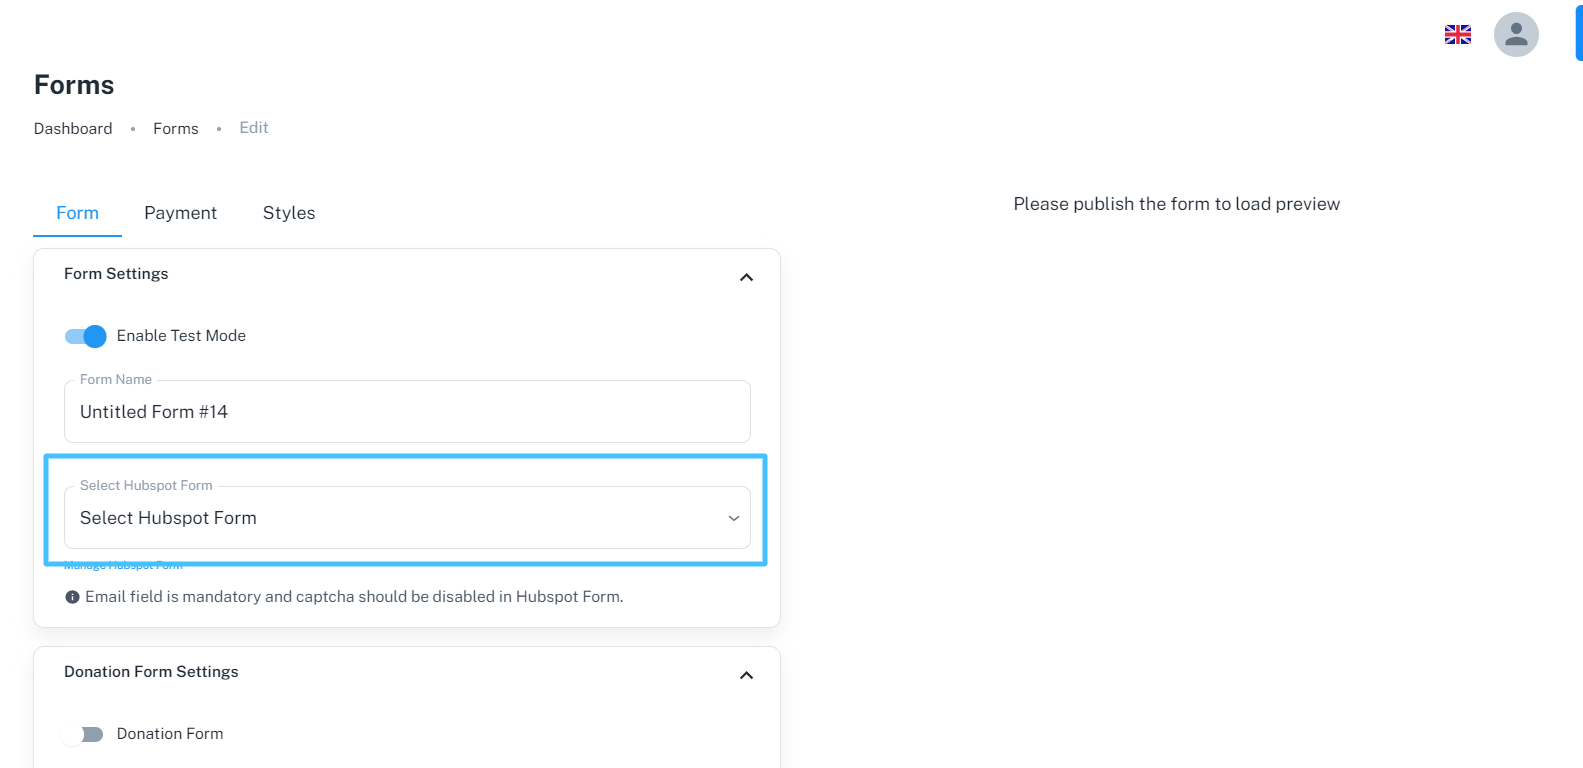
- Add details like form name, donation amount, payment gateways and more.
- After you add all the details, click on the Publish Form button.
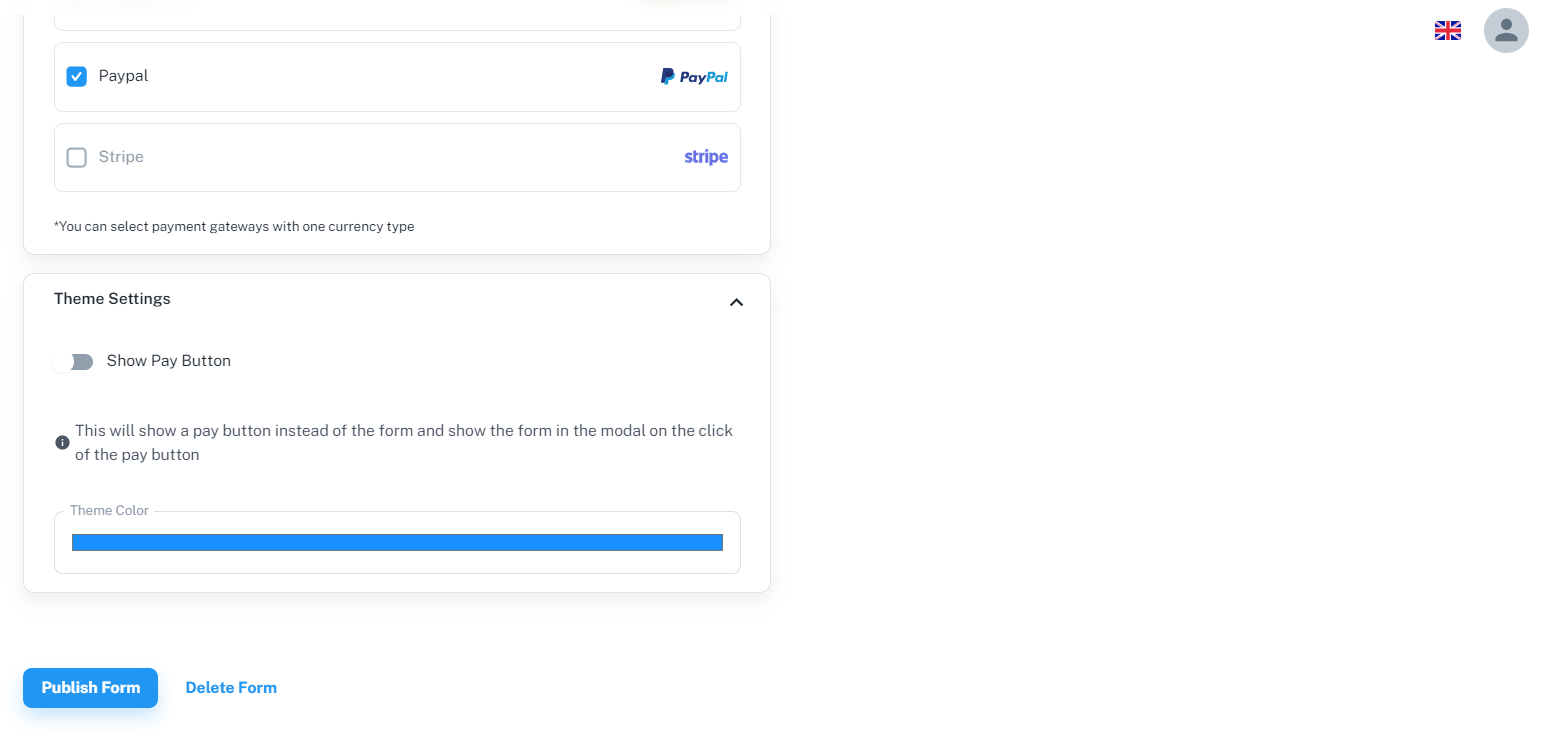
- Your HubSpot fundraising form will be published. You’ll see the preview on the right side of the edit page.
- Above the preview, you’ll get the embed code and form URL.
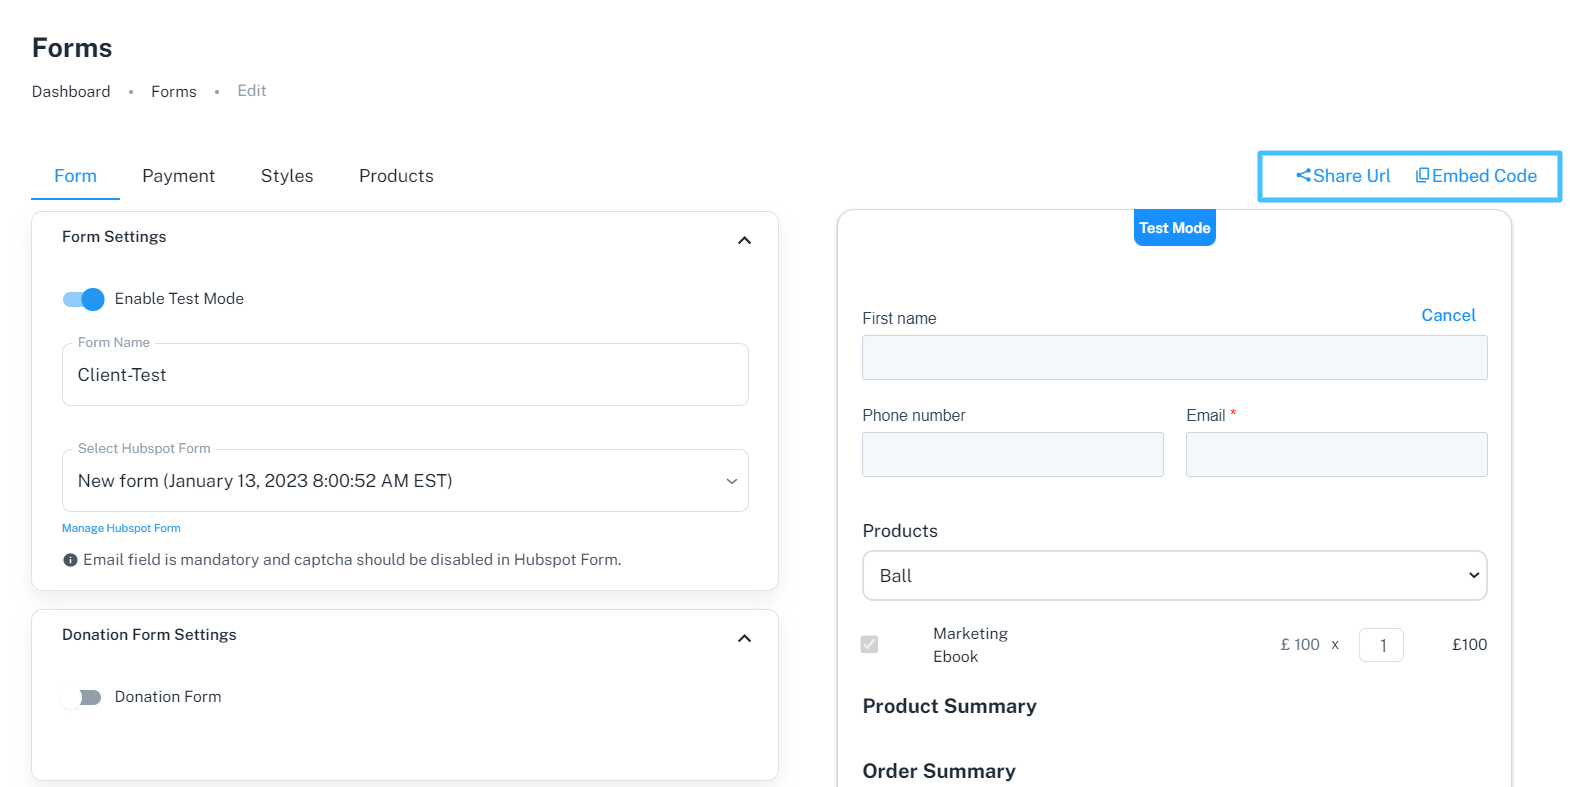
If you want to embed the form, you can paste the embed code on the landing page you created. Or if you want to share the form only with the users, copy the form URL and send it to your donor.
Having A Tough Time Setting Up Your HubSpot?
Well, you didn’t need to if you had us onboard you.
3. Lists
HubSpot lists help you segment your contacts, and companies based on their behavior, demographics and other criteria.
This segmentation helps you craft personalized messages as you prior understand the likes and dislikes of your audience.
As a HubSpot nonprofits organization, you need to segment your donors. To do that,
- Go to your HubSpot account. Navigate to Contacts > Lists.
- Click Create Lists. Select Contact-based if you’re segmenting contacts or companies if you’re segmenting companies.
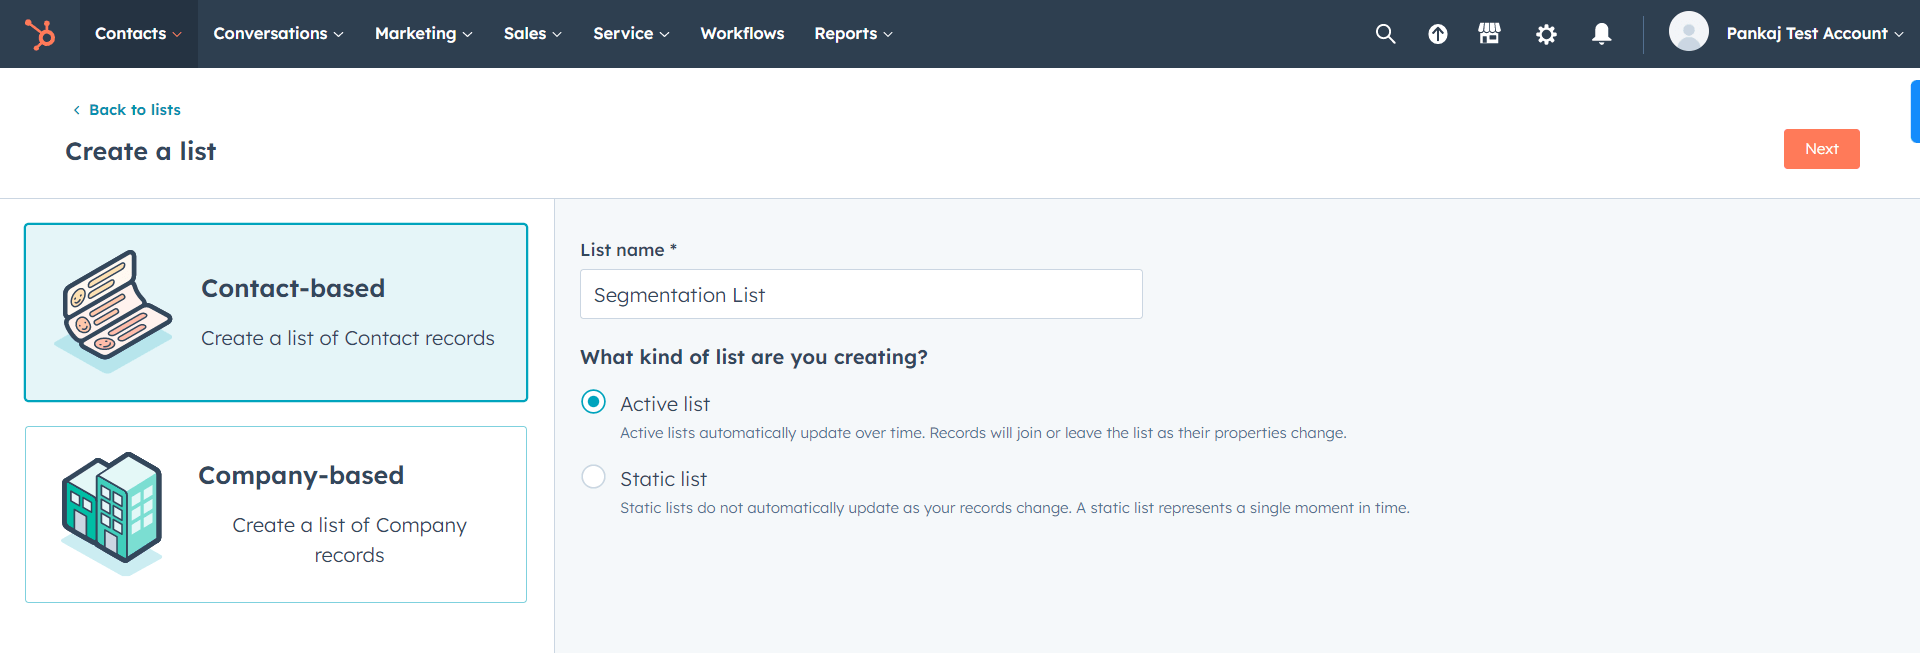
- Select Active or Static list. Add the name of your list and move further.
- Active lists: Automatically enroll/unenroll records.
- Static lists: Don’t enroll records automatically.
- Add the filters to your list to enroll specific donors. Let’s say you want to enroll donors living in Colorado only. For this, click Add Filter, select Contact Properties > State/Region and add Colorado to the value.
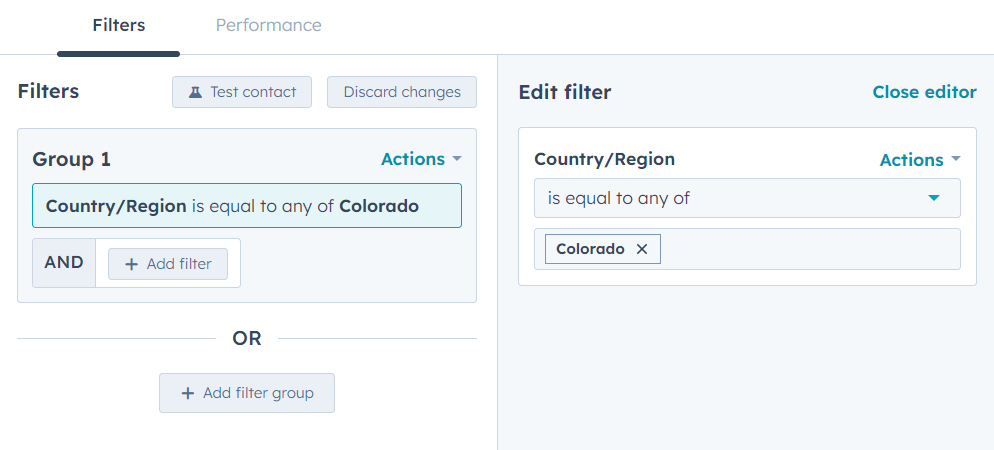
- All the donors from the state of Colorado will be extracted.
- Click Save list to save your list.
Similarly, you can create other types of lists by following similar steps.
4. Campaigns
In a HubSpot campaign, you can add all your assets like CTAs, Forms, Emails, etc. to track the combined performance of your non profit marketing assets.
These campaigns will help track the response of your audience toward the non profit marketing efforts. By analyzing these responses, you can comprehend if you’re shooting the arrows in the right direction.
To create campaigns,
- Navigate to Marketing > Campaigns in your HubSpot account.
- Add details like name, owner, start and end date, goal, audience, budget, etc.
- Once done, click Create.
- Your campaign will now be created.
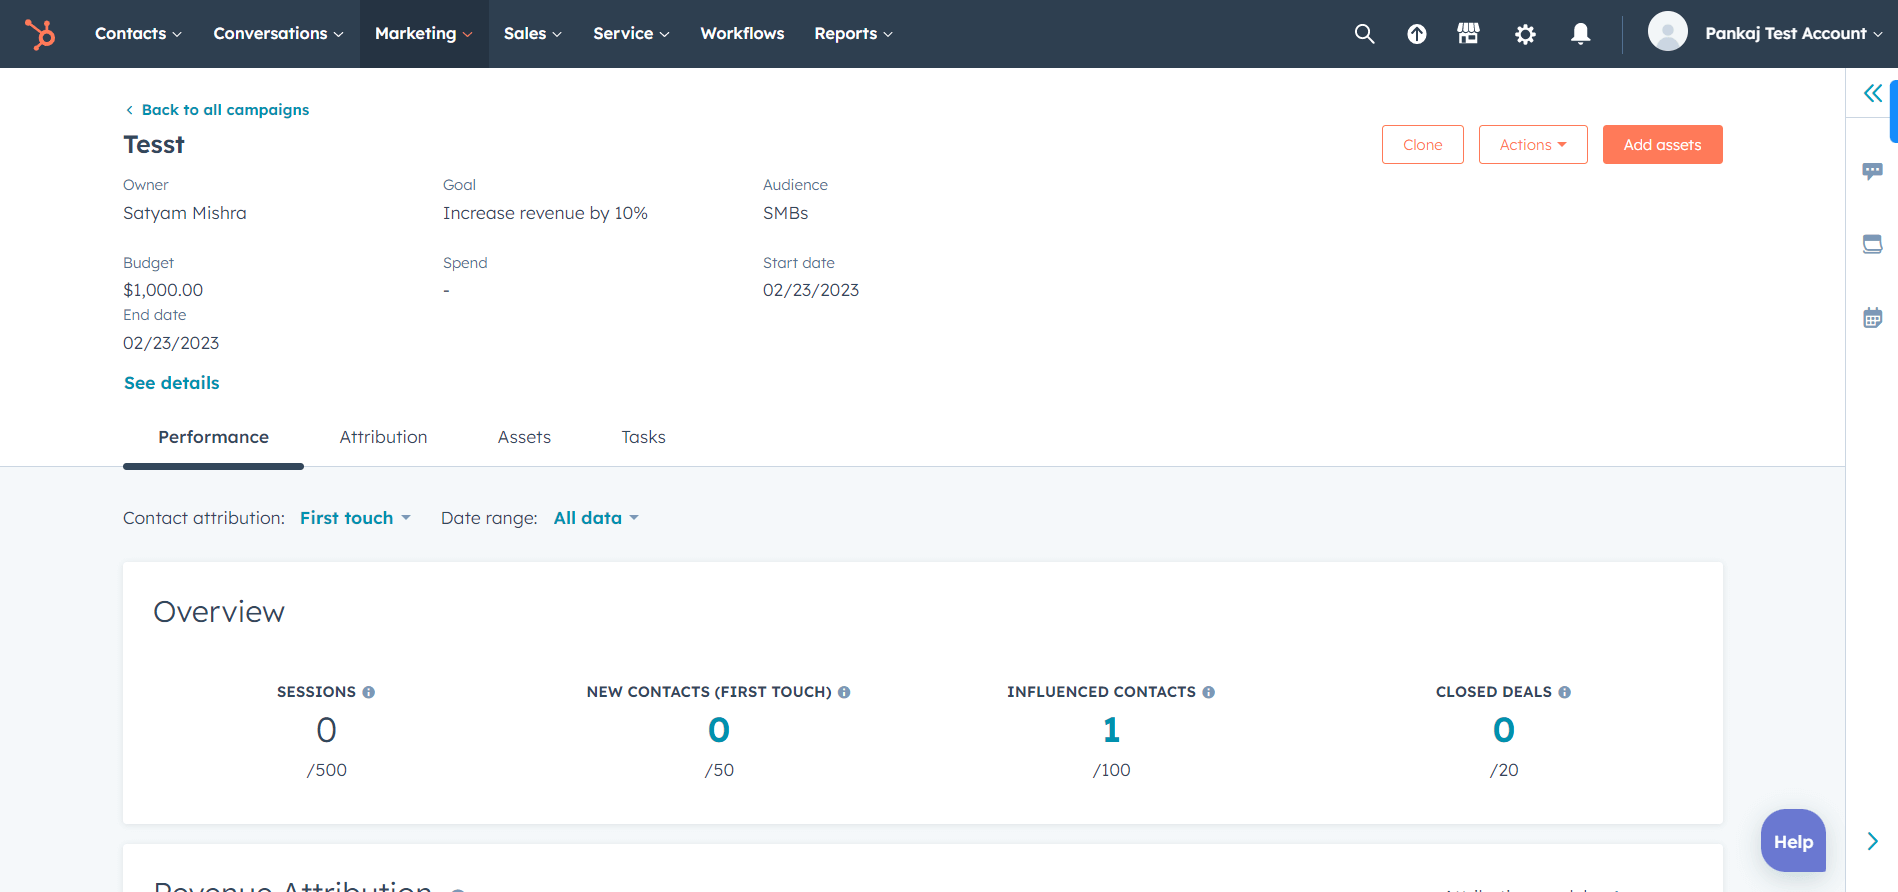
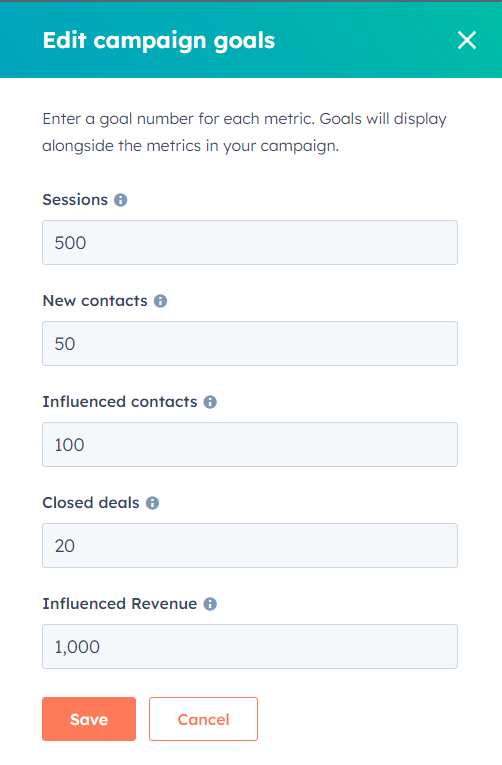
- Click the Actions button and then Edit goals. Describe your goals and save.
- Now, add assets to the campaign by clicking Add assets button on the top right.
- Once you add the assets, you’d start seeing the performance of your campaign in the Performance tab.
- After successfully executing the above steps, click Actions and select Create tracking URL. By creating the tracking URL, you can track how effective these campaigns are at driving traffic to your pages.
![]()
- Add the required details of your tracking URL and click Create.
These campaigns help you track the performance of all your non profit marketing assets from a single point.
You’re Not Using HubSpot to its Full Potential!
Unfortunately, that’s true. But you can still unleash your HubSpot CRM to get the max out of it. Just grab a free HubSpot audit to find out the cracks and fix them.
5. Social
Social media promotions can be stressful. You have to generate content and publish it on time. But not all nonprofits, especially small ones are capable of hiring social media managers who’ll do that.
But don’t worry. HubSpot can be your economical social media manager.
You can connect your social media accounts with HubSpot by following these steps:
- Go to your HubSpot account and navigate to Marketing > Social.
- Click Connect Accounts and select the accounts you want to connect.
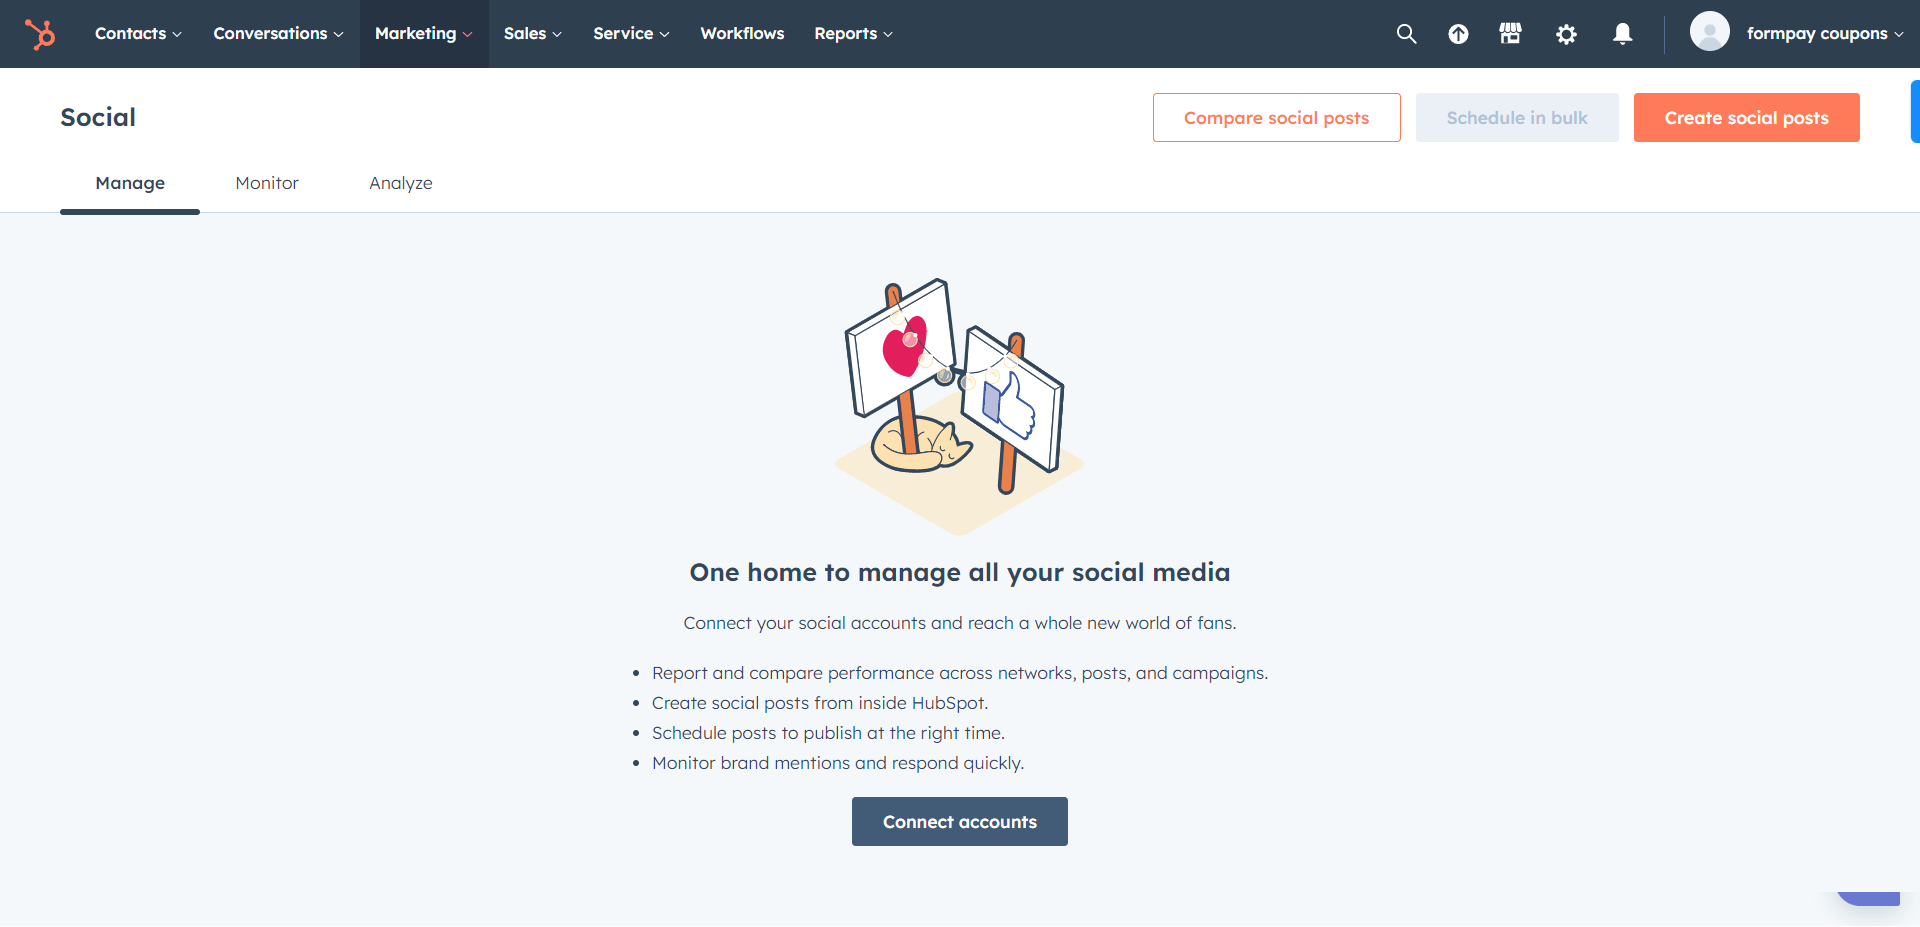
- Select a default account if you’ve connected multiple accounts.
- Add publishing and notification details and your social media accounts are connected.
- You can then create a single post, schedule in bulk and compare them for performance.
You have to upload a CSV or an XLS file to schedule the posts in bulk.
6. Workflows
Workflow can be the most powerful feature of HubSpot for non profits.
Your nonprofit organization can use it to deliver newsletter emails, donation receipts, and feedback surveys automatically.
To create workflows in your HubSpot CRM:
- Navigate to Workflows and click Create Workflows.
- Select From scratch or From template.
- Let’s say you selected From scratch to create a new survey from zero.
- Select the object like Contact-based workflow and click Next.
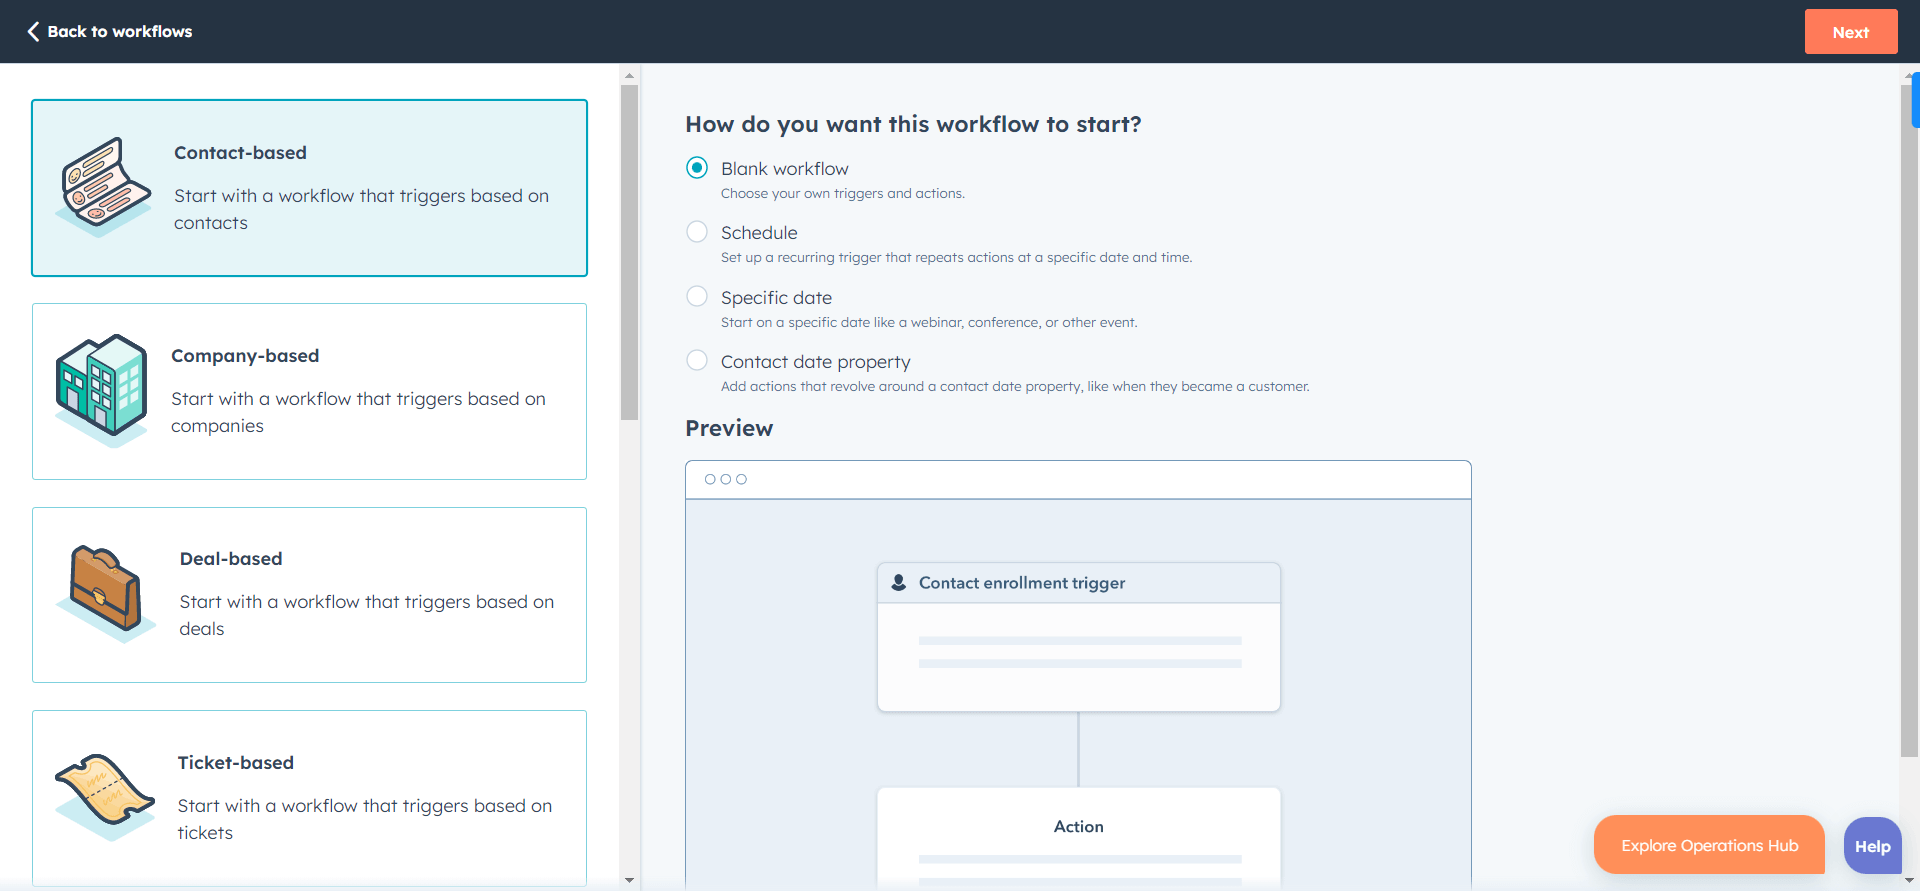
- Click on Set up triggers, select filter type and select the properties you want to use as a trigger. For example, you want to deliver an email to users who fill out a form on your website.
- Then, select form submissions as filter type and select the form and click Apply filter and then Save.
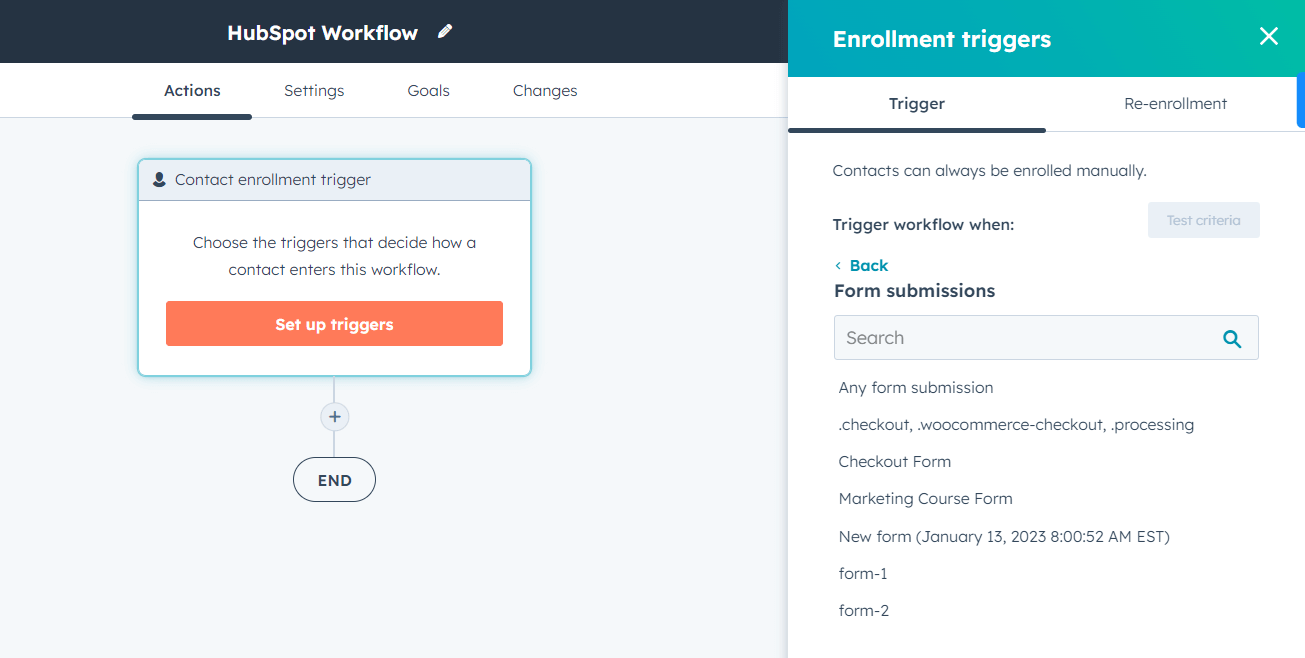
- Once the trigger is set up, click + plus icon to add further actions like sending an email, creating a deal, etc.
- After completing the workflow, click the Review and publish button to make your workflow live.
7. Chatflows
Using chatflows, you can add a chatbot or live chat to your website.
This helps you set answers for common queries so that your reps don’t answer them again and again.
To create chatflows in your HubSpot CRM:
- Go to your HubSpot CRM and navigate to Conversations > Chatflows.
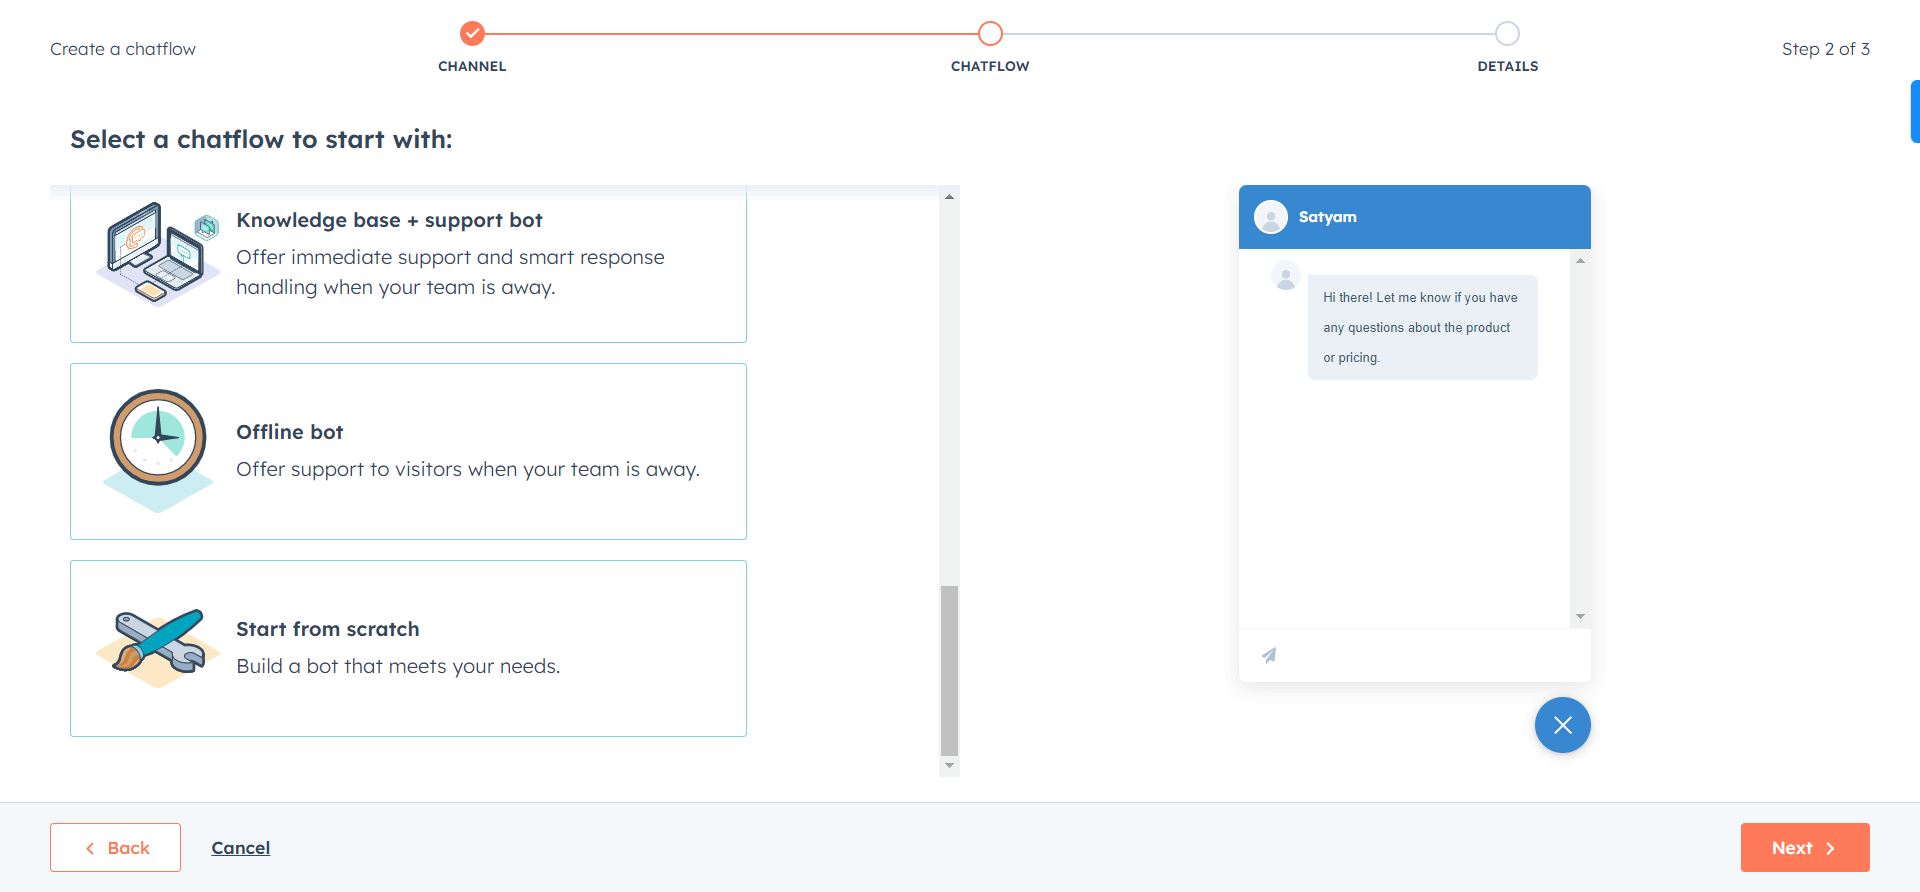
- Click on the Create chatflow button.
- Select either Website or Facebook messenger. Depends on where you want to display your chat widget.
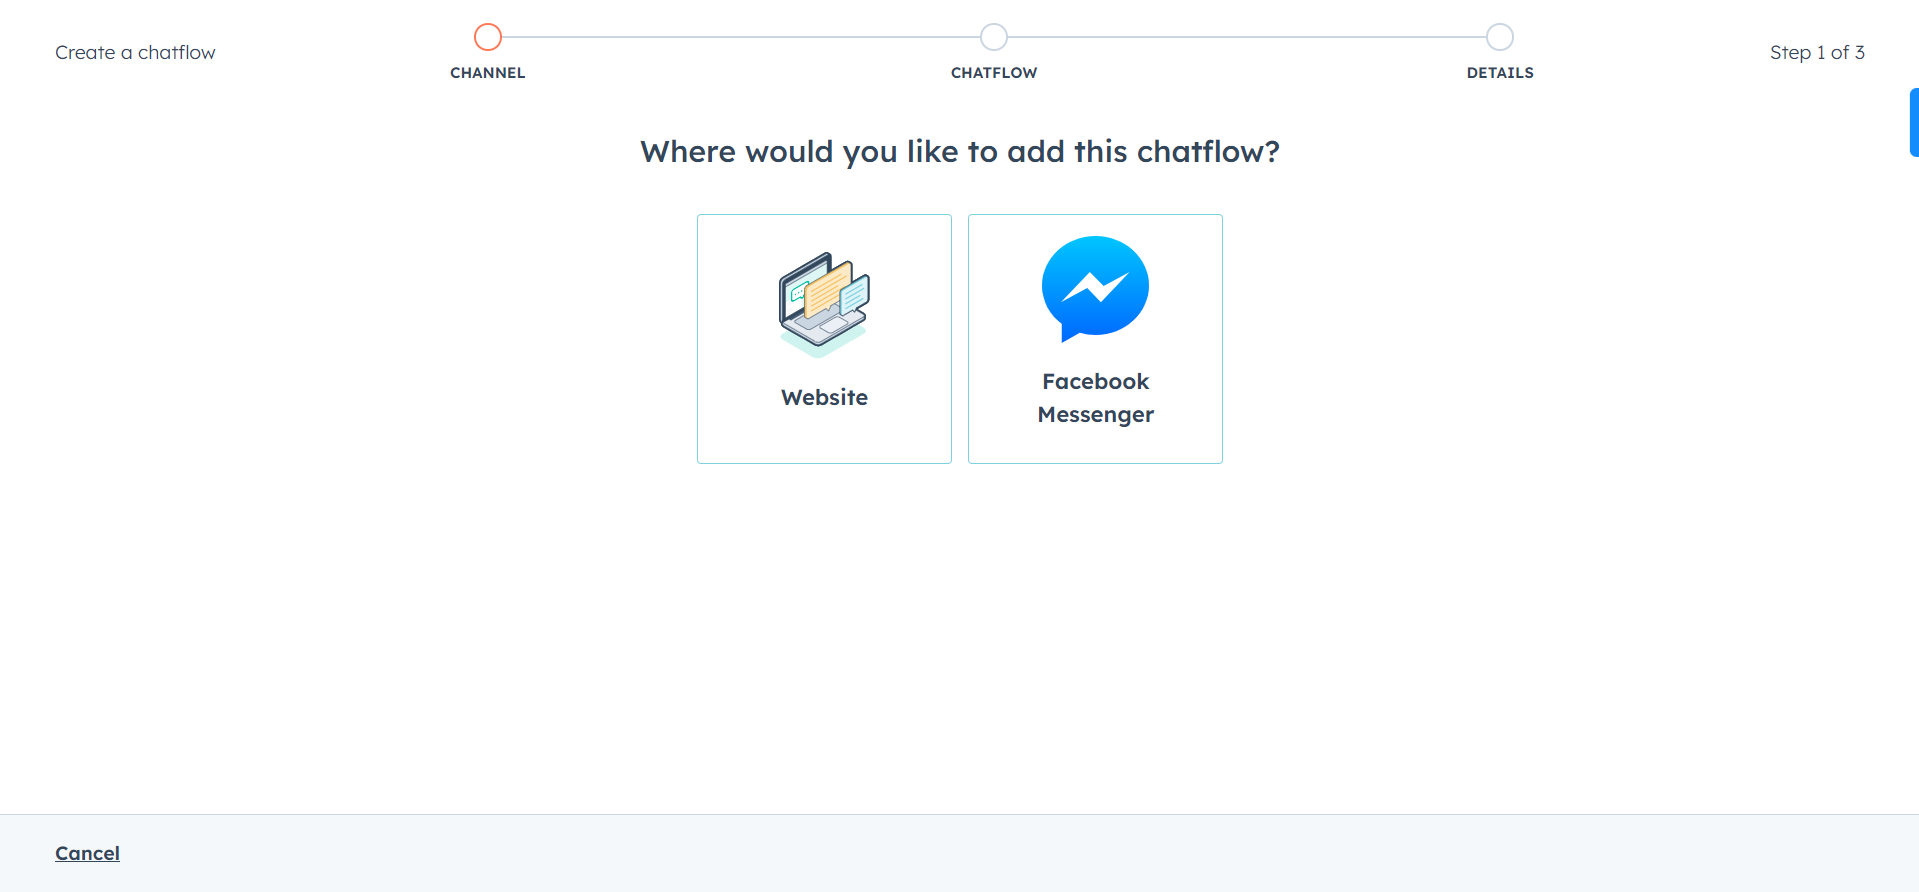
- Select Live chat or Bot, whatever you want to create. If you want your reps to communicate with the visitors, you can select live chat. But if you’re looking to automate your communication to the possible extent, go with the bot.
As I’ve already covered the HubSpot live chat creation in another blog, let me share the steps for creating a bot.
- In the Bots section, select Start from scratch to create your own custom bot.
- Click Next to select the Inbox and the language.
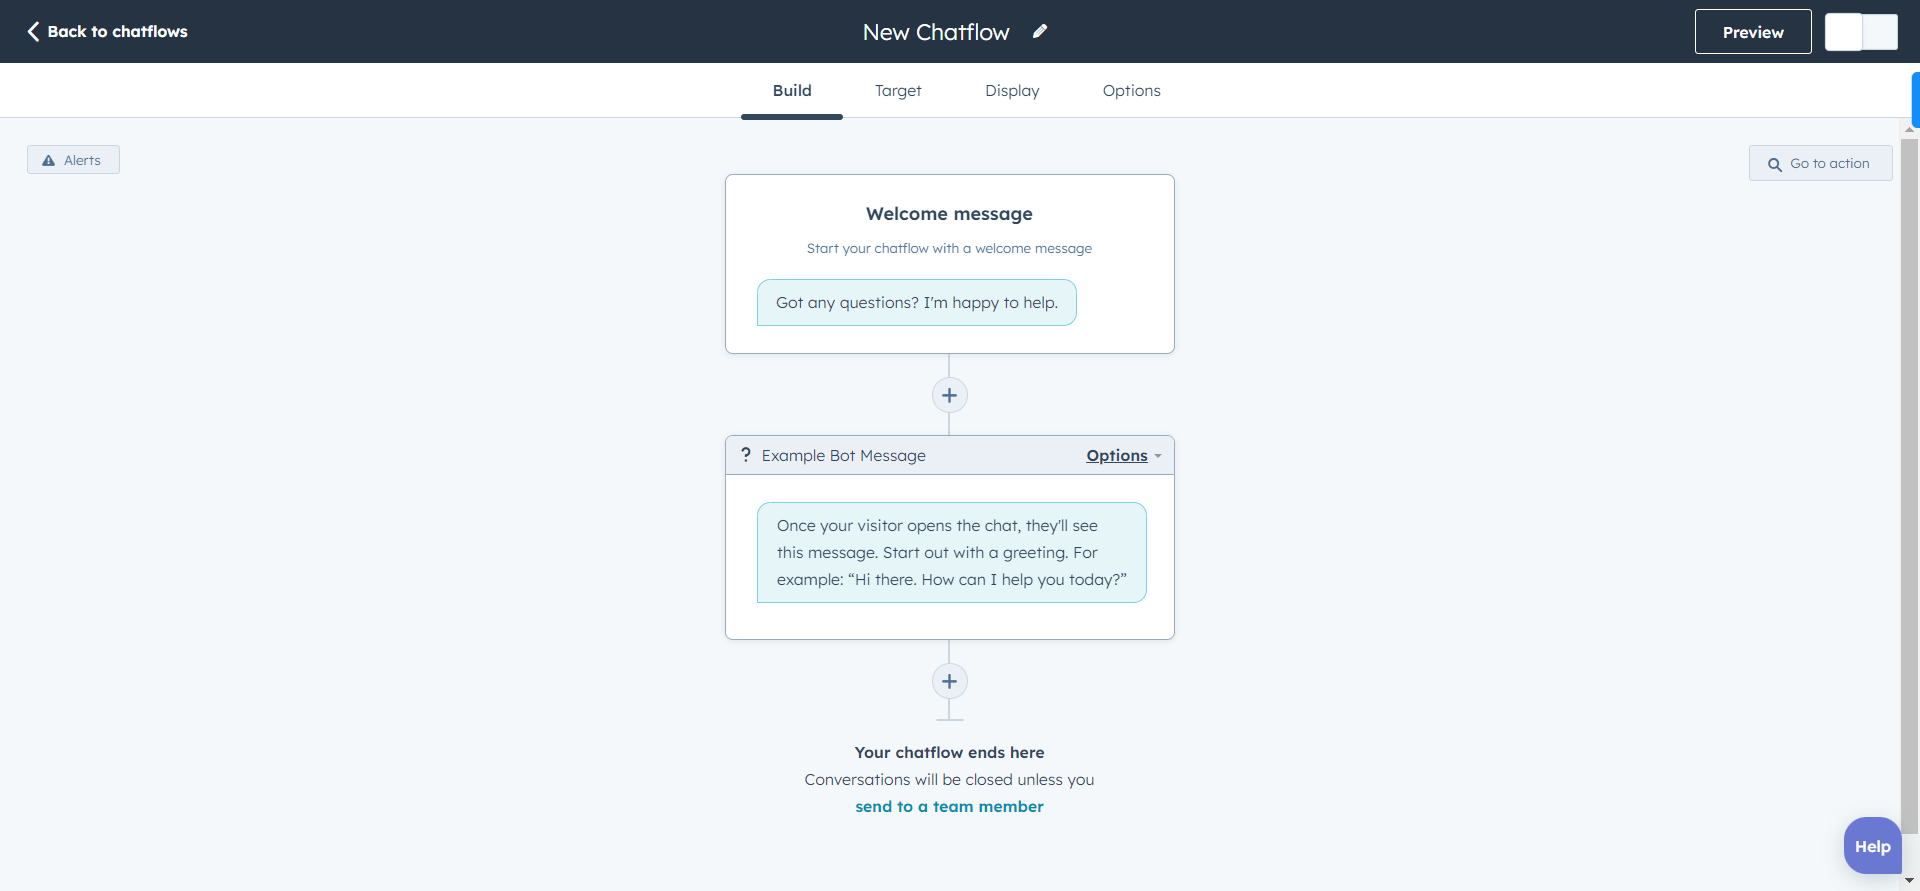
- Then click Create and customize your bot accordingly.
- First, add your welcome message and questions from the Build section.
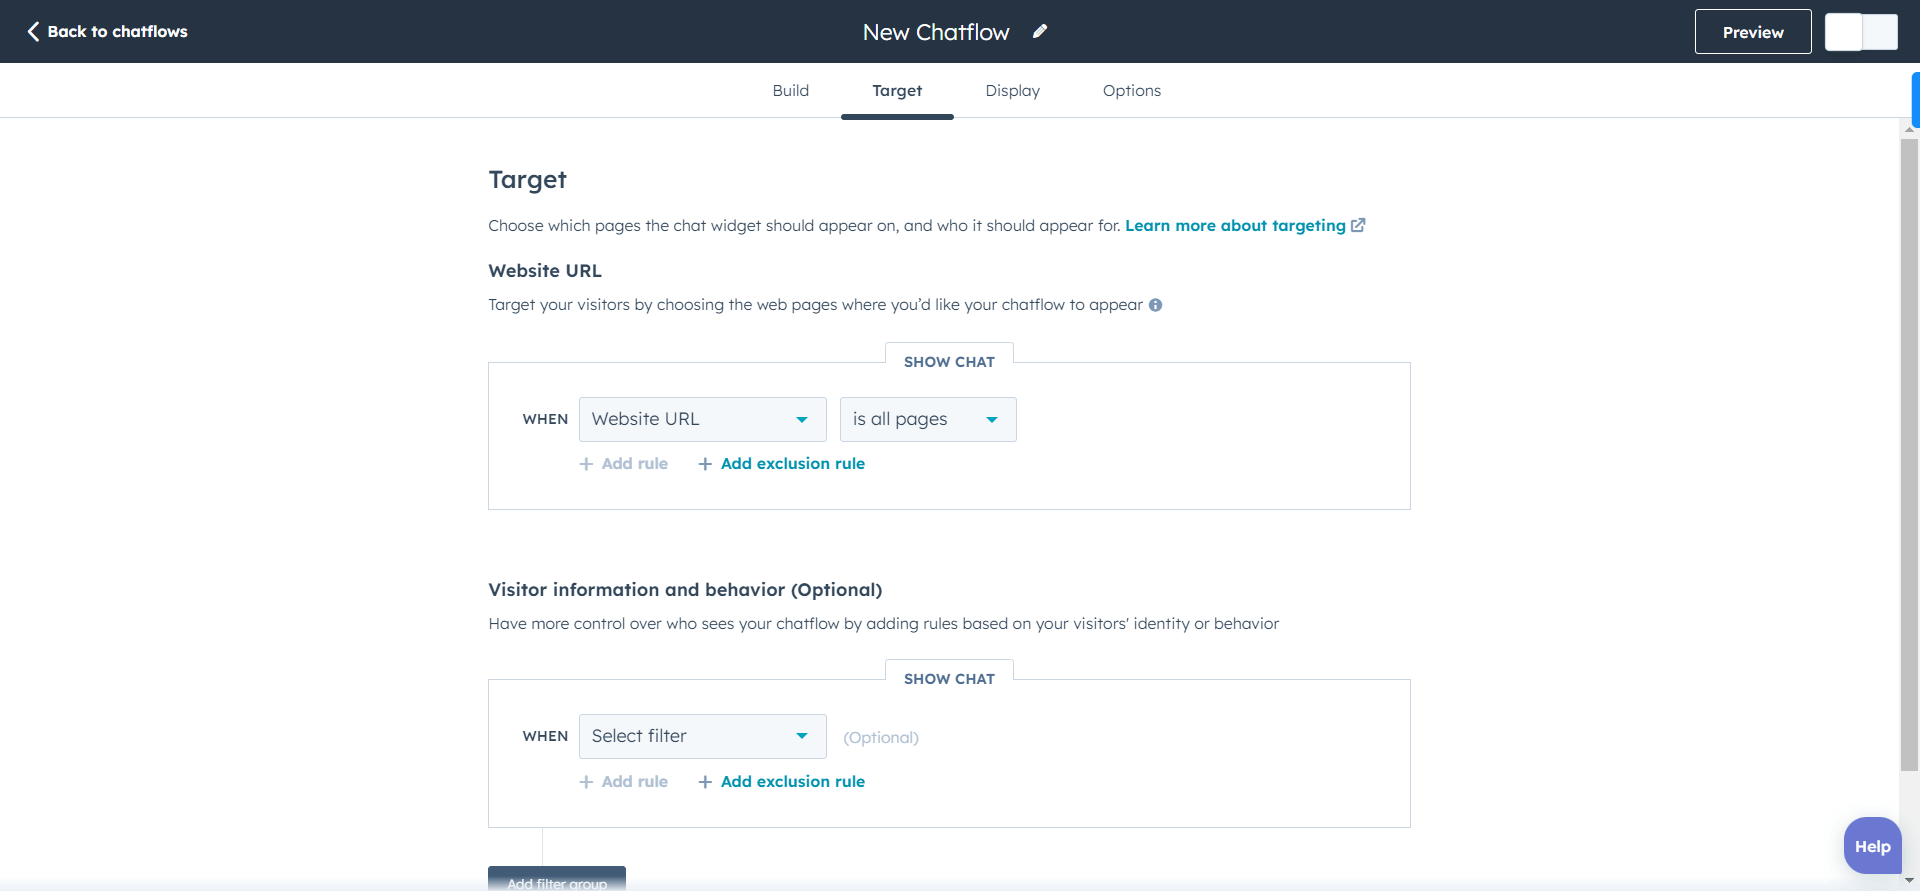
- Then from the Target tab, select who will see your chatbot widget and when.
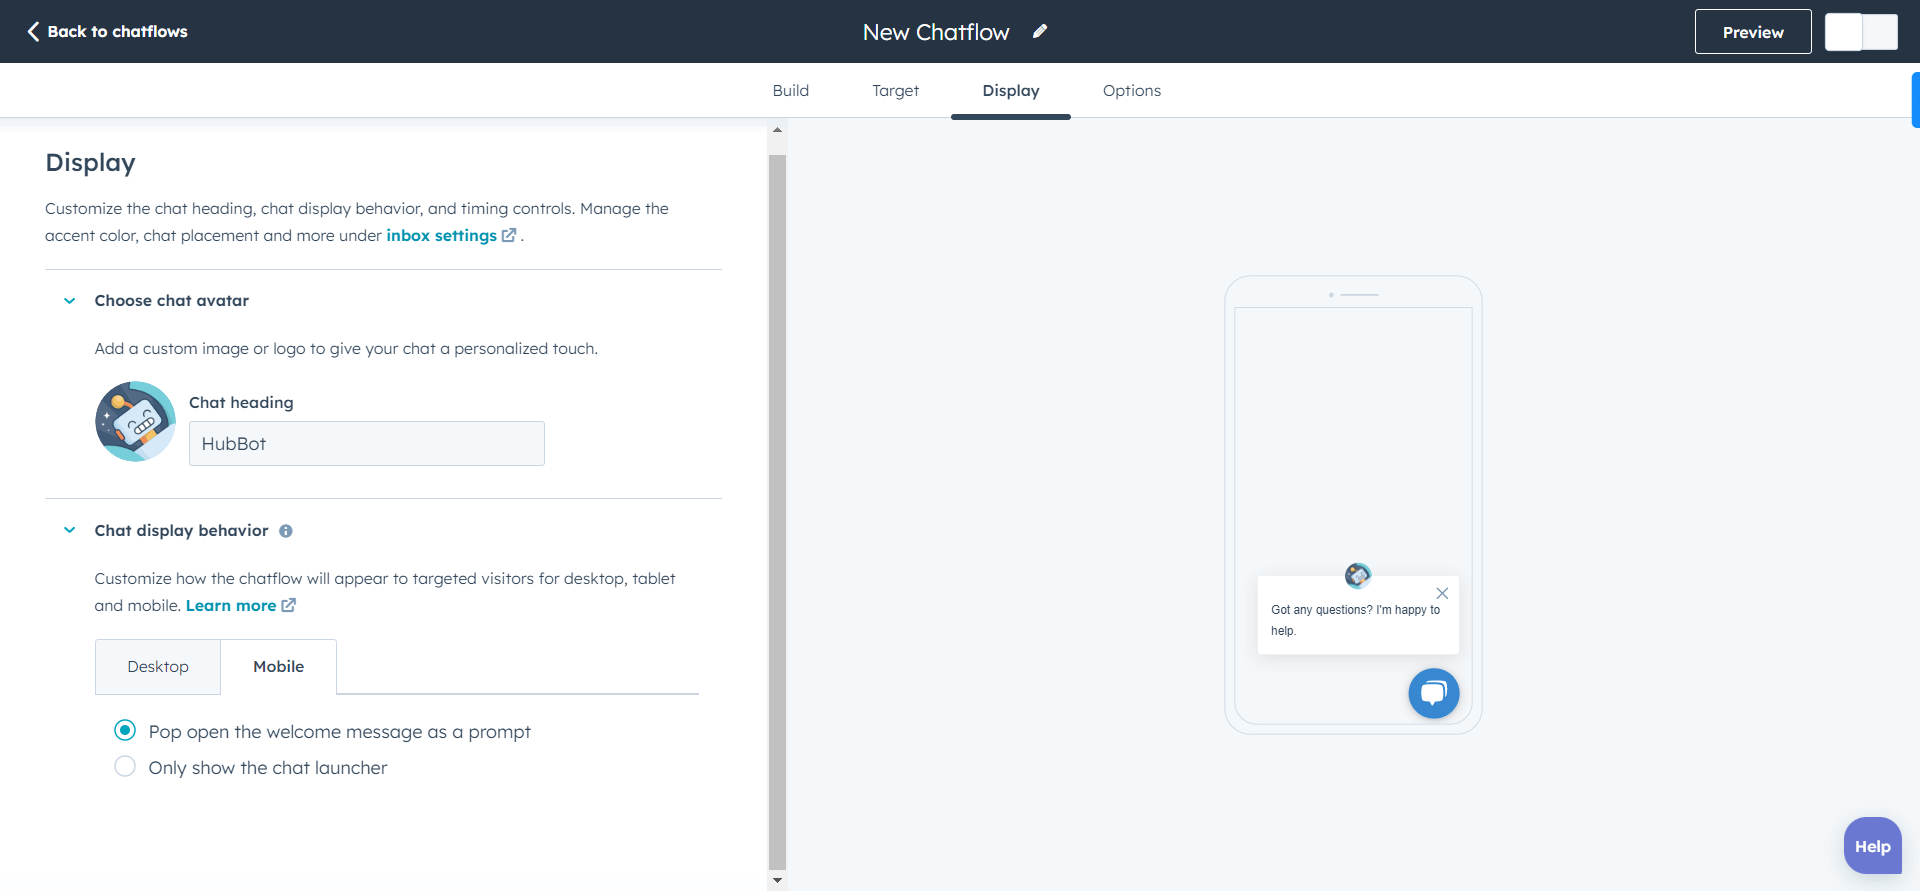
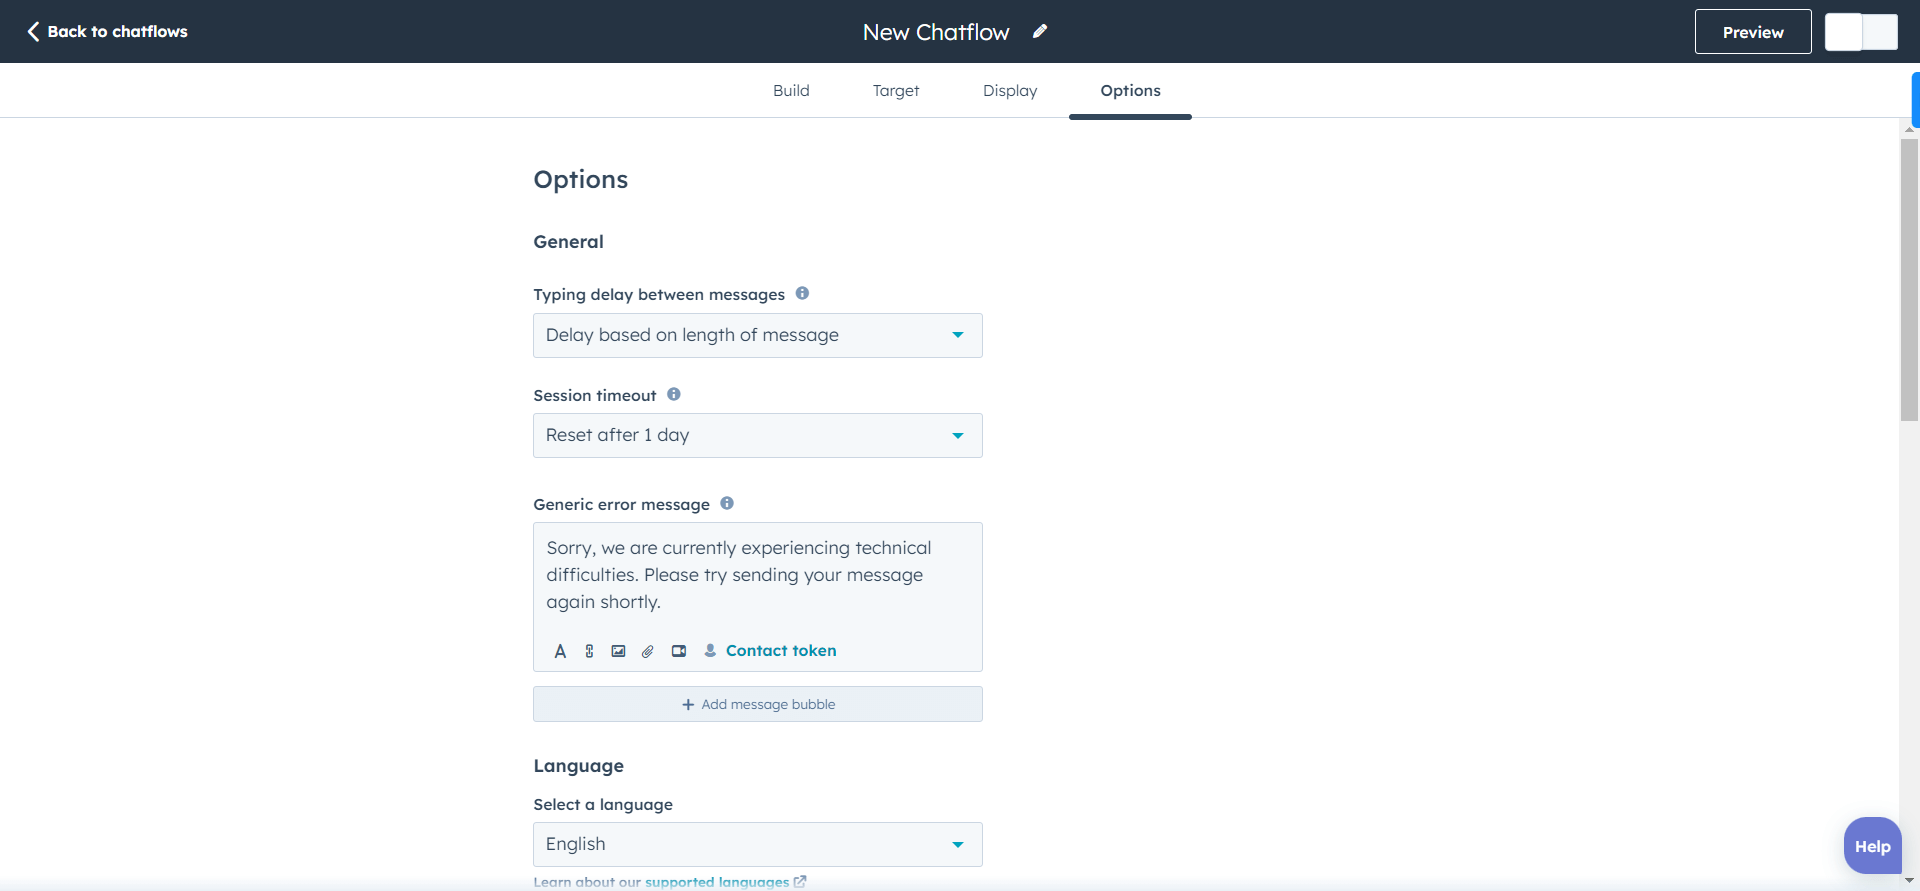
- Customize your chatbot widget from the Display tab.
- Lastly from the Options tab, tweak other settings like an error message, availability, and more.
- Preview your bot by clicking on the Preview button before making it live.
- Once you’re satisfied, enable the toggle on the top right corner to publish your bot.
Your chatbot can now answer the queries you set and help you free your reps from answering the same questions visitors ask on your site.
8. Reports & Dashboards
As I said earlier, HubSpot’s analytics tool offers comprehensive reports for different aspects.
You can check all of them above in this blog.
Since there are several types of reports you can create with HubSpot for non profits, explaining all of them would elongate this post unnecessarily. Thus, I’m sharing the steps to create custom HubSpot reports only.
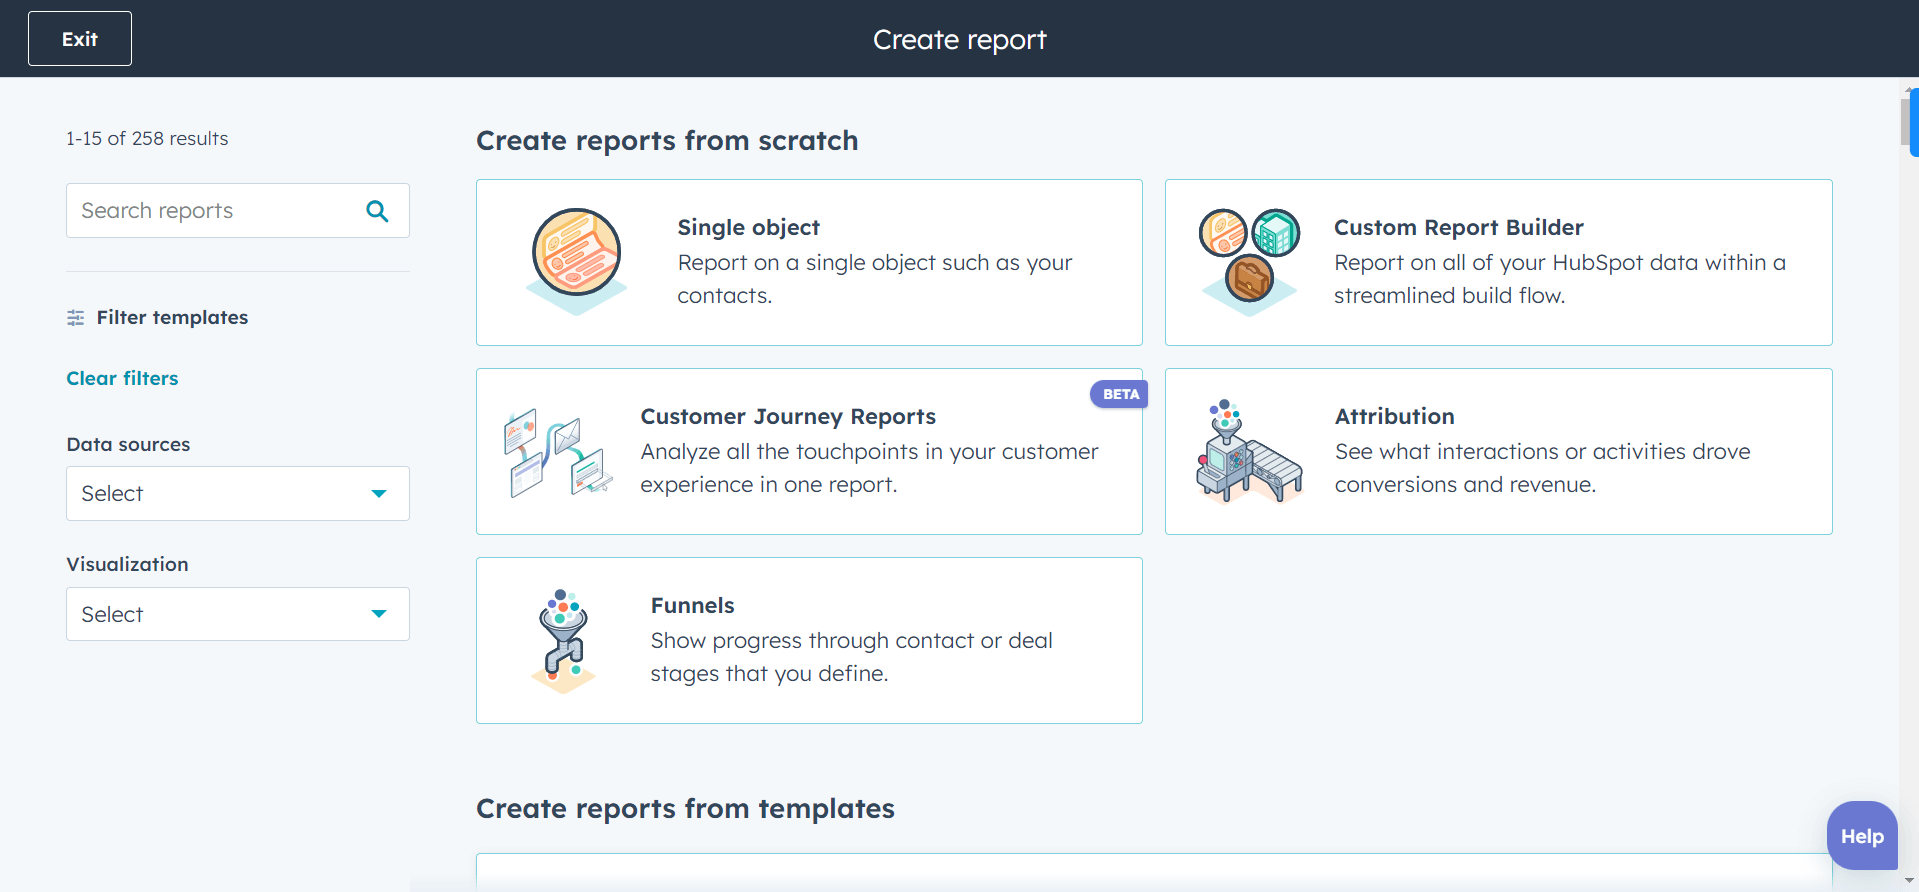
- Go to your HubSpot account and navigate to Reports > Reports.
- Click Create report button and select the type of report you want to create.
- Select Custom Report Builder and click Next.
- Select Primary and Secondary data sources.
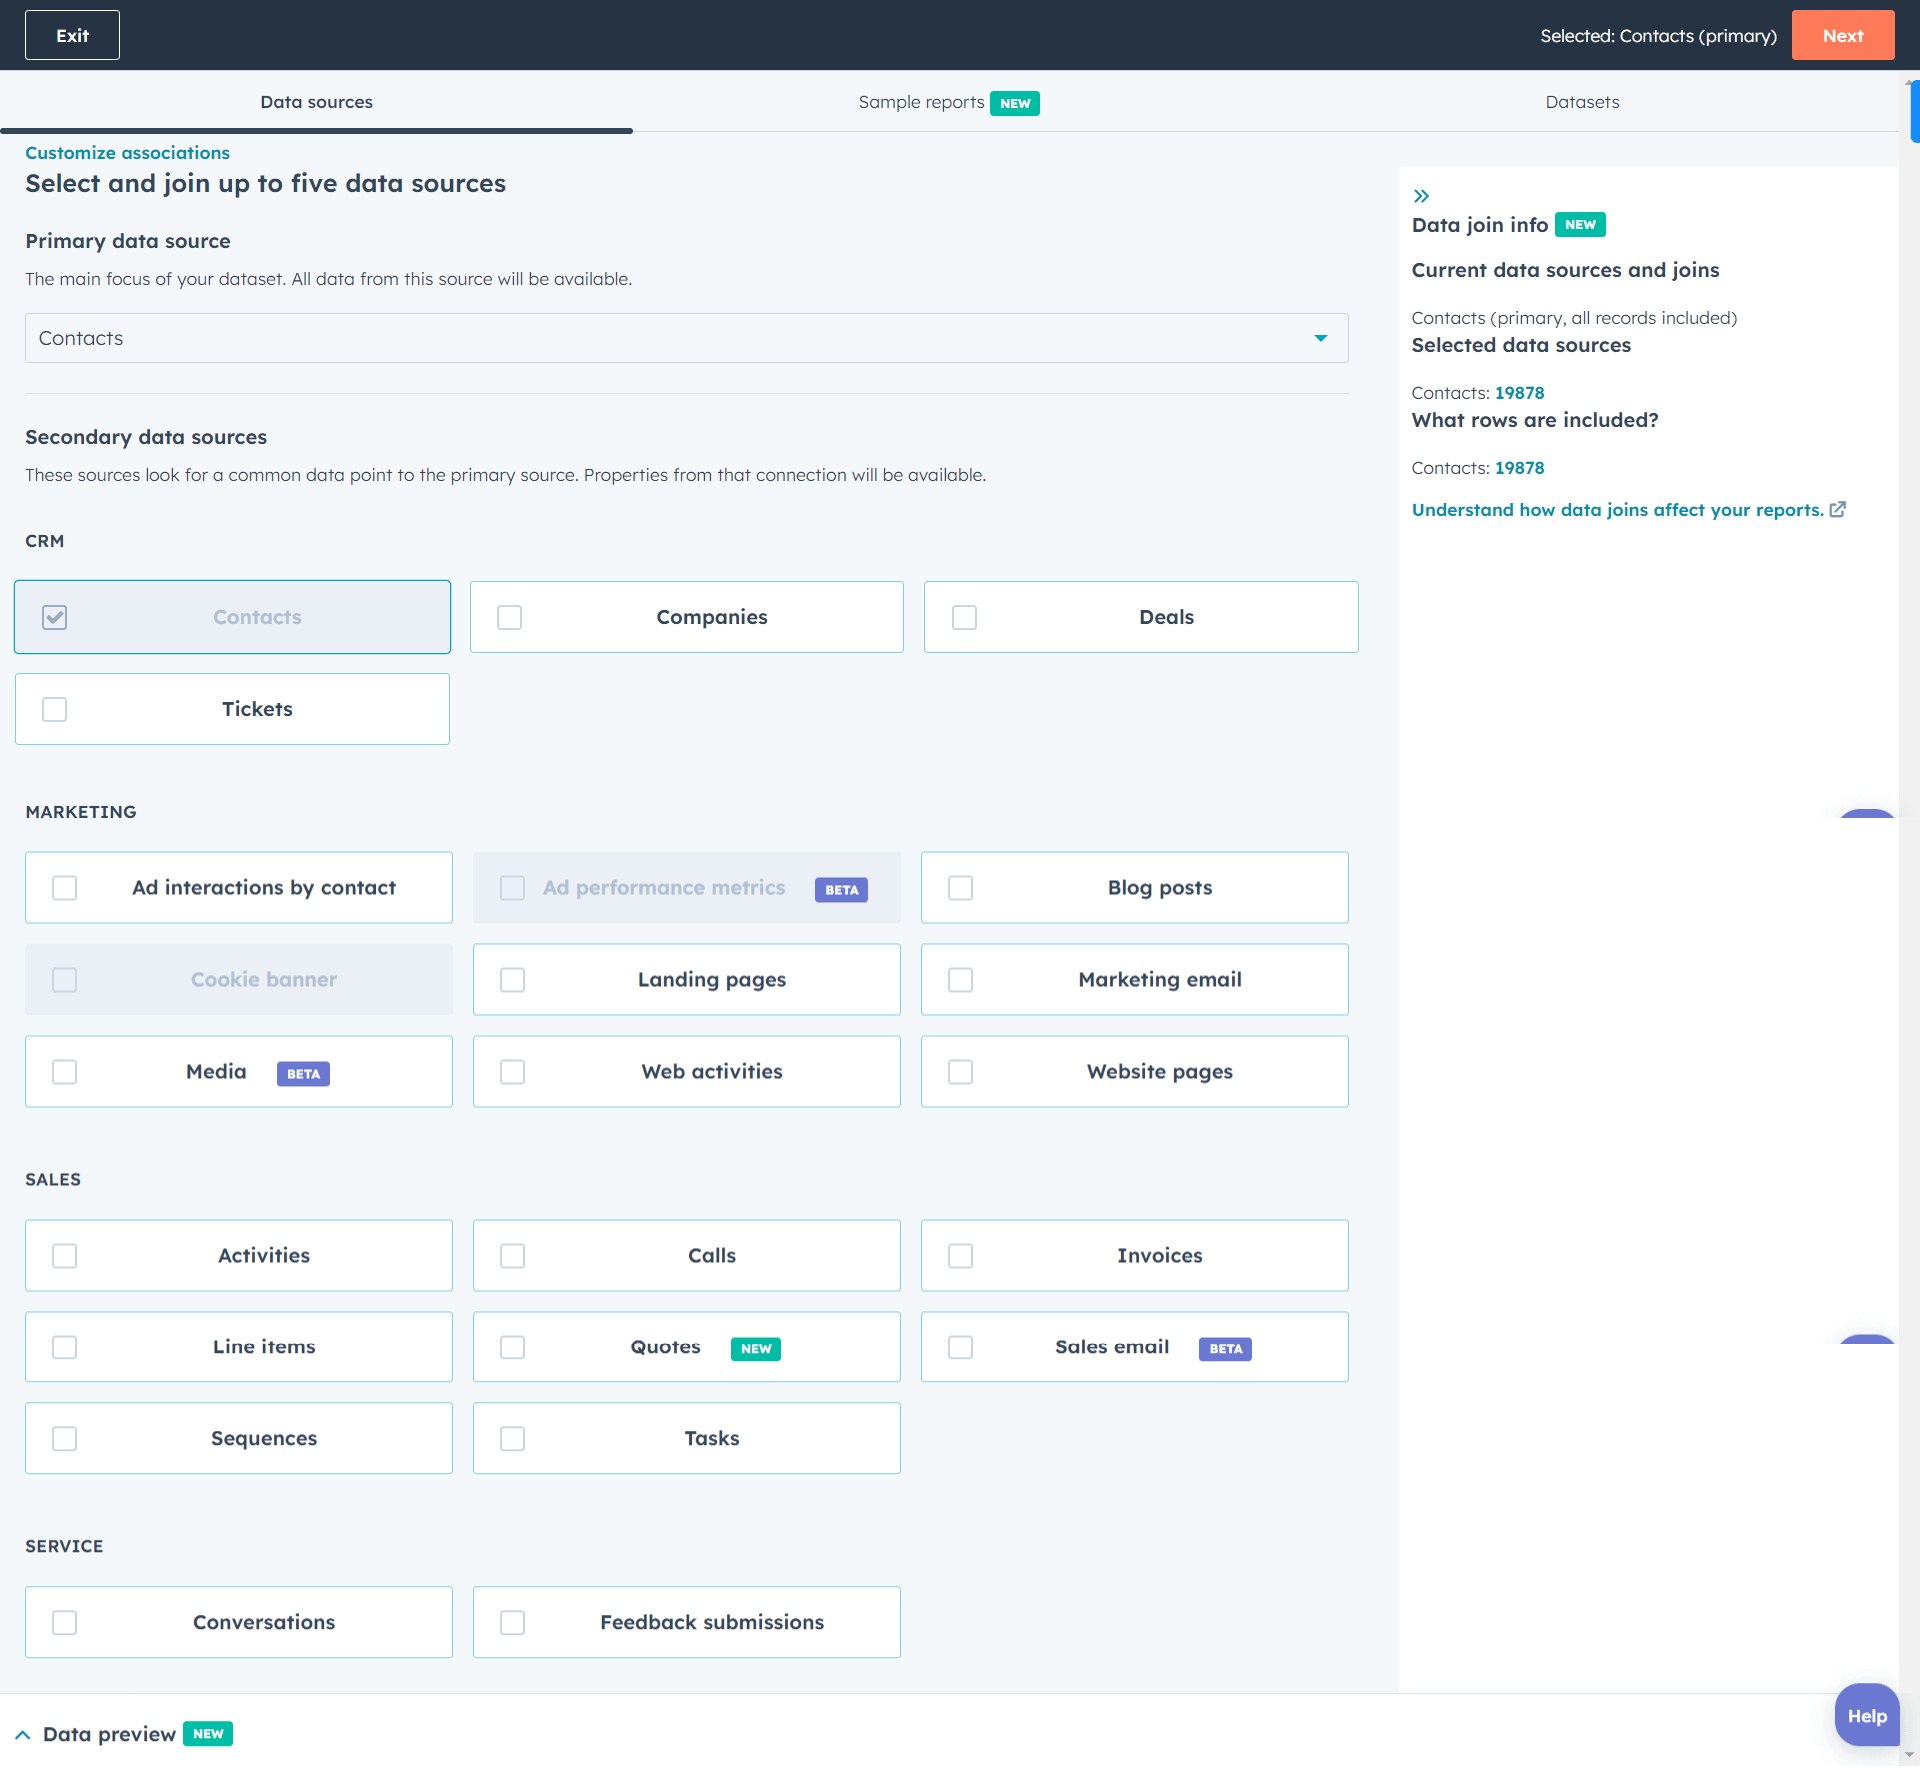
-
- Primary data source: The object in your HubSpot CRM like Contact, Companies, etc.
- Secondary data source: Data points related to the primary source like Calls, Emails, Tasks, Feedback Submissions, etc.
- After selecting the sources, click Next.
- Now, you’ll need to add properties in the X and Y axis. For example, you can add Contact Create Date in the X axis and Count of Contacts in the Y axis to generate a report for a number of contacts created each month.
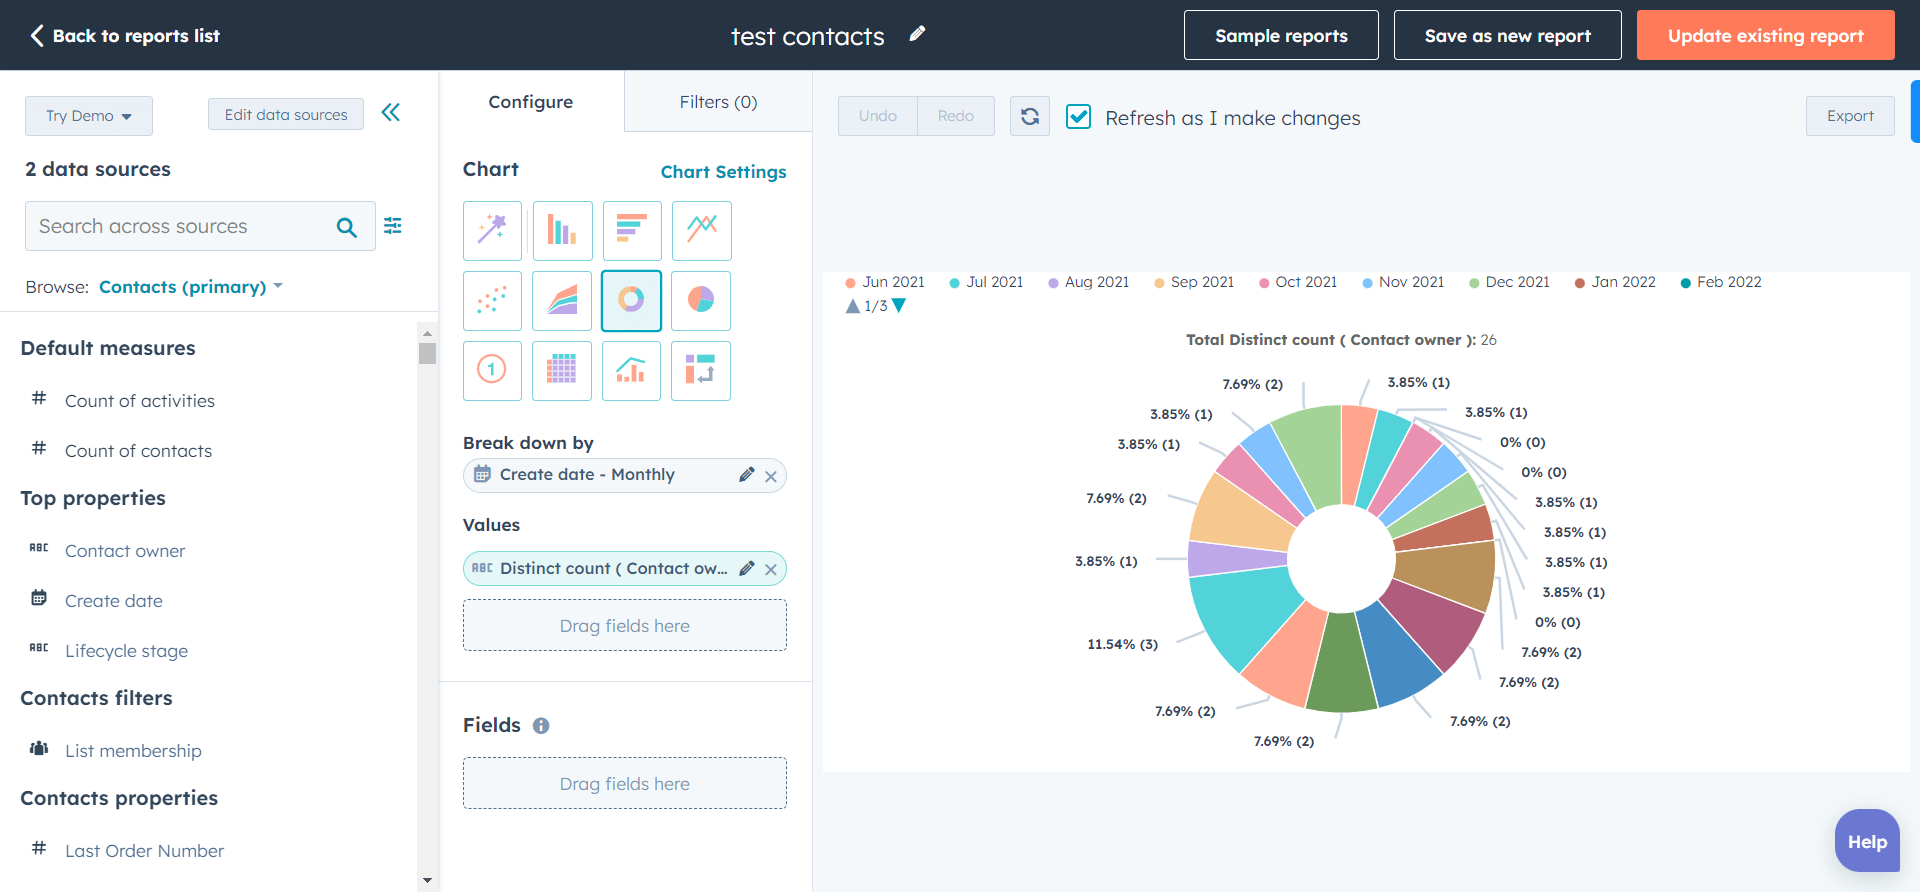
- Click Save report and select if you want to add your report to a dashboard.
- Then, select who can see your report and click Save.
9. Feedback Surveys
Without understanding the loopholes, you cannot fix it.
And feedback surveys unveil all the goods and bads of your organization to help you improve.
There are different types of feedback surveys you can create with HubSpot for non profits. Each survey has a different objective. To be precise, there are:
- Customer support: How helpful your brand was for the user?
- Customer satisfaction: How happy a user is with your brand?
- Customer loyalty: How likely a user is to recommend your brand to others?
Based on the type of feedback you want, you can select a template. Else, you can create a custom survey from scratch.
To create a custom survey:
- Go to your HubSpot account and navigate to Service > Feedback Surveys.
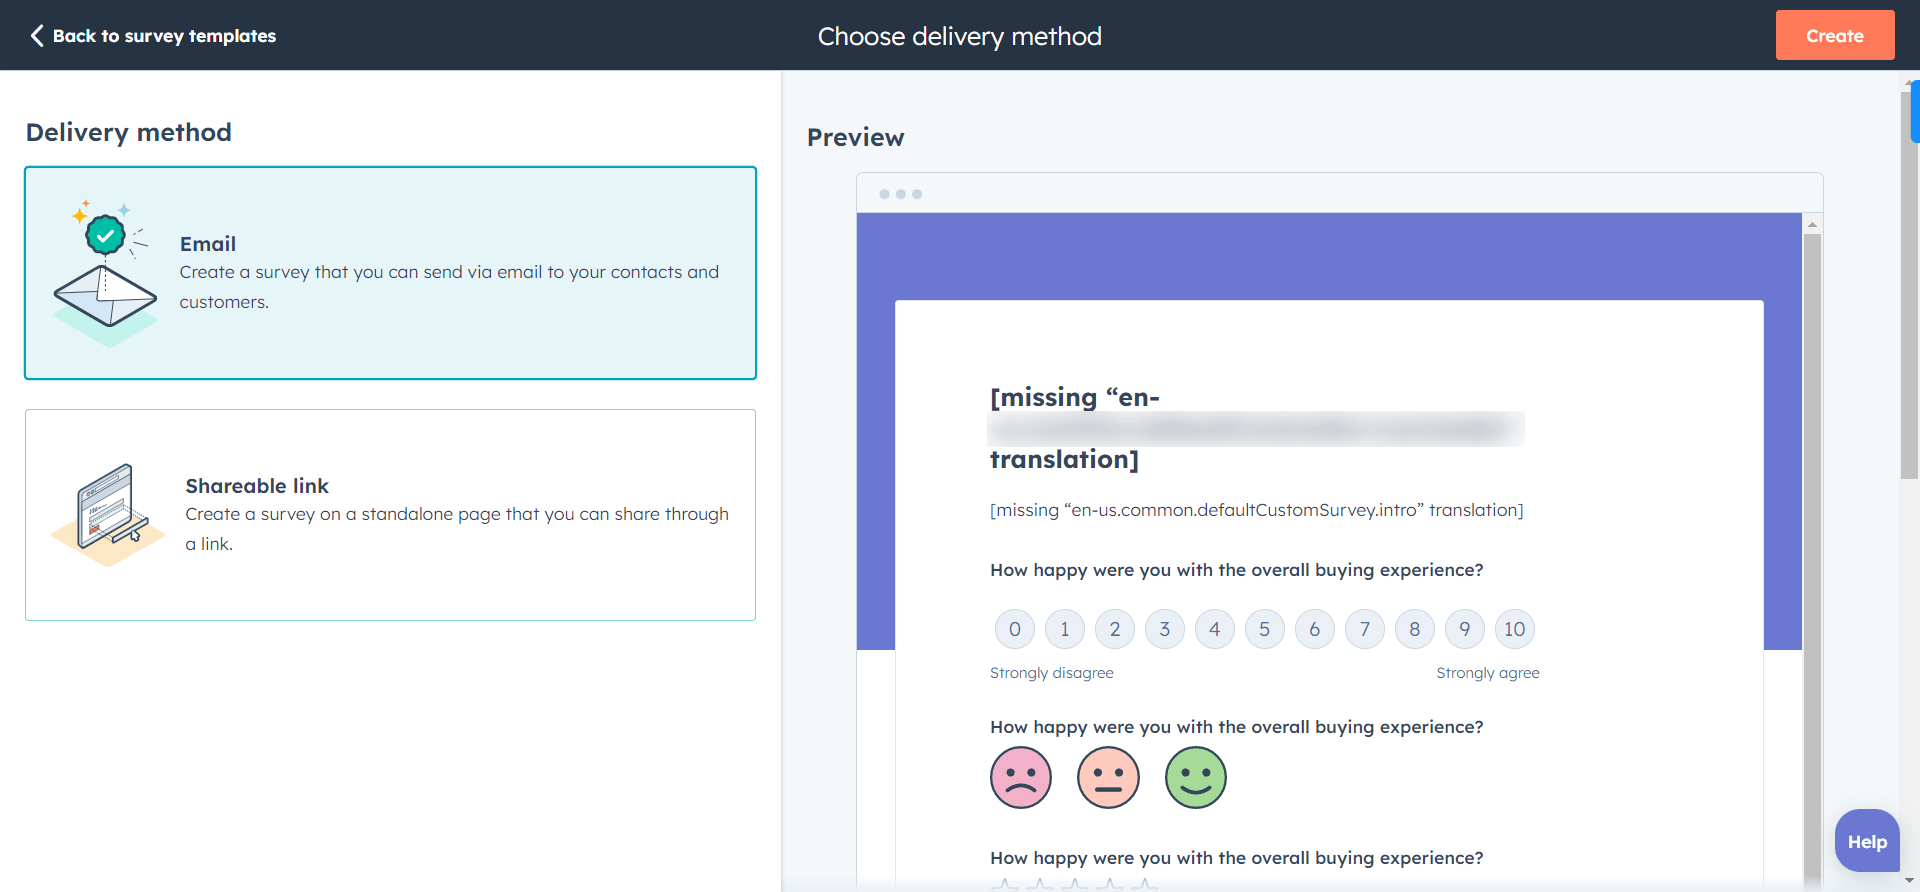
- Click on Create Survey and select Custom Survey and click Next.
- Choose a delivery method between Email or Shareable link and click Create.
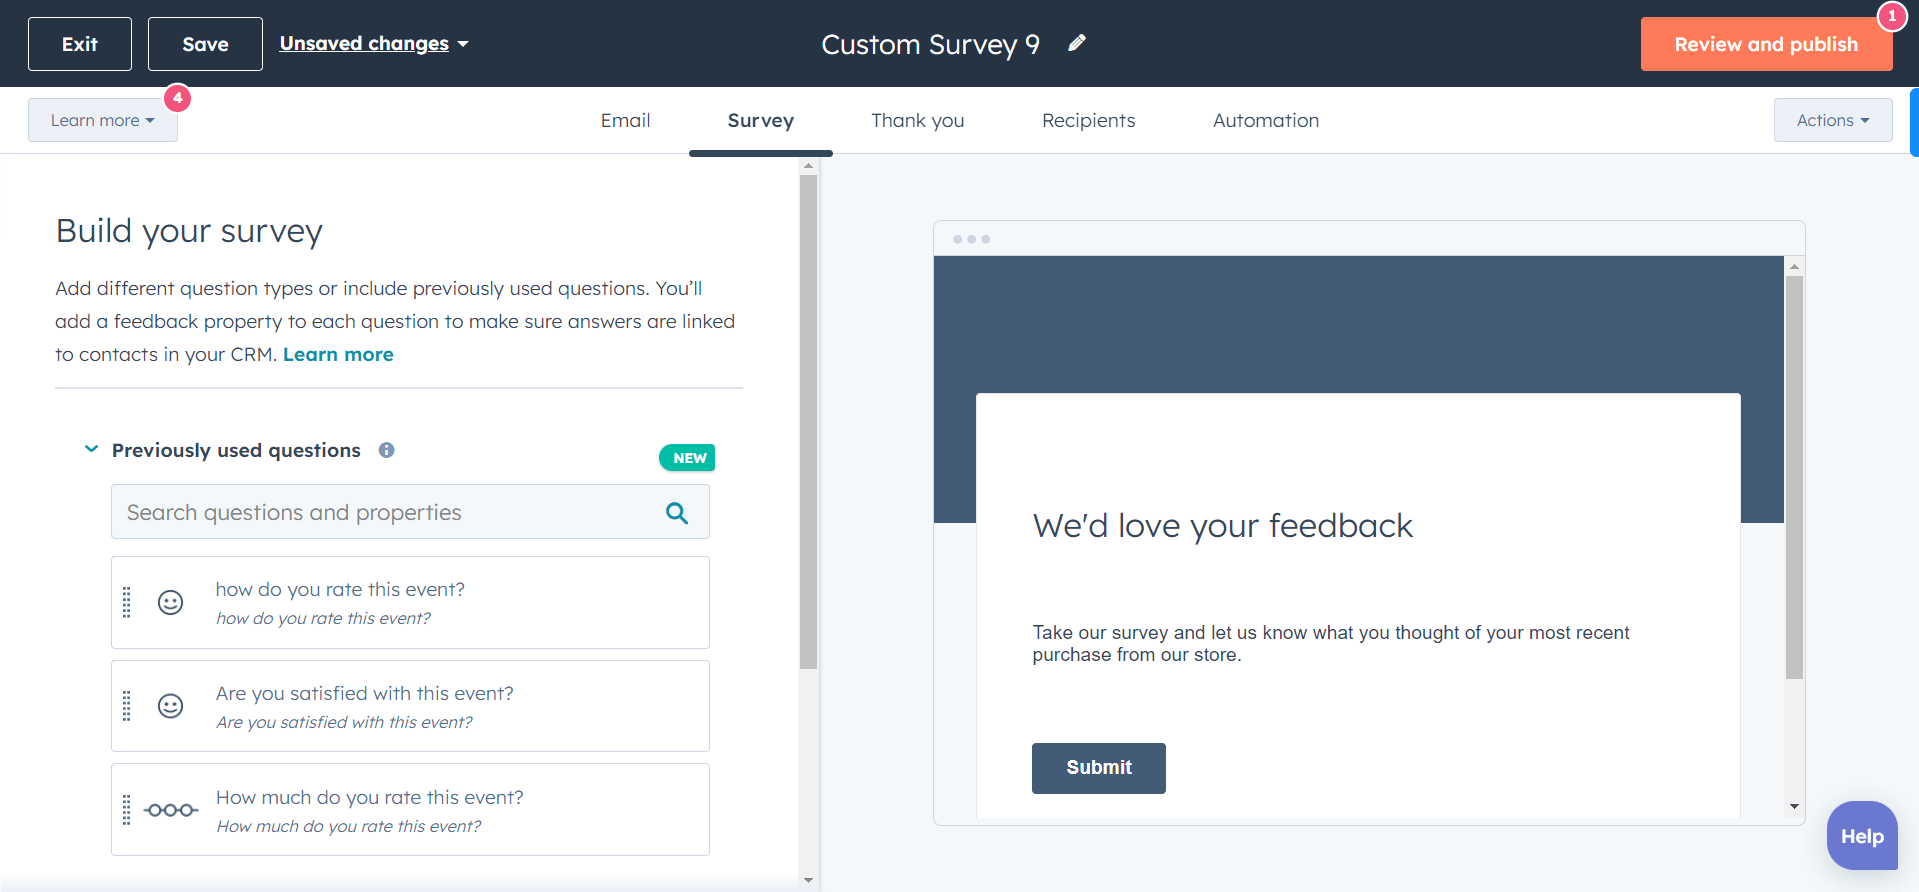
- Let’s say you select Email and then add the question you want to ask.
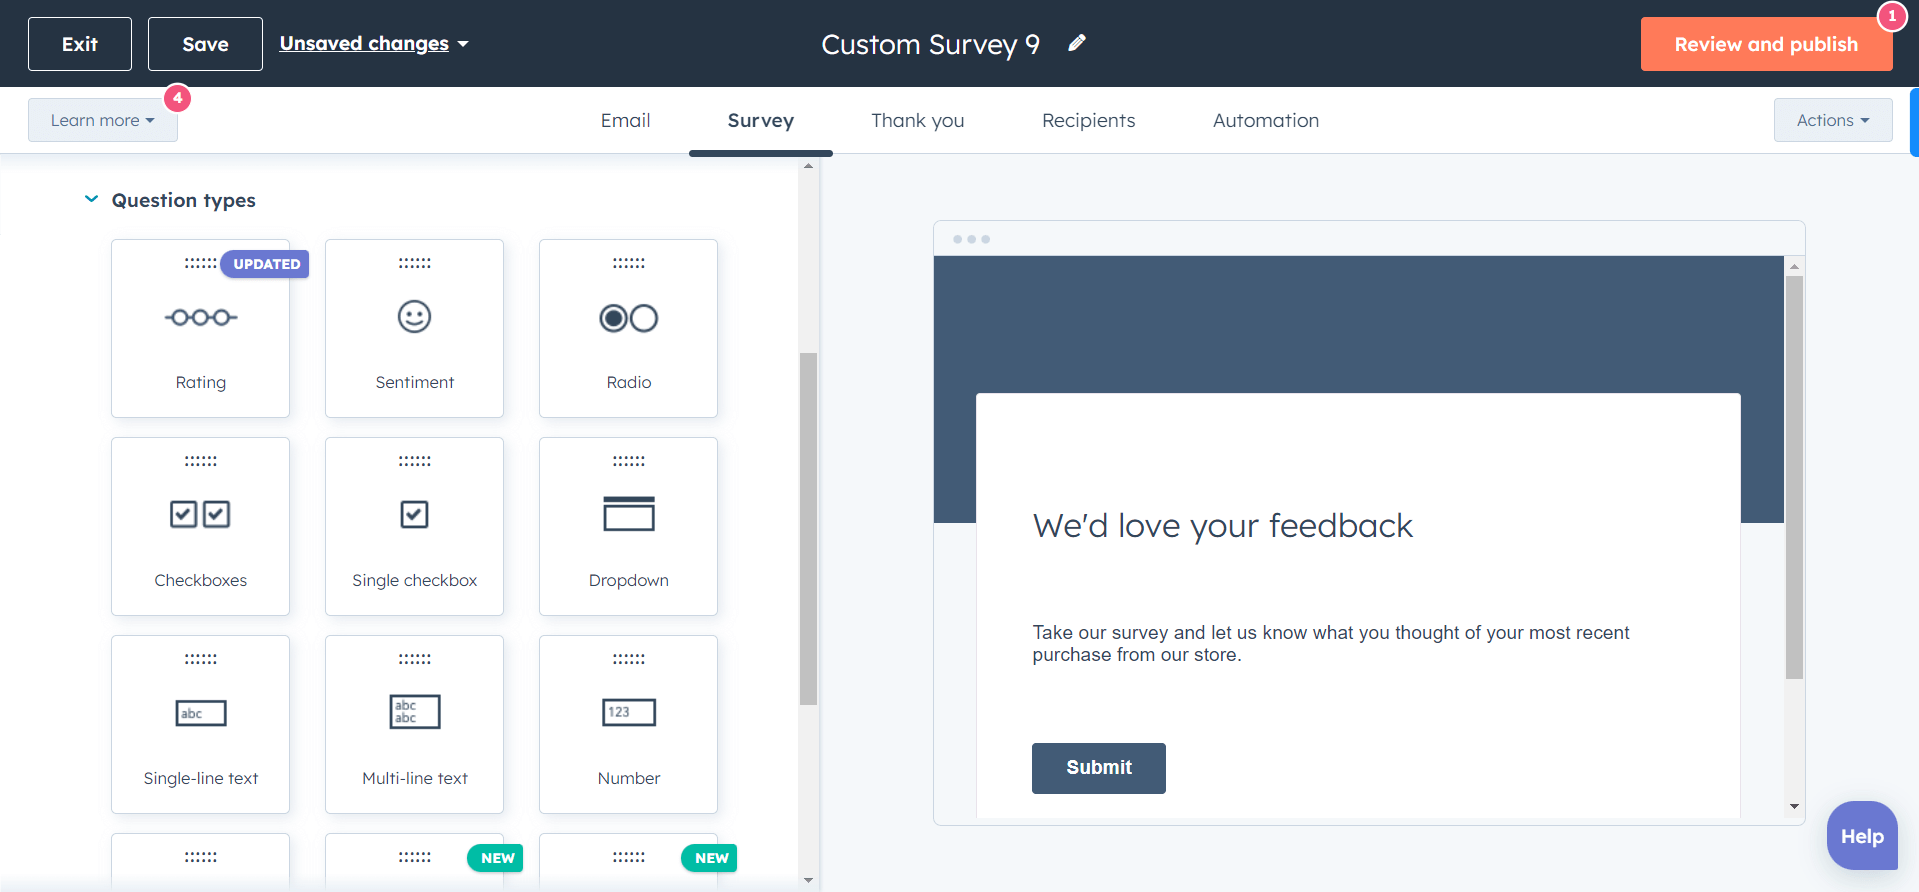
- Add modules like Ratings, Sentiment, Radio button, Dropdown, etc.
- Click on the Thank you tab and add craft your thank you message.
- Click Recipients to select who’ll receive a survey and when.
- Go to Automation and tweak automation related settings.
- Once you’re done, click Review and publish to make your survey live.
Since you set the automation as well as the audience, the survey will be automatically delivered to the users.
You can analyze these surveys to understand the problems your users encounter. Then you can act on these problems to eliminate them.
Why Use HubSpot CRM for Non profits?
Before diving into the setup, let’s talk about the benefits of using HubSpot CRM for nonprofits.
-
Lasting Donor Relationships
People think twice before donating their hard-earned money.
Hence, it’s an uphill battle to retain your donors for long like eCommerce brands.
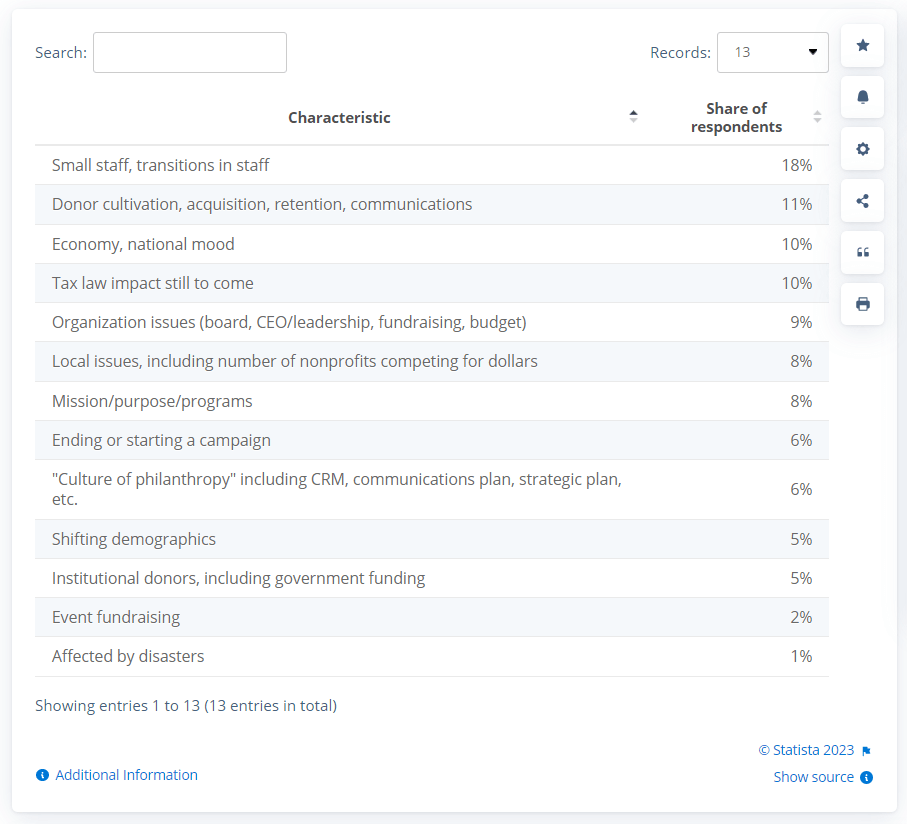
Even the reports found that donor retention is the 2nd biggest challenge for nonprofits.
But using HubSpot for non profits comes as an aid in this case. The platform comes with a complete email marketing toolkit. You can use it to build your email marketing campaign and constantly engage your donors.
You can, for example, send a donor receipt after a successful donation. Or enroll them into your newsletter subscribers list once a user donates. Whole Whale does this effectively.
If you subscribe to their newsletter, they reach out to you with the right frequency and content.
This type of content will keep your donors engaged and make them feel that you didn’t alienate them after collecting a donation. Resulting in a lasting donor relationship.
-
Hyper-focused Marketing
Marketing is a waste of time, resources and money.
Unless you’re delivering the right content to the right person at the right time.
And you cannot achieve such kind of accuracy manually. You have to employ a smart tool for that.
And HubSpot is such sort of tool. It helps you offer personalized content to your donors. Like you can use HubSpot properties to write personalized emails.
One-third of online fundraising revenue comes from emails. Nonprofitssource
Moreover, you can also use A/B Testing to design test variants of your pages and email for different audiences.
This clears out what works well and what doesn’t for your audience. And enables you to create content as per your audience’s likes.
-
Easy Donor Management
Once your nonprofit starts thriving, a common obstacle that occurs is donor data management.
Data accounts for 40% of a direct marketing campaign’s success.
But you often start using different platforms to manage your data. Like one for email marketing and another for data analysis.
Such scenarios give rise to complexities. And having a complex setup is the last thing you want in your organization.
The solution to this problem is obviously putting and managing all your data from a central point. And here, HubSpot for non profits comes to the rescue.
For example, you can sync your HubSpot nonprofits website’s data automatically over the CRM. From donors, volunteers, donations to products, tickets, etc. you can send all your data to HubSpot CRM and manage it without switching to another app.
-
Accurate Donor & Donation Tracking
Having a clear track of your donations is crucial. It helps you keep track of each of your donations you received with thorough details.
Using HubSpot for fundraising makes it pretty easy to track your donations. You can use HubSpot for non profits pipeline building with apt lifecycle stages like:
- Subscriber
- Lead
- Hot lead
- Donor
- Volunteer
- Promoter
These stages will automatically change based on the activities taking place at your website, helping you understand which stage a donor/donation is currently in.
A donor will move into these stages based on the activities s/he does at your website.
Like if a Hot lead donates on your website, she’ll move to the Donor stage. And once that donor fills out a volunteer form for example, s/he’ll enroll into the Volunteer stage.
-
Updated Donors About Your Organization’s Activities
Alienating your donors is the worst thing you can do as a nonprofit.
You have to keep your donors in the loop about your organization’s happenings.
According to Nonprofitsource, you can get 126% more donation for your campaign if you update your donors.
Keela is a good example of this. They keep you connected and update you through their newsletter,

But updating all your donors about your ongoings isn’t possible once you have a good-sized community.
Thus, you have to automate your communication with your donors. Here, using HubSpot for non profits can be a perfect solution for you.
You can create workflows with it to deliver emails about your organization’s updates. Sending such emails would help your donors stay up to date about your organization. Eventually, increasing their engagement.
In fact, reports say that marketing automation can boost your organization’s revenue by 417%. And that’s a win-win.
-
Insightful Reports for Better Decision Making
You have to make data-driven decisions to avoid any mishaps, especially when you’re working for a cause.
And to make data-driven decisions, what you need is accurate data. Here, HubSpot comes into play.
One of the most powerful tools of HubSpot for non profits is its reporting and analytics. You can generate the following types of reports using the HubSpot analytics tools.

Apart from these preset reports, you can create custom reports & dashboards in your HubSpot CRM. These reports share meaningful insights and eventually help you make calculated decisions.
Ready to Set Up HubSpot CRM for Non Profits?
Having your CRM set up correctly is the first step to streamline your tasks.
And you can follow the above steps to set up HubSpot for non profits.
After executing all the above steps told in the post, you’ll have a HubSpot CRM to get started with.
But remember, these steps will help you do the basic HubSpot CRM setup. But if you want to reach the destination of your goals and milestones, you need to go deeper into this set up.
For that, you can download our complete HubSpot CRM setup for non profits guide. It contains the steps to set up all your marketing, sales, and service hub with thorough examples.
Please check out the guide to have a complete HubSpot CRM set up with ease.
And by the way, did I tell you that MakeWebBetter can be the right agency if you’re using HubSpot for your non profit org. We are the Elite HubSpot Solutions partner with over 25000+ happy customers and over 8 years of expertise on the platform.
If you’re looking to achieve your non profit goals, we’ll create the pathway.
Let us help you so you can help others.
From payments to data syncing, MakeWebBetter has the right HubSpot solutions for your nonprofit.