

Looking to grow your sales? Multiply your revenue? Or increase brand awareness using HubSpot?
A HubSpot marketing campaign can be the solution for all.
Reports say, 76% of marketers run marketing campaigns for their business while 17% don’t.
So if you want to reach your goals in a smooth and efficient manner, and stay updated with the progress towards them, create and run HubSpot marketing campaigns.
And how will you do it? That’s exactly what you are going to learn in this post.
Table of Contents
What Are Campaigns in HubSpot?
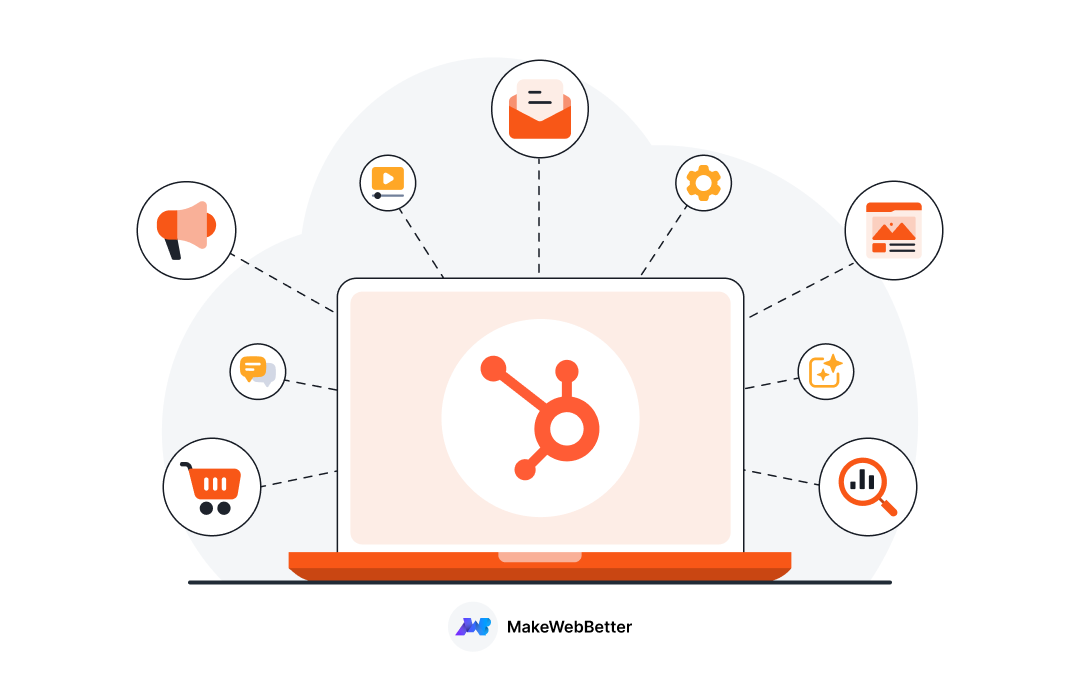
Campaigns is a tool that helps you create, run, and track the performance of your HubSpot campaigns. You can specify an owner, goal, budget, and audience in each campaign and also tag assets to track their performance.
For instance, let’s say you want to re-engage your cold leads. And for that, you’re sending some automated emails through workflows. So if you want to track the performance of those emails and workflows, you can create a campaign and attach all the assets you’re using.
Once you do that, you can see some KPIs like unique opens, unique clicks for emails and workflow conversion, and joined goal list for workflows. All of this from one place.
Want to create converting HubSpot Campaigns?
Talk to our HubSpot experts and they’ll create result-driven campaigns for you.
How to Set Up Campaigns in HubSpot?
Setting up a full-fledged HubSpot campaign requires multiple setups. Thus, I’m dividing this segment into a few different phases. Let’s start with the first one:
1. Creating Campaign
- Go to your HubSpot portal.
- Navigate to Marketing > Campaigns.
- In the upper right, click on the Create Campaign.
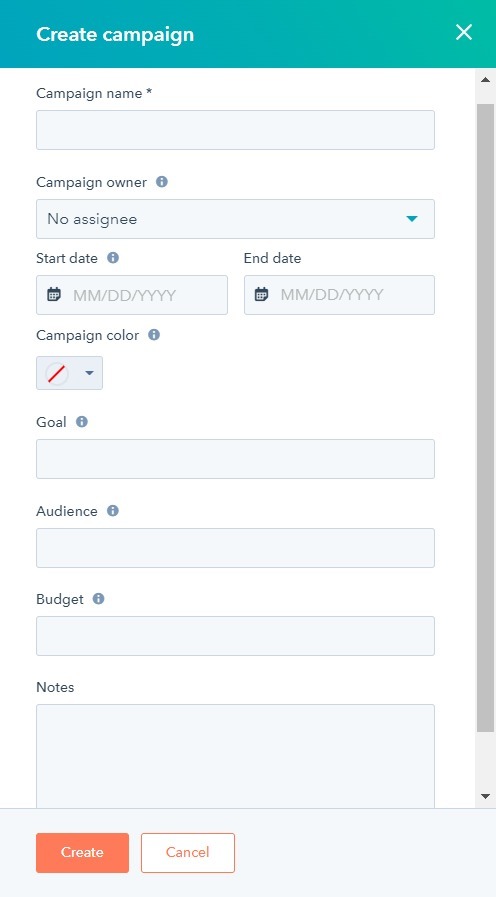
- A dialog box will appear, asking you to enter some details like:
- Campaign Name
- Campaign Owner
- Start and End date
- Campaign Color
- Goal
- Audience
- Budget
- Notes
- Enter the required details and click on Create to your campaign.
You’ve successfully created your campaign now. But it won’t work yet. To make it functional, you need to add some more details to it like tracking URL, tasks, goals, and assets. Let’s talk about how you can do that.
2. Create Tracking URL
Tracking URLs helps you track the performance of your campaigns. Whenever a user visits your website through your created tracking URL, it sends that visit’s data to the campaign. You can check this data through the campaign analytics tool.
Follow these steps to create a tracking URL for your HubSpot marketing campaign:
- Open the campaign you created earlier.
- Click on the Actions button on the upper right.
- Then click on the Create Tracking URL option.
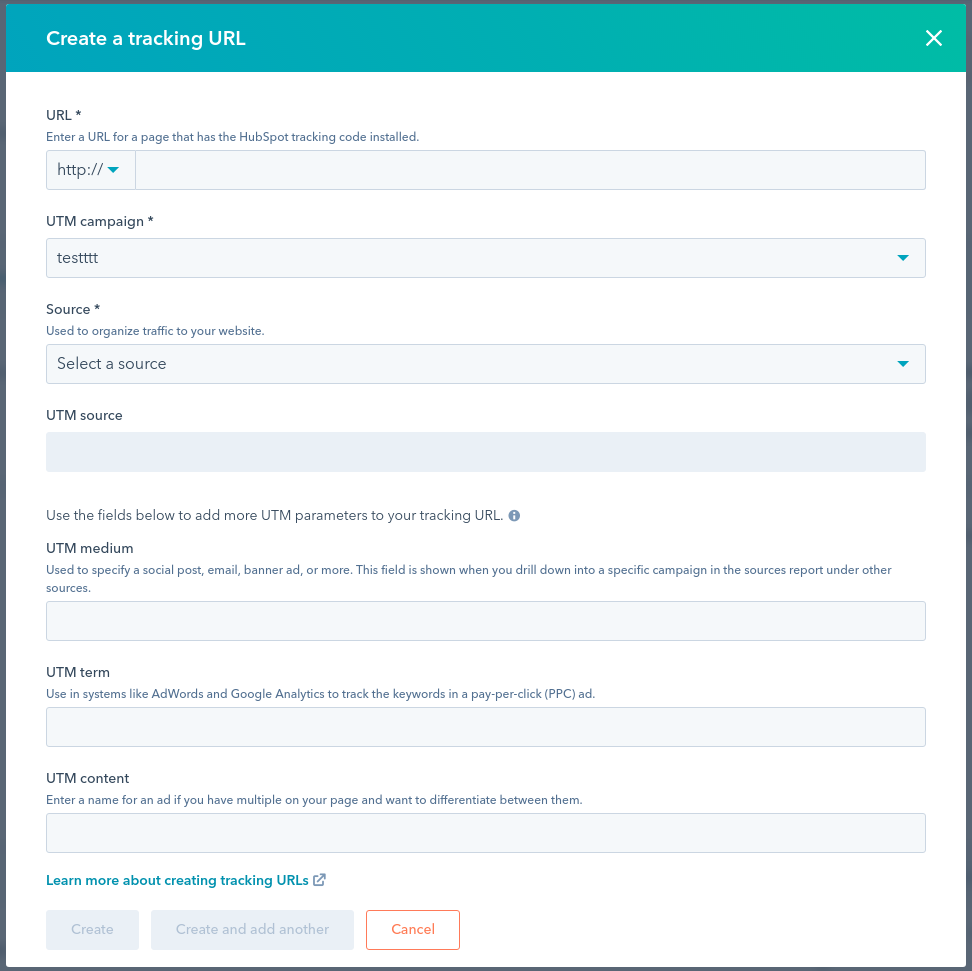
- A dialog box will appear, asking you to enter some details like:
- URL: URL of a page where you want to send the user. It must contain the HubSpot Tracking code.
- UTM Campaign: Select the campaign where you want to collect the data of the visits you’re getting through the above URL.
- Source: Select a source where you’ve added the link.
- Once you fill in all the details, click on Create and your tracking URL will be created. If you want to create another tracking URL after that, click Create and Add Another.
So after creating the tracking URL for your campaign, you can move to the next step which is adding details to your campaign.
3. Add Tasks
Adding tasks to your campaign will help you and your team know the things required to be done in a campaign. This will also keep all your team in the loop and help you track the progress of your created to-do list.

Here’s how you can create tasks in your HubSpot marketing campaigns:
- Under your HubSpot campaign, click on the Action button in the top right.
- Then click on the Create task button.
- A dialog box will appear, asking you to enter these details:
- Title
- Type
- Campaign
- Assigned to
- Due date and due time
- Notes
- Add all the required details and click on the Save button. If you want to create another task after this, click on Save and add another button.
4. Edit Campaign
The edit campaign setting allows you to update all the details you specified in the beginning while creating the campaign.
To update your existing HubSpot marketing campaign:
- Open your campaign.
- On the upper right, click on the Actions button.
- Then click on the Edit Campaign.
- A dialog box will appear, asking you to update the details you added before.
- After adding the details, click on Update to save the details.
After clicking on Save, you’ll see a message saying “Your campaign was updated” and the updates will start reflecting.
5. Edit Goals of Your Campaign
Goals are the core of every campaign.
Reports found that over 60% of marketing campaigns had a primary goal of brand awareness. Whatever your campaign’s goals are, let’s see how you set them up.
In the goals section, you can specify the amount of traffic, leads, or revenue as a benchmark. This helps you track your progress towards those goals.
To add goals to your campaign:
- Open your campaign.
- On the upper right, click on the Actions button.
- Click on Edit Goals.
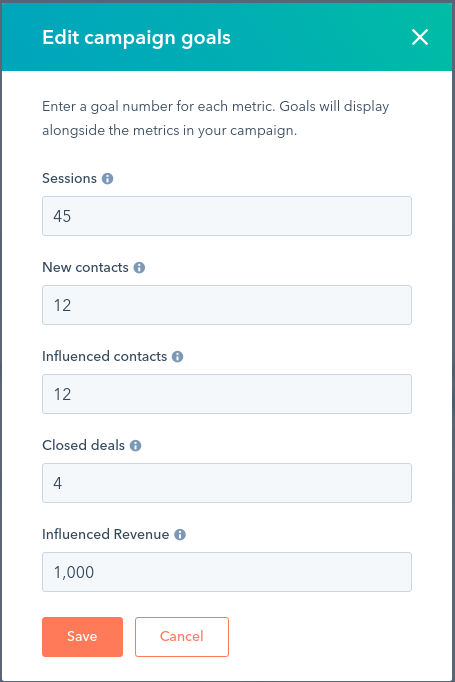
- A dialog box will appear, asking you to enter a number for these metrics:
- Sessions: The traffic to a HubSpot page that contains the tracking code.
- New Contacts: Number of new contacts whose first touch was in the campaign you’re setting goals on.
- Influenced Contacts: Number of contacts who engaged with one or more assets in the campaign.
- Closed Deals: Number of deals made by contacts.
- Influenced Revenue: Total revenue from all closed/won deals.
- After adding the number, click Save and the numbers will now display on your campaign in the performance section.
6. Add Assets to Your Campaign
After adding goals, you need to attach assets to your campaign. Associating assets to your campaign will provide you with data whenever a user engages with the attached asset.
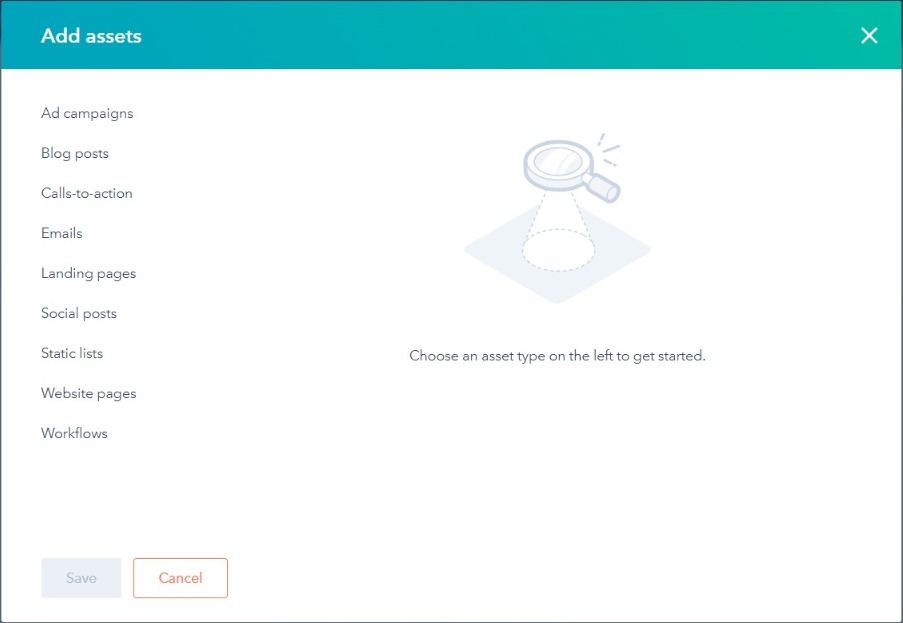
In a campaign, many assets like blog posts, Social posts, Calls-to-action, emails, Landing pages, Static lists, website pages, workflows, can be added.
To add assets to your campaign:
- Click on your campaign to open it.
- On the upper right, click on the Add Assets button.
- A dialog box will appear with the type of assets listed in it.
- Click on the type you want to add.
- Select what asset you want to add to your campaign and click on Save.
You can add multiple assets in a single HubSpot marketing campaign if needed.
Congratulations! You’ve successfully created your HubSpot campaign. Now it’s time to discuss how you can track the performance of your HubSpot campaigns.
Apart from those primary settings, there are other trivial options like Comments and Access. You can check if anybody has commented on your HubSpot campaign. And share the access accordingly.
How to Set Up Reporting for Your Hubspot Campaigns

A HubSpot report found that 72% of marketers use reporting tools. And over 60% use built-in CRM tools for reporting. This shows the importance of reporting.
So let’s say you’ve created your marketing campaign in your HubSpot CRM. But that’s not all.
You need to track how it is performing. How much is it helping you achieve your goals? And to identify that, you need to set up HubSpot campaign reporting.
So let’s see how you can do that:
- Go to your HubSpot portal.
- Navigate to Reports > Analytics Tools.
- From the options, click on Campaign Analytics.
- The report for all of your campaigns will be displayed in the window.
- If you’re running multiple campaigns and want to track a specific campaign, scroll down, select the one you want to track and it’ll be displayed.
- You can select the date range if you want to check the data for a specified date range.
- In the end, you can also export the data into a .CSV or .XLS file or also save it as a report and add it to your dashboard.
Prerequisites to Create HubSpot Campaigns
HubSpot Campaigns feature comes with specific HubSpot plans. Their plans are:
- Marketing Hub Professional
- Marketing Hub Enterprise
- Legacy Marketing Hub Basic
So if you have one of these plans, you can create and run HubSpot marketing campaigns.
Final Words
I hope you now know how to get started with your HubSpot marketing campaigns. How you can create these HubSpot campaigns, add assets, goals, create URLs, and track their progress.
With HubSpot, it’s super easy to create a HubSpot marketing campaign and run it to achieve desired goals. If you still need any kind of help in creating your HubSpot campaigns or any other assistance, connect with our HubSpot experts and they’ll help you out.
Need help with your HubSpot Campaigns?
Connect with our HubSpot experts and they will guide you through.


A great resource, takes it right from the basics and yes thank you for the resourceful tips.
Thanks for the appreciation Nikhil :) Hope you’ve learned something valuable from this post.