Managing your eCommerce store can be a mess, especially if you’re doing it manually. But, hey! Have you thought to connect WooCommerce to HubSpot yet?
eCommerce market is getting tougher to manage, every day. And with boozing traffic, it gets even more complex if you haven’t automated the processes. Imagine, how good it would be to segment your contacts into a list and emailed them automatically while you’re sitting on your couch & sipping on a hot cup of coffee?
This is 2022, you fairly know how important it is to automate your eCommerce business to save your time and efforts. Thankfully, HubSpot is a one-stop for all your sales and marketing automation needs.
HubSpot CRM can easily be integrated with almost any eCommerce platform, thereby, making it easier for you to manage and automate your routine business processes like lead generation, email marketing, order management, inventory management, lead nurturing, workflow management, customer service, and a lot more.
This all-in-one sales, marketing, and customer service platform determines your business problems, boost your sales velocity, helps you build more meaningful connections, and make decisions with extensive performance reporting.
Free Download HubSpot Audit Checklist
Audit your HubSpot portal the right way! DIY.
Can You Connect WooCommerce to HubSpot?
Yes, definitely. You can connect WooCommerce to HubSpot easily using the integration software. Moreover, connecting and syncing the data between these two platforms will help you manage your contacts, segment your audience, track your website activity, run your sales pipeline, and give you detailed reporting of your WooCommerce store.
So let’s say goodbye to those busy days, and take a relaxing breath by connecting WooCommerce to HubSpot. And the best way to do this is by using an integration tool that doesn’t require any coding or other efforts.
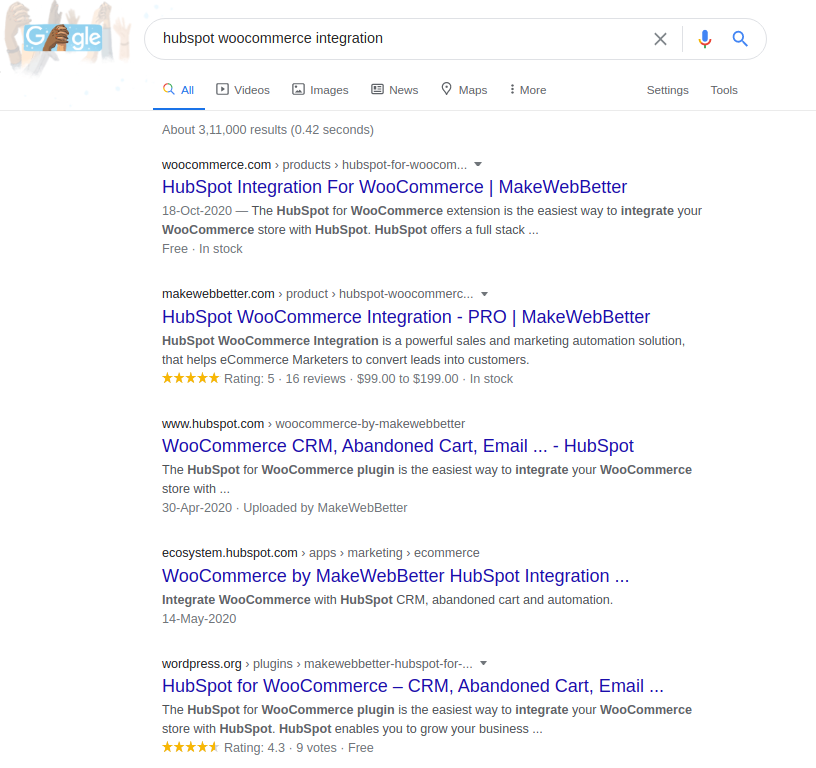
And for connecting WooCommerce to HubSpot, the most powerful tool I find is HubSpot WooCommerce Integration. It converts your website traffic to leads, eventually creates deals, automates your marketing, and business processes centrally.
And we’re not doing self-promotion here. It’s what the Google SERP results say when you search for HubSpot WooCommerce Integration –
Connect WooCommerce to HubSpot in 7 Steps!
In this section, you will learn how to connect your WooCommerce store to HubSpot using our FREE HubSpot Integration for WooCommerce, step-by-step.
Step 2. Create Custom Groups and Properties With HubSpot
Step 3. Organize Your Leads With Active Lists and RFM Segmentation
Step 4. Setting-up Converting Marketing Workflows
Step 5. Automate Your WooCommerce Orders With HubSpot Deals
Step 6. Pull Your Customers Back With Cart Abandonment Settings
Step 7. Visualize Your Business Growth With Comprehensive Reporting
Step 1. Install HubSpot WooCommerce Integration
The first step is obvious. You need to download and install our HubSpot integration on your store. You can find this plugin either on WordPress, WooCommerce, or HubSpot Marketplace.
Download and complete the installation of HubSpot WooCommerce Integration.
Important!Please Create a HubSpot Account to install the integration successfully. If you already have one, you can move straight to Connect Your Account. |
While installing the plugin, you will be asked to set up Groups & Properties, Lists, Synchronization. If you don’t know what they are, let me give you a quick idea about them:
- Groups & Properties: Properties are used to store specific data for objects like Contacts, Tickets, Companies, etc. For example, a Billing Address property will store the billing address of a Contact object. And Groups are simply a collection of relevant properties.
- Lists: Lists hold the data of your objects that share similar attributes. A list of Indian users for example will hold all the contacts in which the Country/Region property is set to India.
- Synchronization: The synchronization tab lets you send all of your WooCommerce data to HubSpot.
After setting up all the things, you will successfully connect your WooCommerce store to HubSpot.
But connecting it successfully won’t do any good. You’ll need to configure it according to your business for a proper give and take of your data and automating things the right way. So let’s talk about the things you must tweak in our plugin.
Step 2. Create Custom Groups and Properties With HubSpot
Next comes setting up custom groups, and properties in our HubSpot WooCommerce Integration extension. I have already explained what properties and groups are.
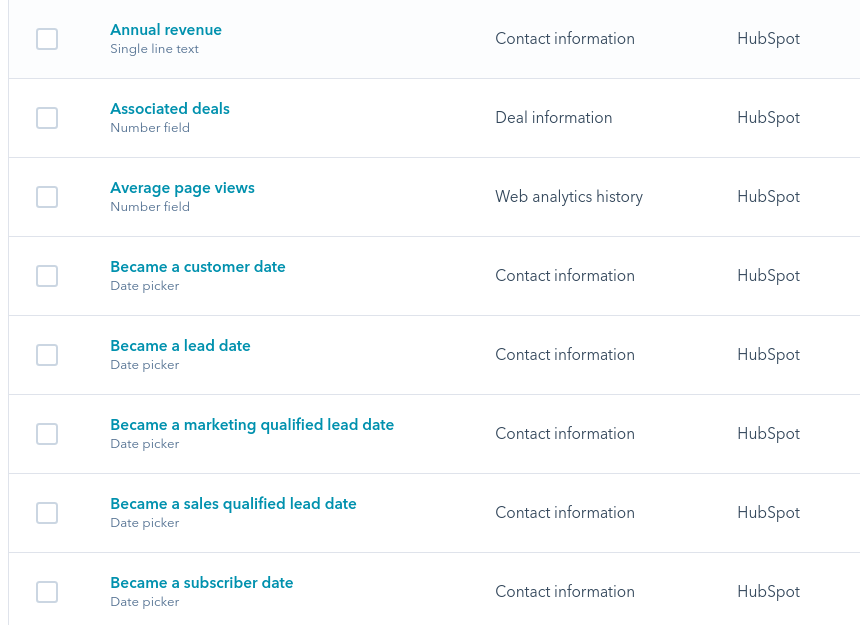
After creating custom groups, you can add custom fields as per the nature of your business. These custom fields will help you capture the data for your contacts, companies, tickets, deals.
Our HubSpot WooCommerce Integration offers 100+ properties you can create in just a single click. You can go to the Settings and click on the Manage button in the Groups & Properties. Create the properties you want to collect data for by clicking the + icon. Once you click, they will reflect on your HubSpot portal and it will start storing data.
Step 3. Organize Your Leads With Active Lists and RFM Segmentation
See if you are having an eCommerce company or any product or service-based organization and your business is thriving. It becomes pretty obvious that you will have a huge list of customers with varying interests, types, nature of business, and behavior.
Keeping all those contacts under one umbrella can be tricky. To avoid this mess, you need to organize your customer’s list according to your needs and the nature of their business.
With HubSpot, you can segment customers based on the contact or deal stage they are on. For example, they are leads, subscribers, lost customers, or what stage of their deals they are currently at, etc. by choosing the right criteria in your list for segmentation.
Our HubSpot WooCommerce Integration makes this process easier by providing you with a set of a few predefined active lists. For example, we provide an active list named “Engaged Customers”. This list will collect all those contacts that have purchased their last product in the last 60 days.
3.1 Predefined HubSpot Smart Lists
The HubSpot smart lists or active lists automatically update once your contacts meet the set enrollment criteria. After creating custom fields and syncing your data to HubSpot; it’s time to segment your audience into different lists depending on their characteristics.
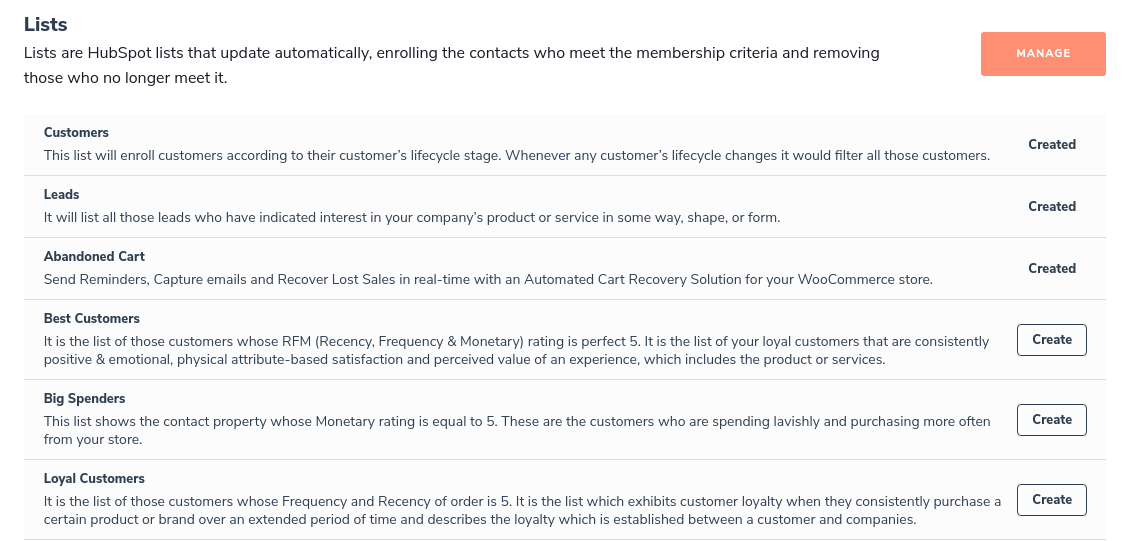
Our HubSpot WooCommerce Integration plugin gives you a predefined set of active lists like Best Customers, Loyal Customers, Abandoned Cart Users, and many more. You just need to click on the create button and the list will be created on your HubSpot portal.
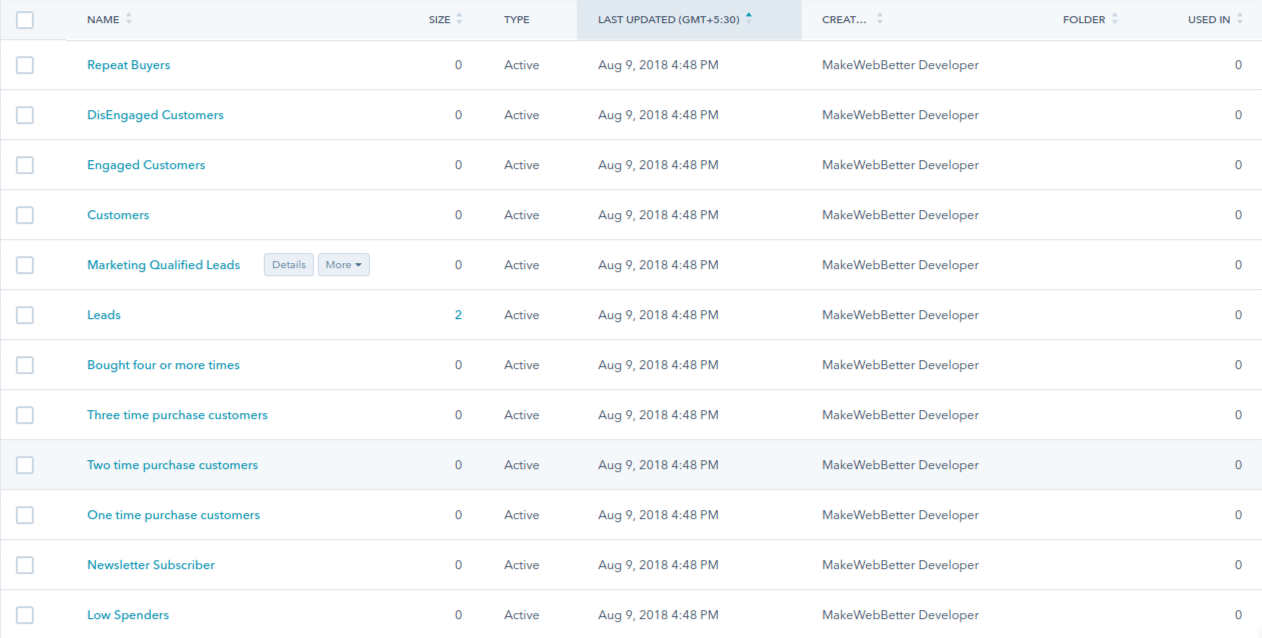
Once created, it will reflect on your HubSpot portal as shown in the below screenshot and start collecting data by enrolling contacts that fall into the set criteria of that list.
You can also create your own lists on HubSpot. For instance, if you want to segment your users based on their age, gender, geographical location, or any other factor, you can segment those users by creating lists on HubSpot and setting criteria as required.
How To Create HubSpot Lists?
To create a list directly through your HubSpot portal you should:

- Go to your HubSpot portal.
- Navigate to Contacts > Lists and click on the Create List button.
- Select the type of records(or data) you want to add to your list, i.e., Contact-based records or Company-based records.
- Give a name to your list.
- Select the type of list you want to create, Active or Static.
- Select Filter Type to set the criteria of enrollment. For example, if you want to target a list of contacts who live in the United States, select Contact Properties, look for Country/Region, add the United States as a value and click on Apply Filter.
- After applying the filter, the contacts who contain the United States as a value in their Country/Region property will be displayed to you.
- If you want to check whether the data is accurate, you can click on Actions > Test A Contact to check if the contact contains the given value.
- Once you are satisfied with the data, click on Save and your list will be created with all the records that meet the enrollment criteria you have set.
3.2 RFM Analysis
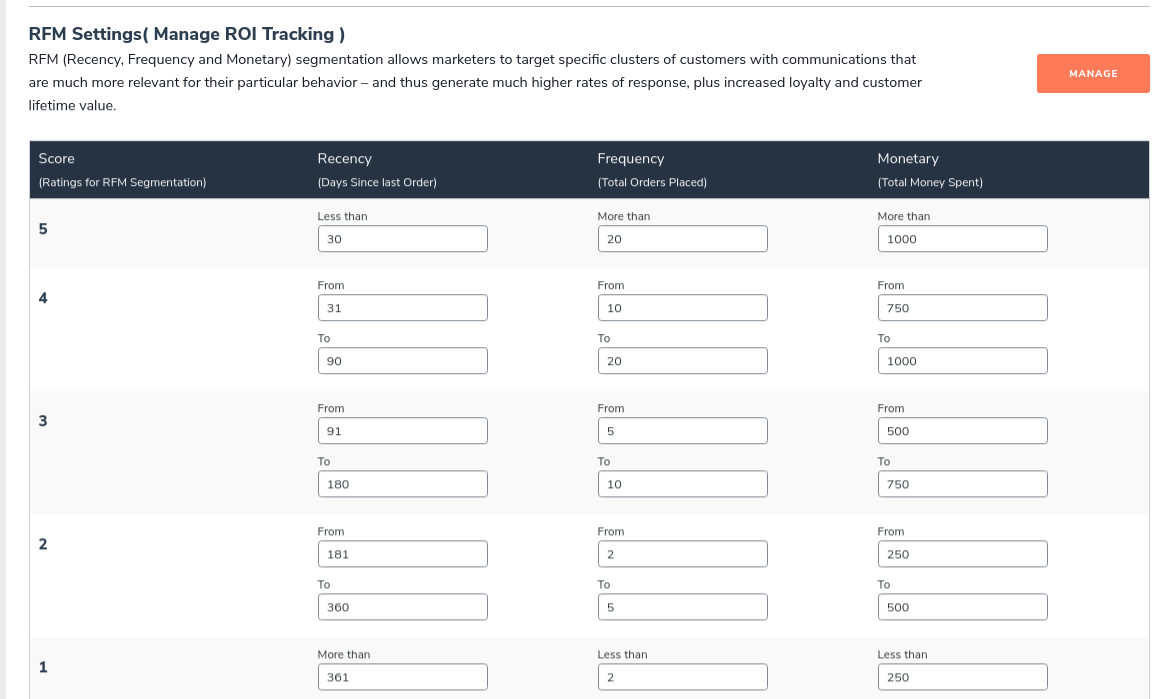
When you are done with creating custom fields, it’s time to analyze your customer buying habits by creating different customer segments through our integration’s RFM (recency, frequency, monetary value) segmentation in HubSpot.
Our HubSpot WooCommerce Integration helps you segment your customers according to their buying frequency, order value, and the number of products they purchase. This helps you get an accurate idea of Customer Lifetime Value or how profitable a particular customer is for your online store.
And according to their LTV, you can segment and target them with an apt approach.
Step 4. Setting-up Converting Marketing Workflows
Now it’s time to create targeted workflows for your business.
Workflows are automated actions bound with a specific group of conditions and are triggered whenever the set condition is met.
Once you’ve segmented customers into a useful list, you can automate eCommerce business processes by creating inbound marketing workflows based on customer groups, RFM ratings, purchase details and other 70+ contact properties.
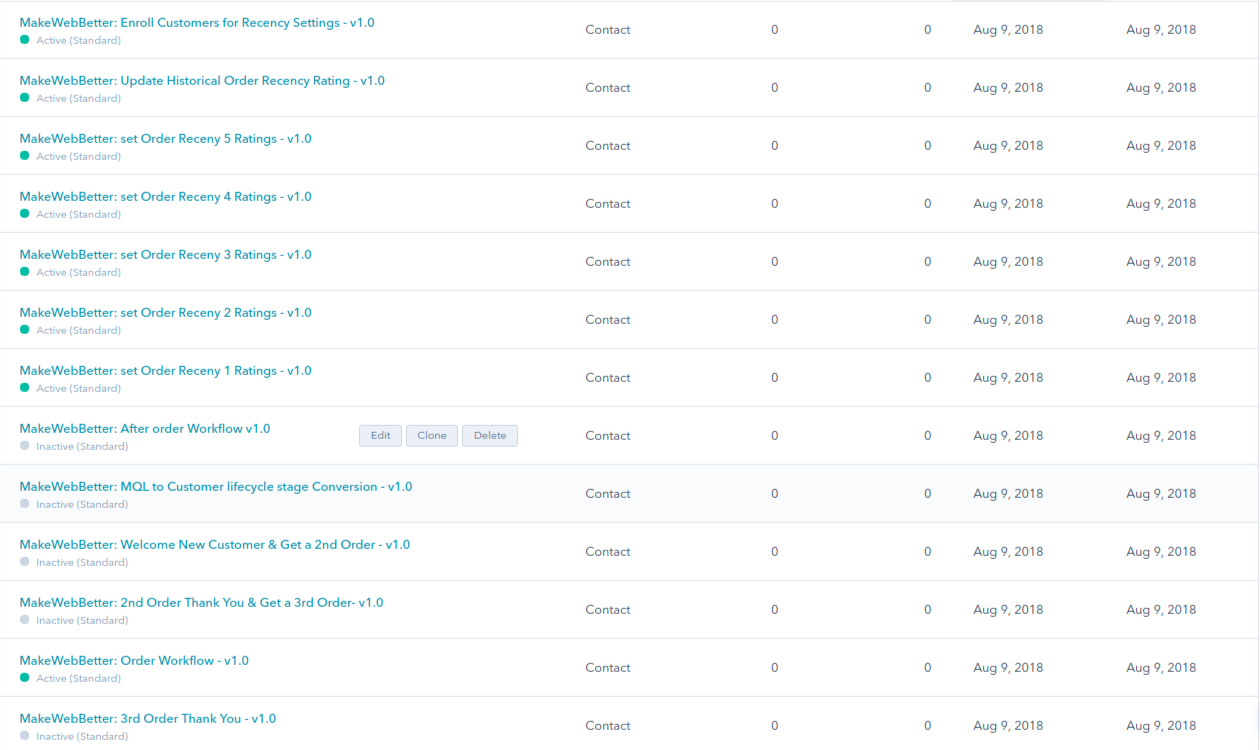
Different customer segments require different workflows, which often include customized content and scheduling. And to make sure you don’t waste your time applying logic to create workflows, we’ve loaded our HubSpot integration plugin with some effective workflows you can create in a single click in your HubSpot portal.
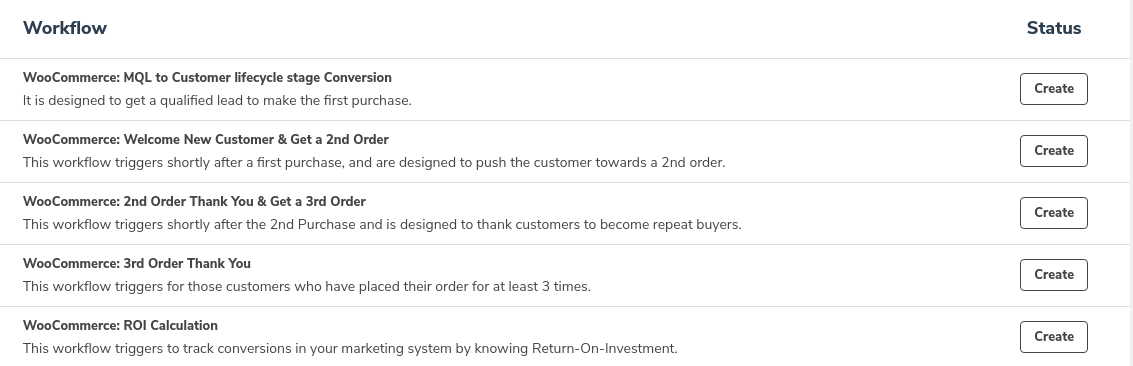
Here are some of them with their explanation:
- Abandoned Cart Recovery: Helps you to recover abandoned carts and let your customers finish their purchase with a series of emails, offering discount coupons.
- Welcome New Customers & Get 2nd Order: This email triggers after the first purchase and gives your customers some useful content that delights them and prompts them to make 2nd purchase.
- MQL Conversion: This workflow will help you nurture the Marketing Qualified Leads (MQLs) of your store. It focuses on converting those leads into customers. Moreover, it will automatically trigger a series of emails and send them to the MQLs at an appropriate time.
- ROI Calculation: This workflow will help in calculating the Return On Investment(ROI) for different inbound marketing campaigns such as MQL Nurturing, Welcome New Customer and Get 2nd Order, and so on.
I’ve explained only four of them, but our plugin offers 10+ workflows you can create with our plugin in one single click.
Step 5. Automate Your WooCommerce Orders With HubSpot Deals
Your WooCommerce orders become deals in HubSpot. HubSpot deals are the opportunities you have with companies and contacts, where contact is more likely to take action. When all the deal stages are aligned in one line, it creates a sales pipeline.
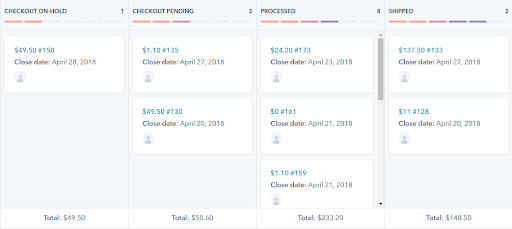
The sales pipeline gives you a visual representation of your sales process. As the order status gets updated, the deal progresses. HubSpot for WooCommerce automates the process of mapping the deal stages with the eCommerce pipeline. You can also create custom deals for new orders in real-time. This new integration syncs all your past WooCommerce orders as HubSpot deals in HubSpot.
Looking for the easiest ways to track sales & revenue of your WooCommerce store?
Step 6. Pull Your Customers Back With Cart Abandonment Settings
As per data from Statista, almost 80% of customers abandon their orders and are not converted into a purchase. This means that 80 out of 100 shoppers are willing to make a purchase but couldn’t find the convenient resources, offers, or environment to complete the purchase.
You can easily recover your shopping carts, with abandoned cart recovery settings in HubSpot for WooCommerce. When you have successfully connected your WooCommerce store to HubSpot, you have your weapons ready to use with a pre-built abandoned cart HubSpot list, contact properties are created automatically in HubSpot.
Check Our: HubSpot Onboarding Services
Also, you get a unique Abandoned cart workflow, which is automatically created for you, to recover potentially lost revenue. HubSpot reporting feature lets you retarget those in-active buyers, with comprehensive abandoned cart reporting.
Step 7. Visualize Your Business Growth With Comprehensive Reporting
This is the last step where you need to set up the reporting so you can track your website’s activities through HubSpot. HubSpot allows you to track the progress of your sales and marketing of your online store through its reporting feature.
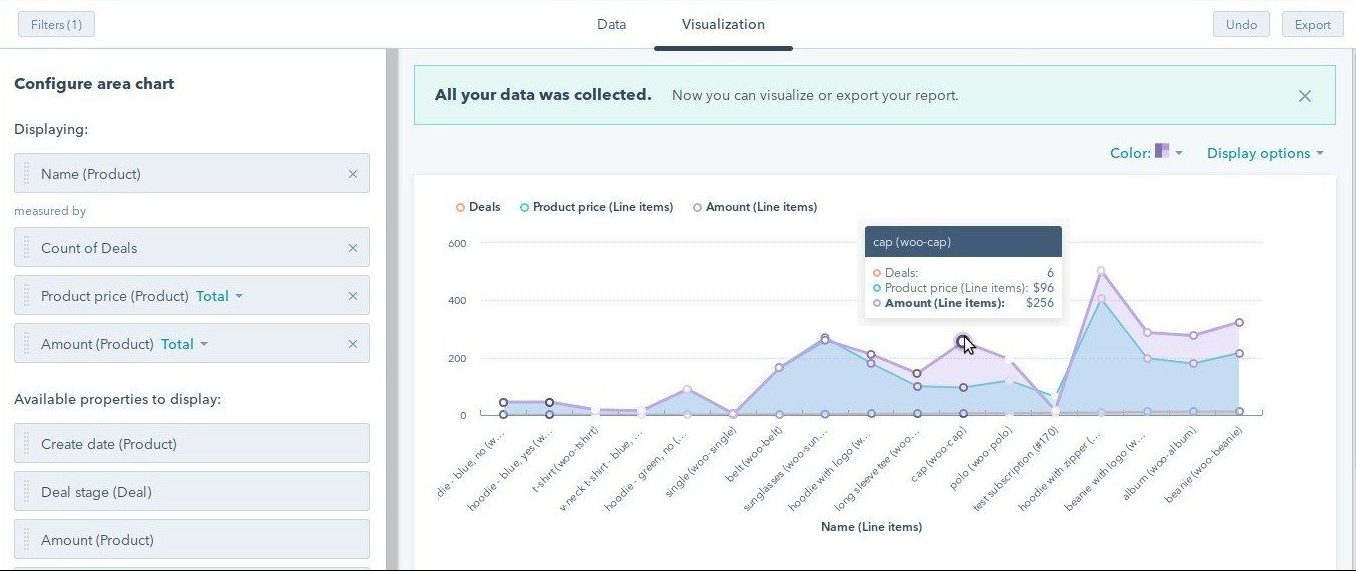
When you start an inbound marketing campaign, at the very moment, it opens the door to a data pool. And you get several assets that should be tracked to get a clear understanding of what’s performing and what’s not.
For example, the landing pages, email templates, website pages, and other content you’ve attached to your campaign. The deals you close, emails you send, and everything in between — the Reporting dashboard can help you understand and monitor their performance.
In The End…
We positively hope that you understood how to connect WooCommerce to HubSpot by now. It’s time to make a smarter move with HubSpot WooCommerce Integration. This extension will make you reach new heights in Sales, Marketing & Reporting, based on customers’ data that matters to your business.
So, come up and use your customers’ data significantly for your business. Segment your customers, create campaigns that really matter to you or anything else to automate your business as soon as possible.
With this, you are very clear, about what HubSpot WooCommerce Integration can do for you. If you’re still not sure how to set up the plugin or want to maximize its potential, you can always contact our HubSpot experts to learn some best practices to do it.
Get A Free HubSpot Consultation!!!
As HubSpot experts, we thought we should let you know that we also perform a FREE HUBSPOT HEALTH CHECK. This will help you identify how you can overclock your HubSpot to maximize results. We simply call it a HubSpot Portal Audit. Here we check how well you’re using your HubSpot plan and what features are still left which can make the most out of it.
Maximize Your HubSpot Potential
Full disclosure, MakeWebBetter is a HubSpot Platinum Solutions Partner. We are HubSpot eCommerce Onboarding Specialists, served over 12000+ satisfied customers with the best of HubSpot for eCommerce, and have been an active HubSpot community member and HubSpot Rising Star.