So you want to sell your courses online. I’d suggest you not to do that.
Yes, you heard that right. Do not sell your courses online, if you will be using a handful of tools to do that.
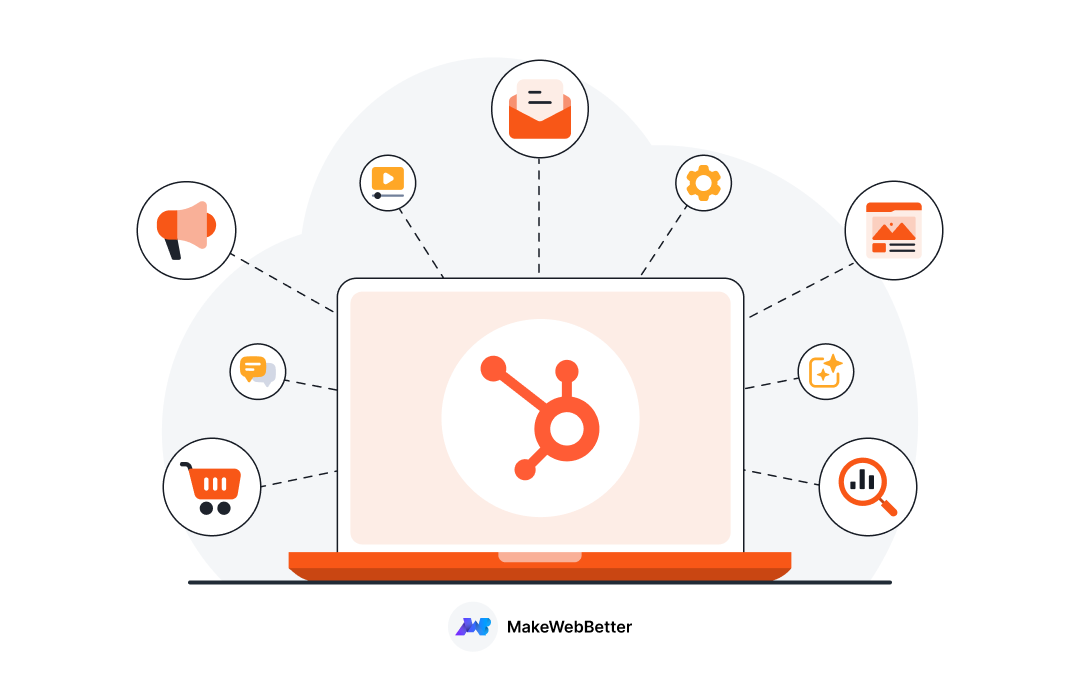
Selling online courses involves multiple activities. You need to host your course, sell & track sales, manage the payments, nurture customers and more. And if you’re using different tools for each of these tasks, you’ll shut down your business in a month.
Hence, the best idea to sell your courses online is by using one single tool to manage all of your tasks. And HubSpot is such a tool that helps you do that efficiently.
In this blog, we’ll explore how you can sell online courses with HubSpot efficiently. Let’s dive right in.
Steps to Sell Online Courses with HubSpot
Let’s dive right into the steps you need to take to sell your online courses with HubSpot.
Set Up A Course Landing Page
The best way to attract the right users to your course is by having a landing page set up. This landing page could contain the summary of your course, telling users what they’d actually get in it.
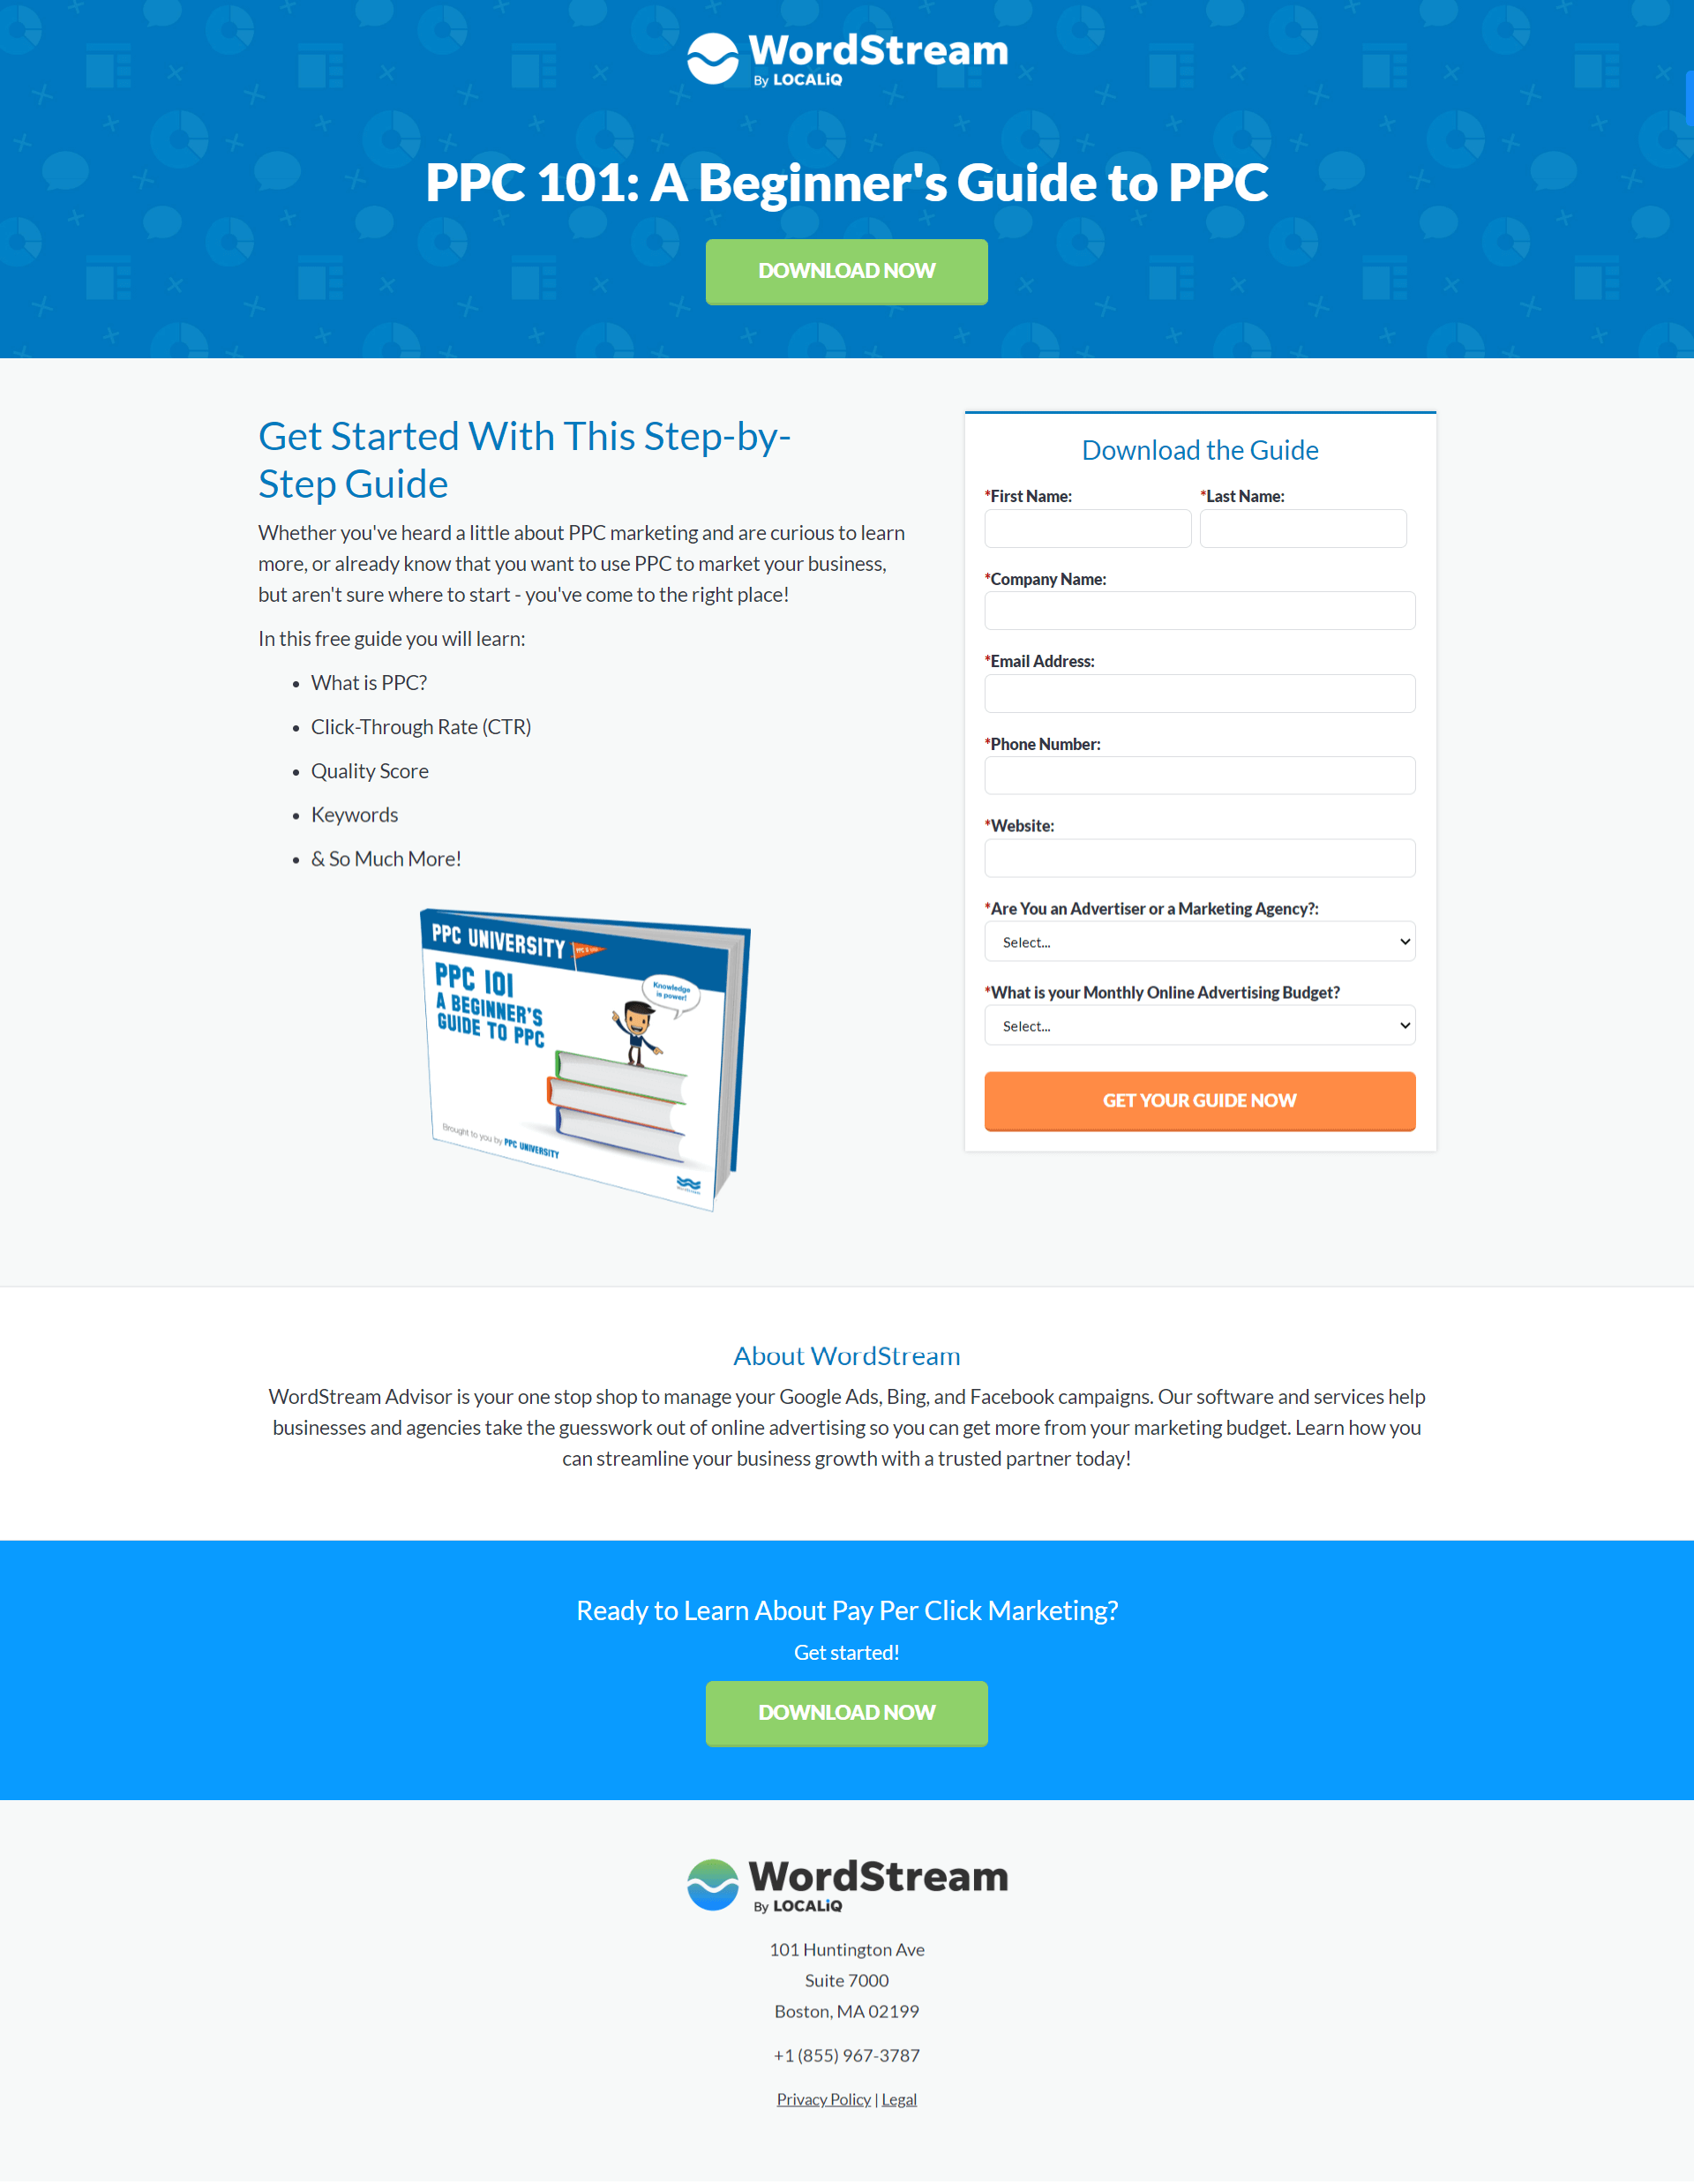
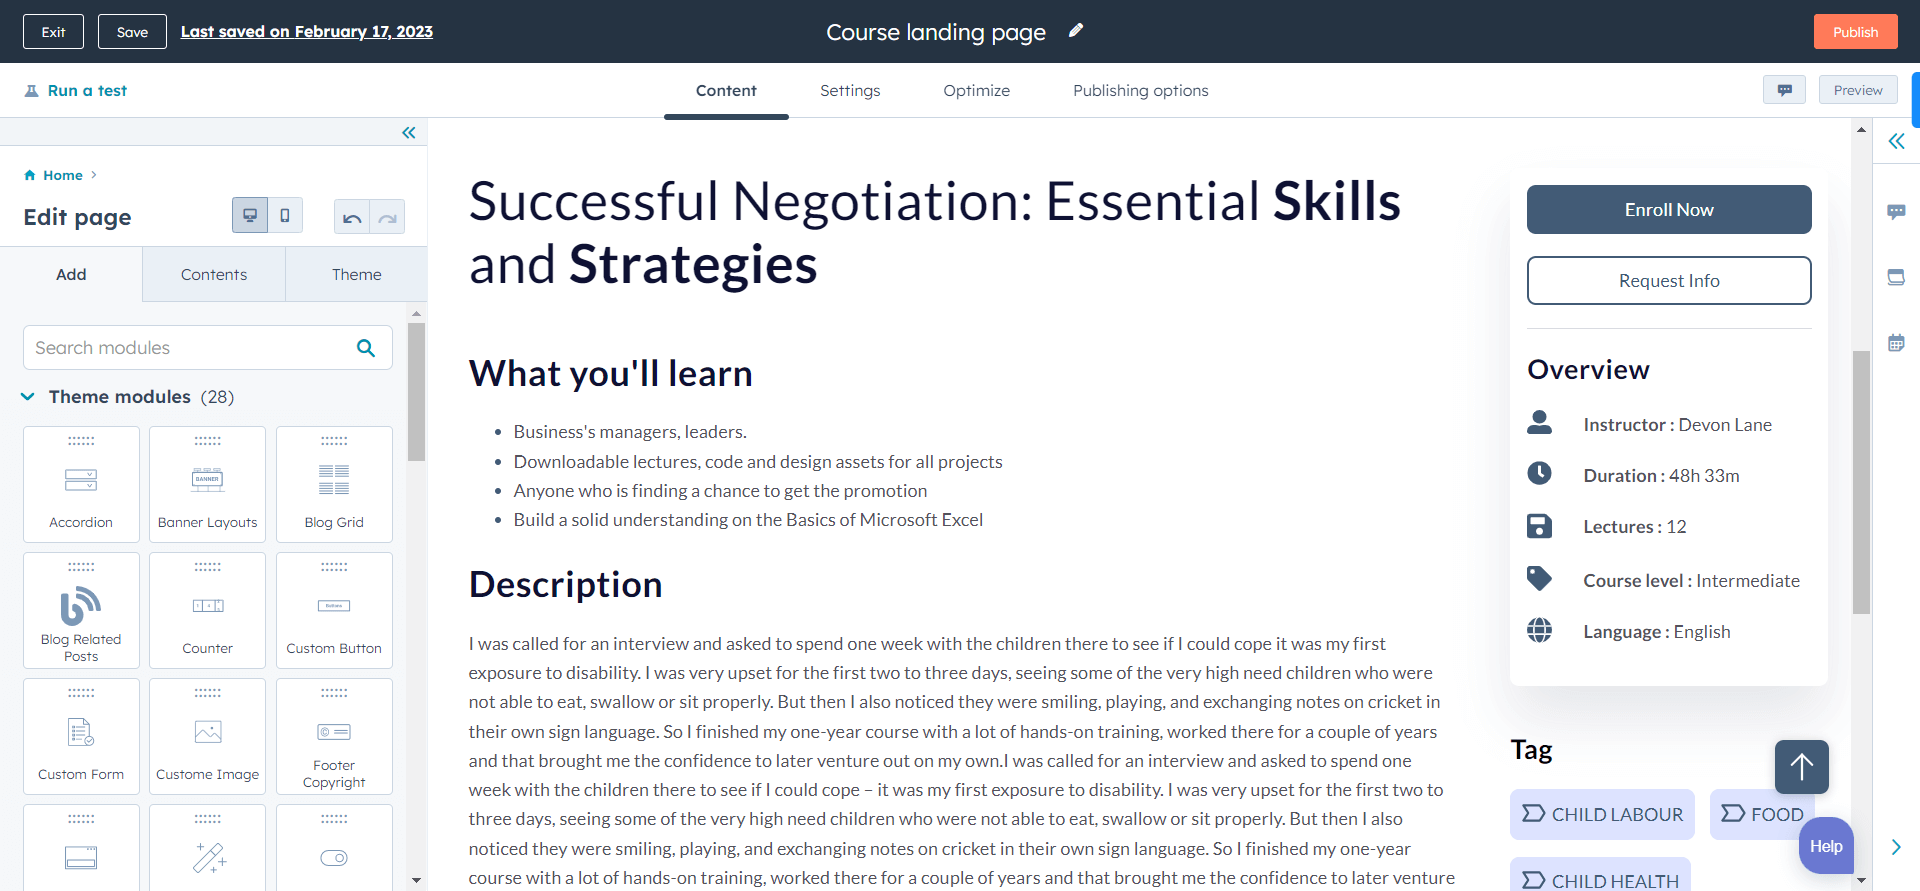
Here’s a good example of a course landing page from Wordstream:
If your website is built on HubSpot CMS, you can use education themes like Academia to build your course landing page.
You can follow these steps to create your course landing page:
- Download your theme, for example, Academia from the HubSpot marketplace.
- In your HubSpot account, go to Marketing > Landing pages and click on the Create button on the top right to build your course landing page.
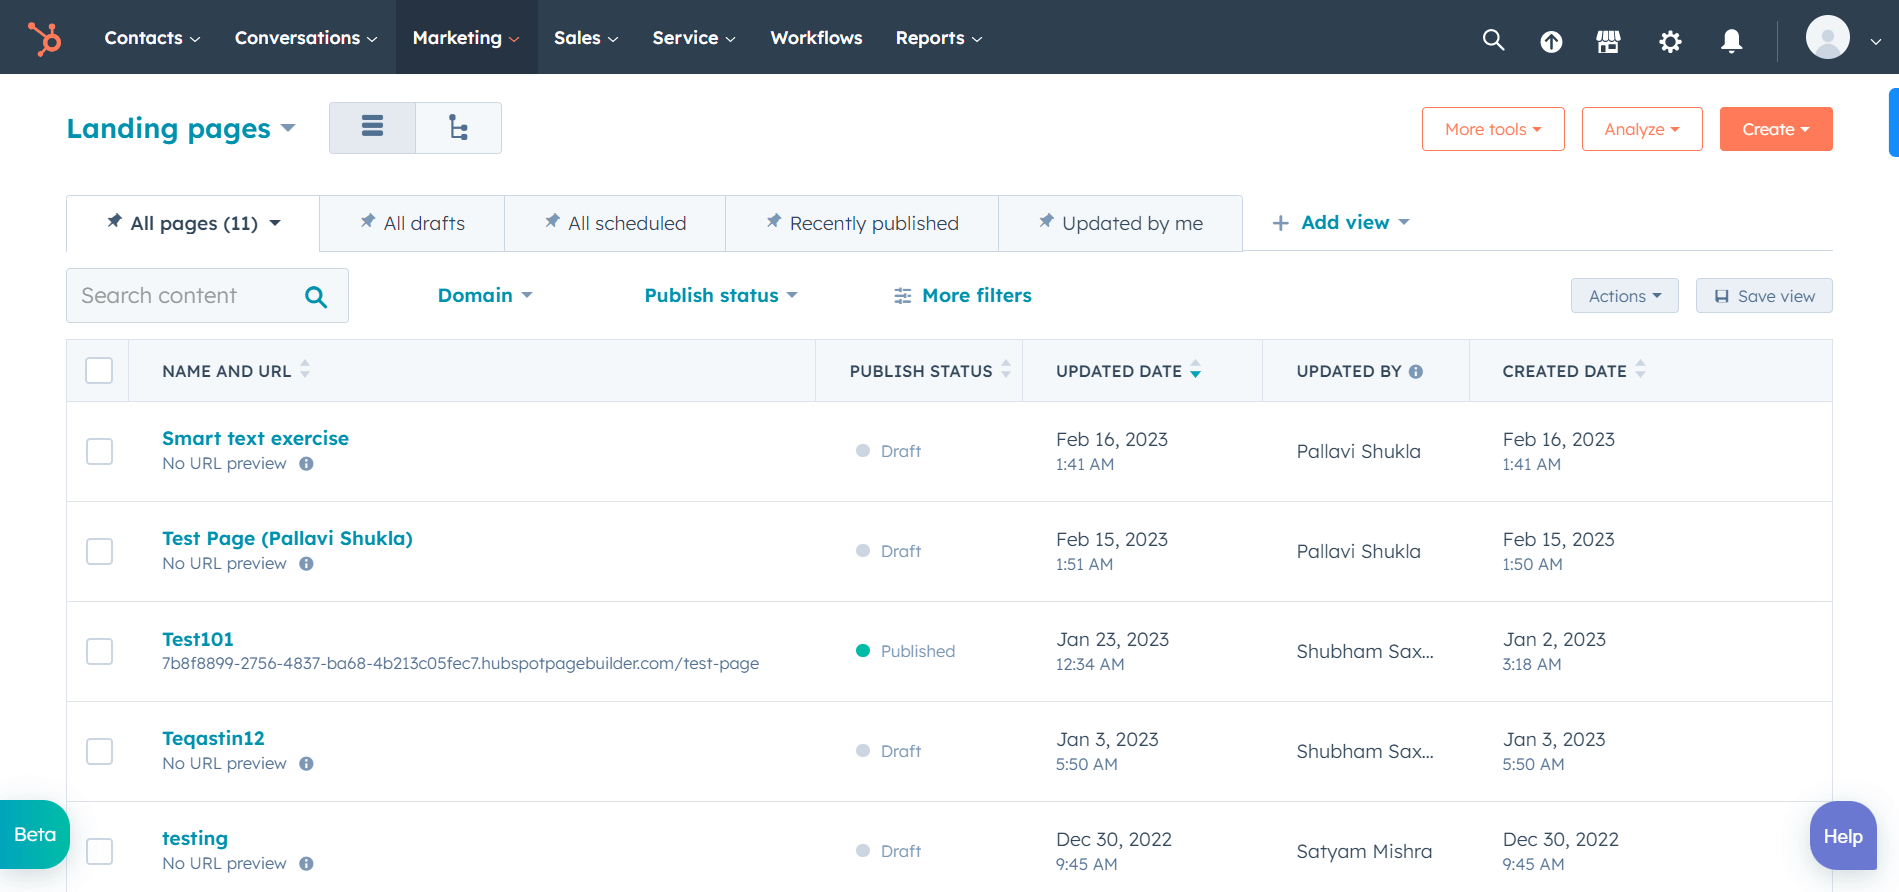
- Name your landing page and proceed further.
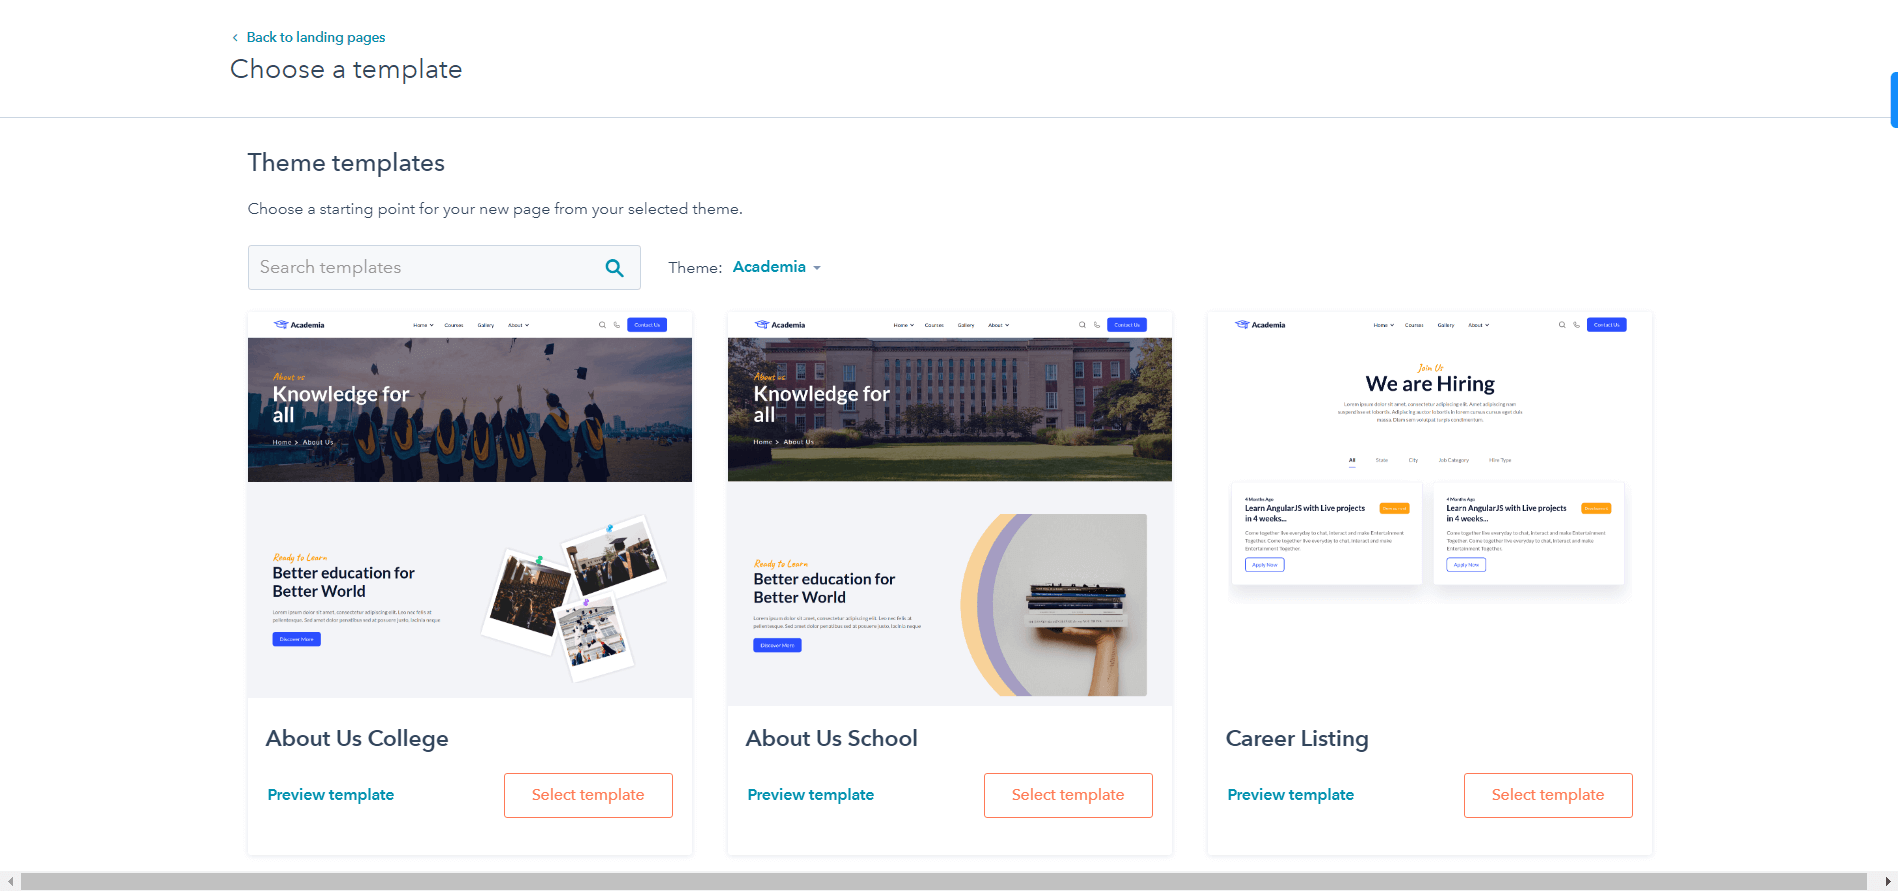
- Select a template you want to build your page like.
- After selecting your page template, move forward to and start customizing your template from the drag and drop editor.
- Once you customize your page and are satisfied with it, click on Publish to make the page live.
A few best practices to follow while creating your course landing page:
- Clear headline and CTA: Your page should have an eye-catching headline that clearly communicates your message. Also, your call-to-action should be clearly visible and encourage visitors to sign up for your course.
- Highlight the benefits of your course: Clearly write the things you’re going to cover inside your course and the benefits of signing up for your course. Try using bullet points & short paragraphs to convey these benefits.
- Add social proof: Use testimonials, case studies, video reviews, etc. to show how your courses have helped others.
- Offer a free preview: Offer a free preview of your course to encourage visitors to sign up.
Convert 2x More From Your Landing Pages
Let our experts revamp your HubSpot pages so you can convert more.
Upload Your Online Course to HubSpot
The next step is to host your online course. And if you’re using HubSpot CRM, you can host it on the platform itself. You just need to upload your course to the CRM.
Here are the steps you can take to upload your course on the CRM:
- Go to your HubSpot account and navigate to Marketing > Files & templates > Files.
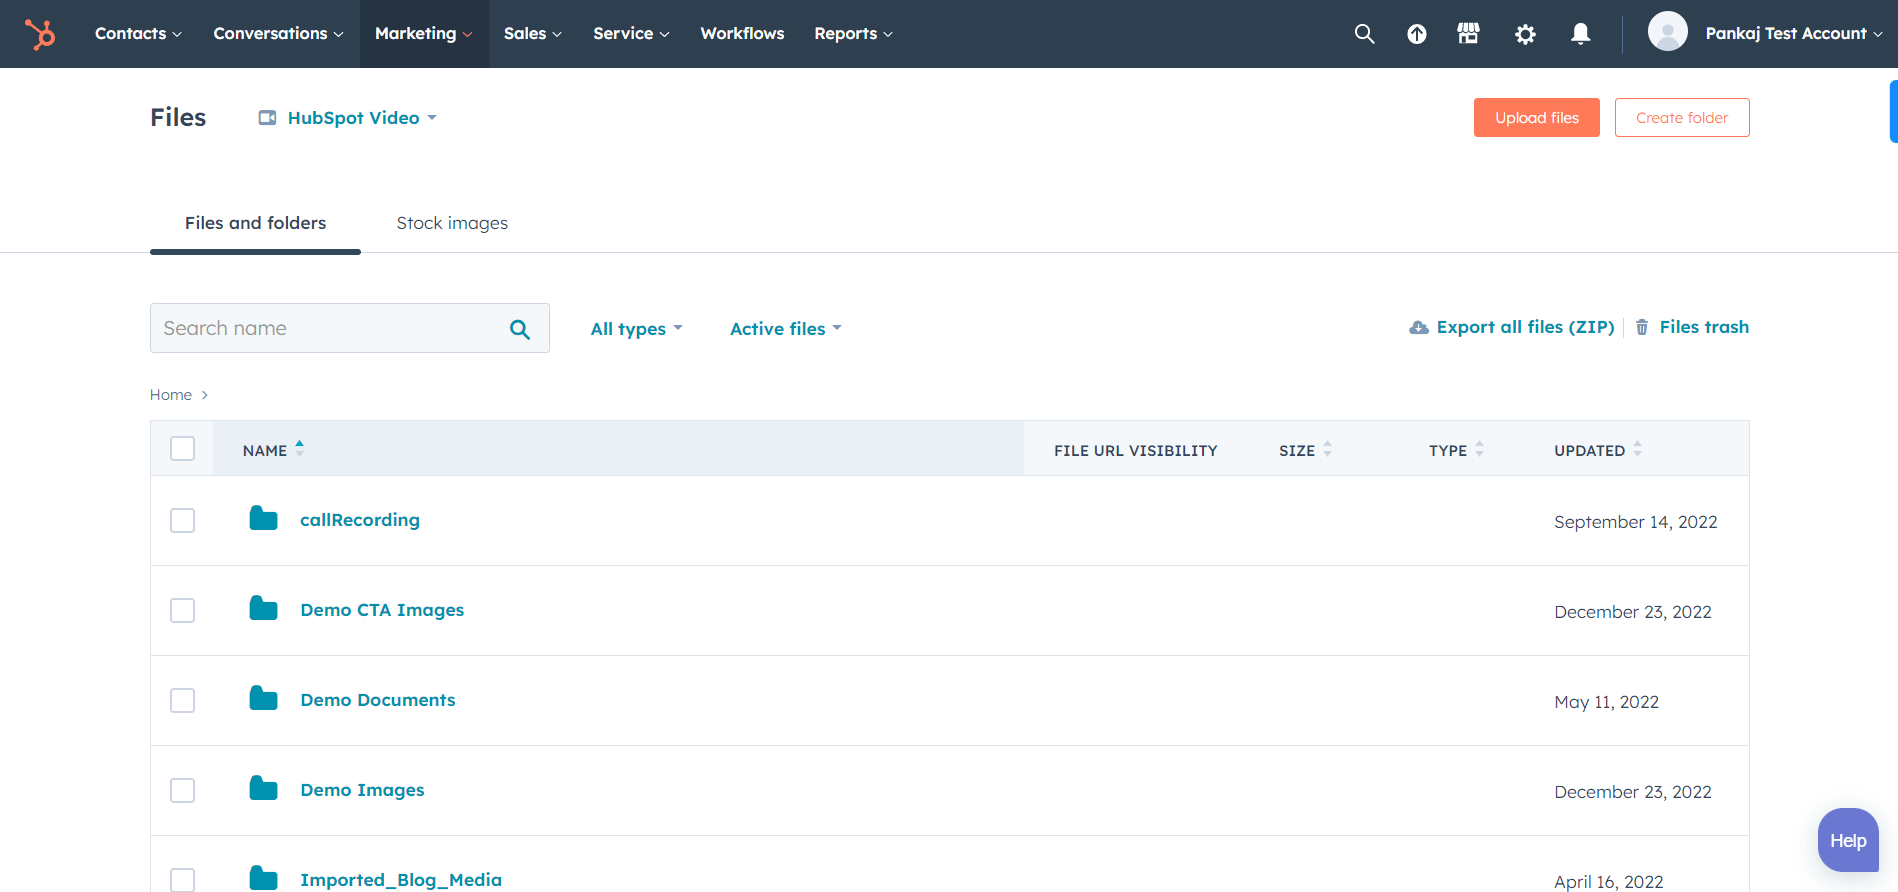
- Click on Upload Files to upload your course file on HubSpot CRM. If you have multiple files, you can create a folder to keep all the files in one place.
- After uploading, you’ll get a URL to your file. Copy this URL and proceed to the next step.
Create Your Course As A HubSpot Product
To sell your online courses with HubSpot, you need to create them as a product. You can do this in your HubSpot CRM in a few steps.
Let’s look at them:
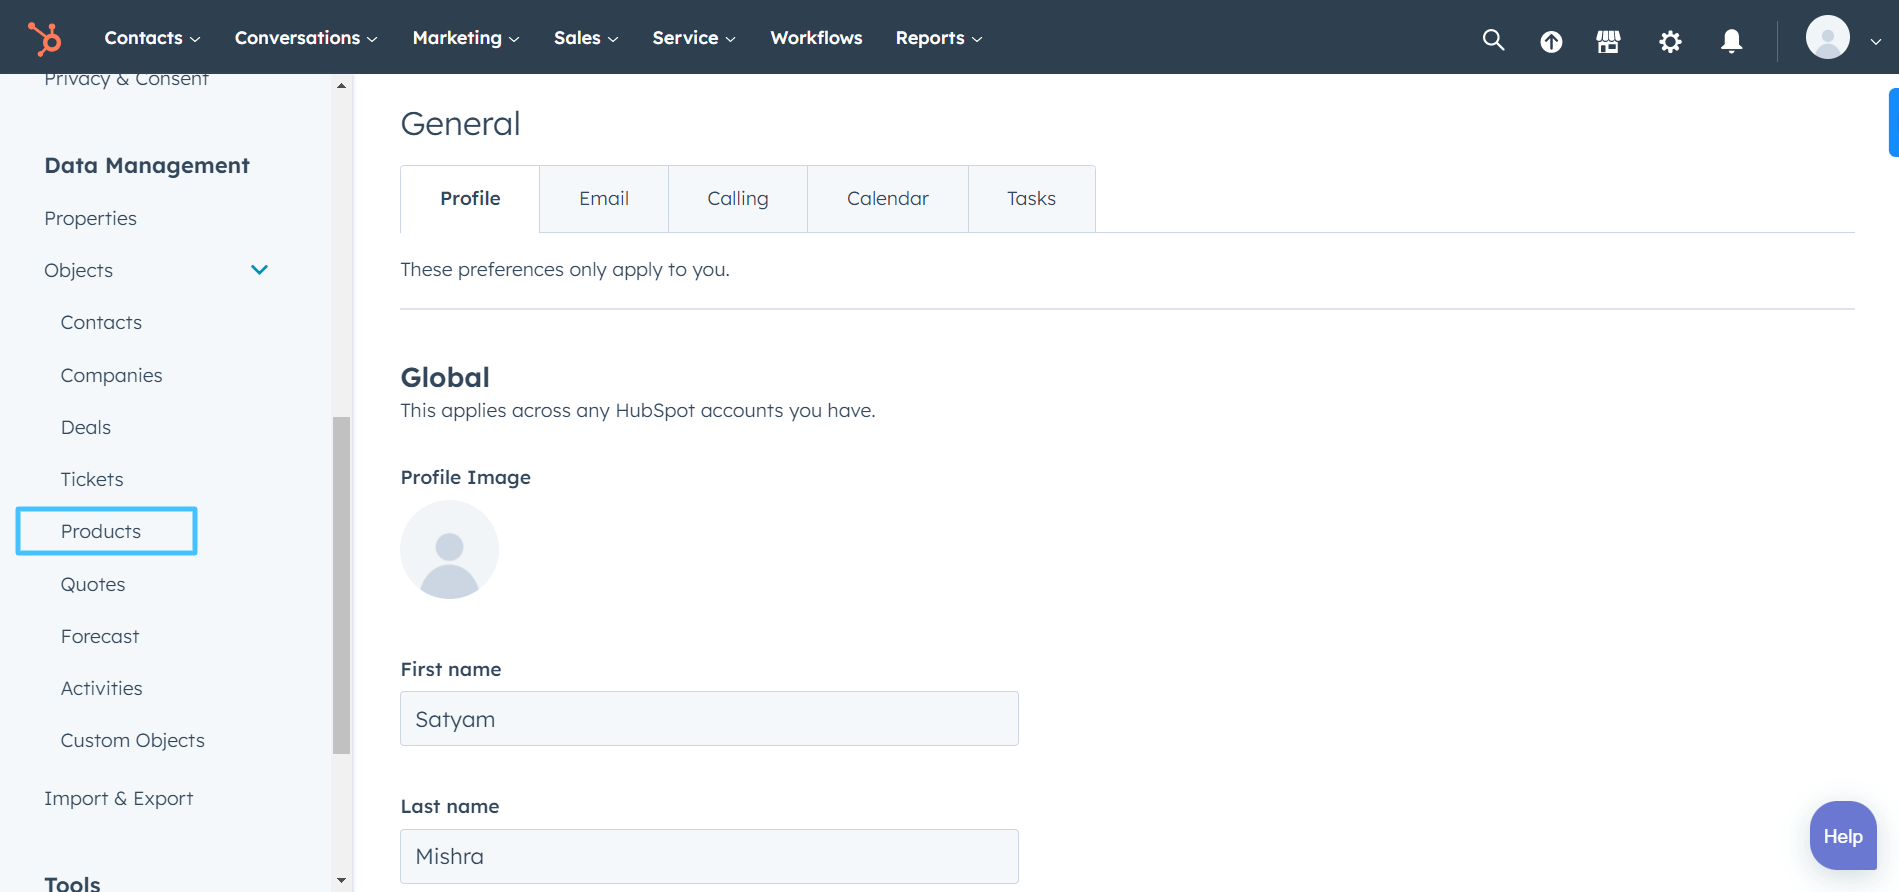
- In your HubSpot account, click on Settings on the navigation menu.
- From the left sidebar, navigate to Objects > Products and you’ll land on the Product library.
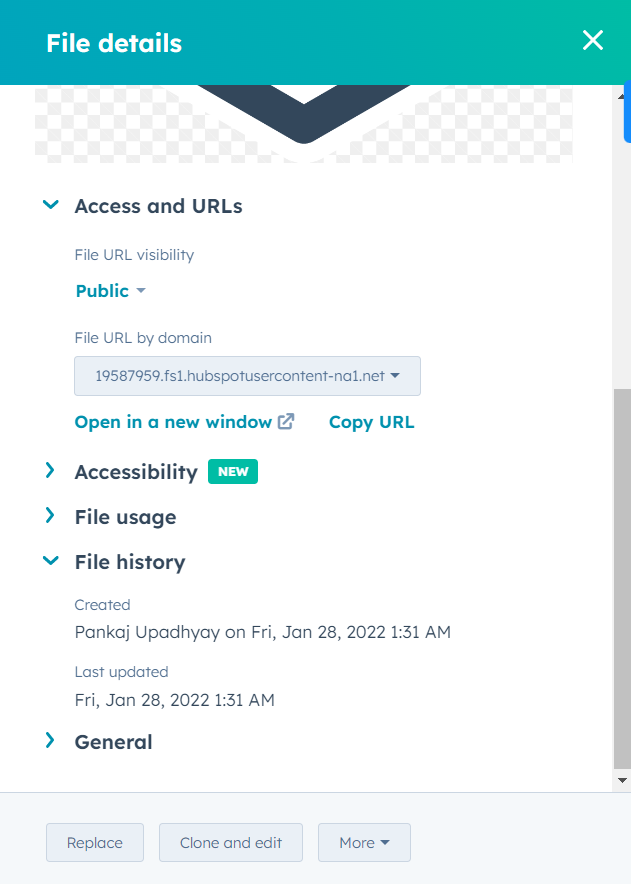
- Click on the Create Product button there and you’ll be asked to fill in details like Name, SKU, Product Type, Price, and more.
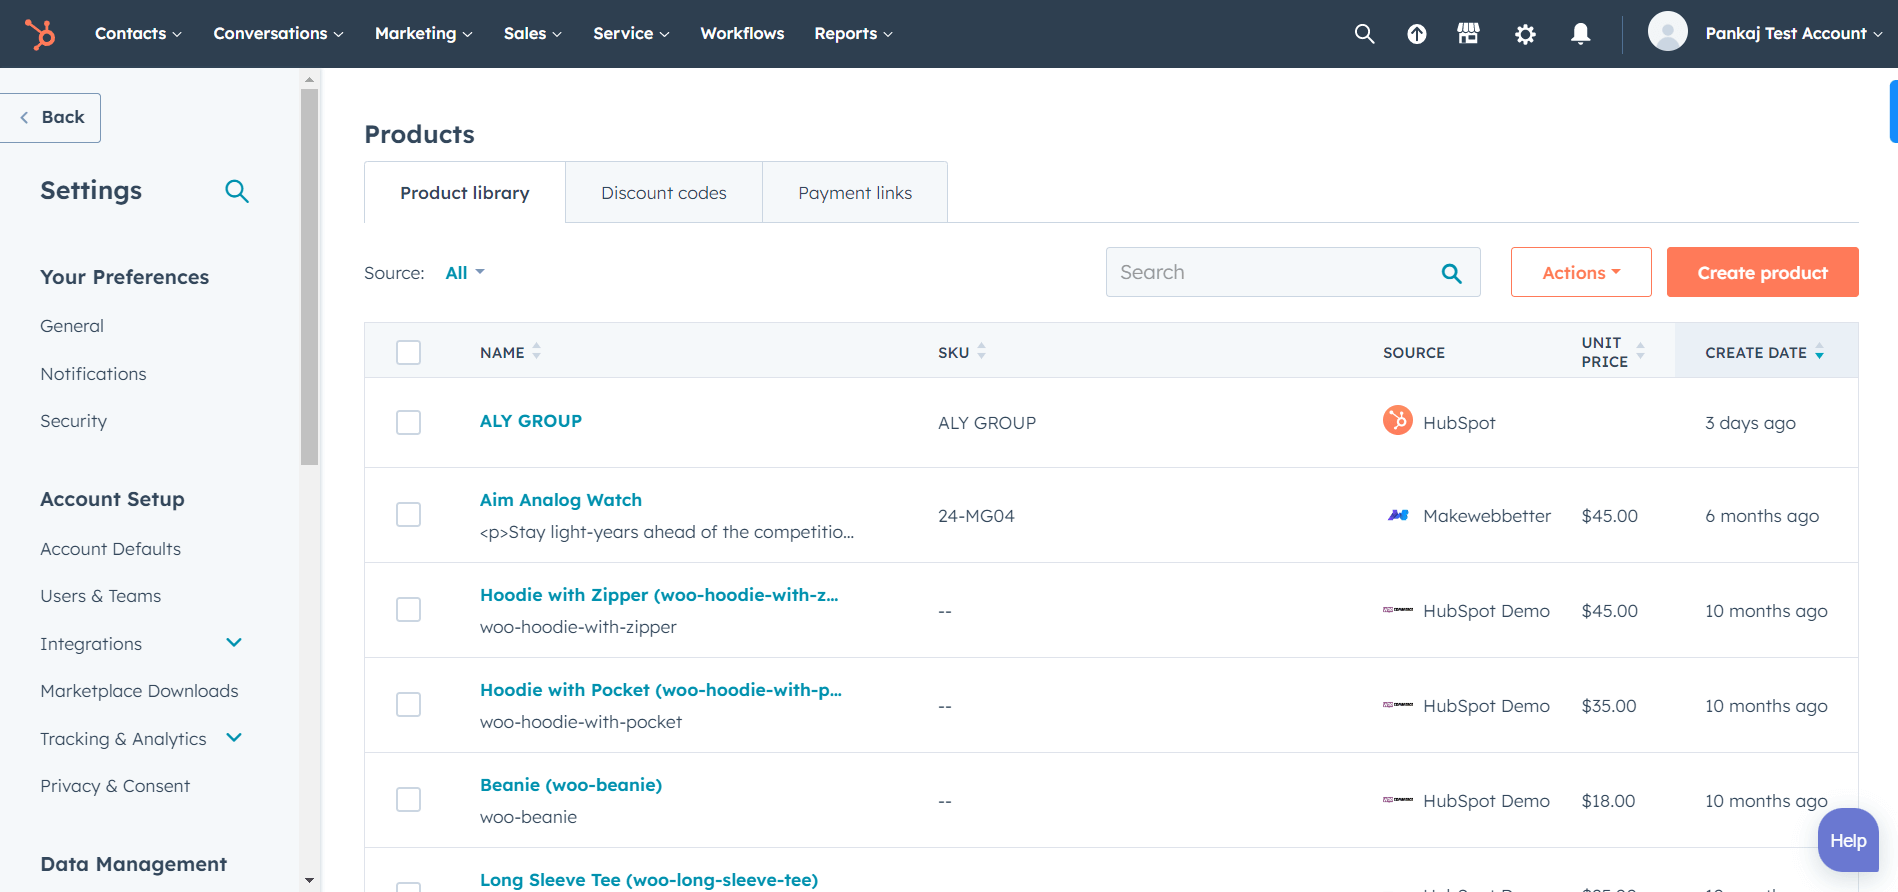
- Among these values, you’ll also see a field named URL.

- Enter your course file URL there, add the price and other necessary details and click Save.
Your online course is now ready as a product.
Create Your Payment Form
Another thing you need to sell online courses with HubSpot is a payment form. This form will be embedded on your course landing page. Users will fill this form to pay you for your online course.
But using a payment form means you have to start using a different platform to manage your payments. And that’s not an ideal solution for businesses looking to scale.
That is where Formpay by MakeWebBetter helps you. It converts your native HubSpot forms into payment forms. As a result, you can sync, manage, and track your payments within the HubSpot CRM. No need to switch to a different platform for payment management.
You can create a dedicated payment form for your course only.
To create your payment form with FormPay, follow these steps:
- Install the Formpay app from the HubSpot marketplace.
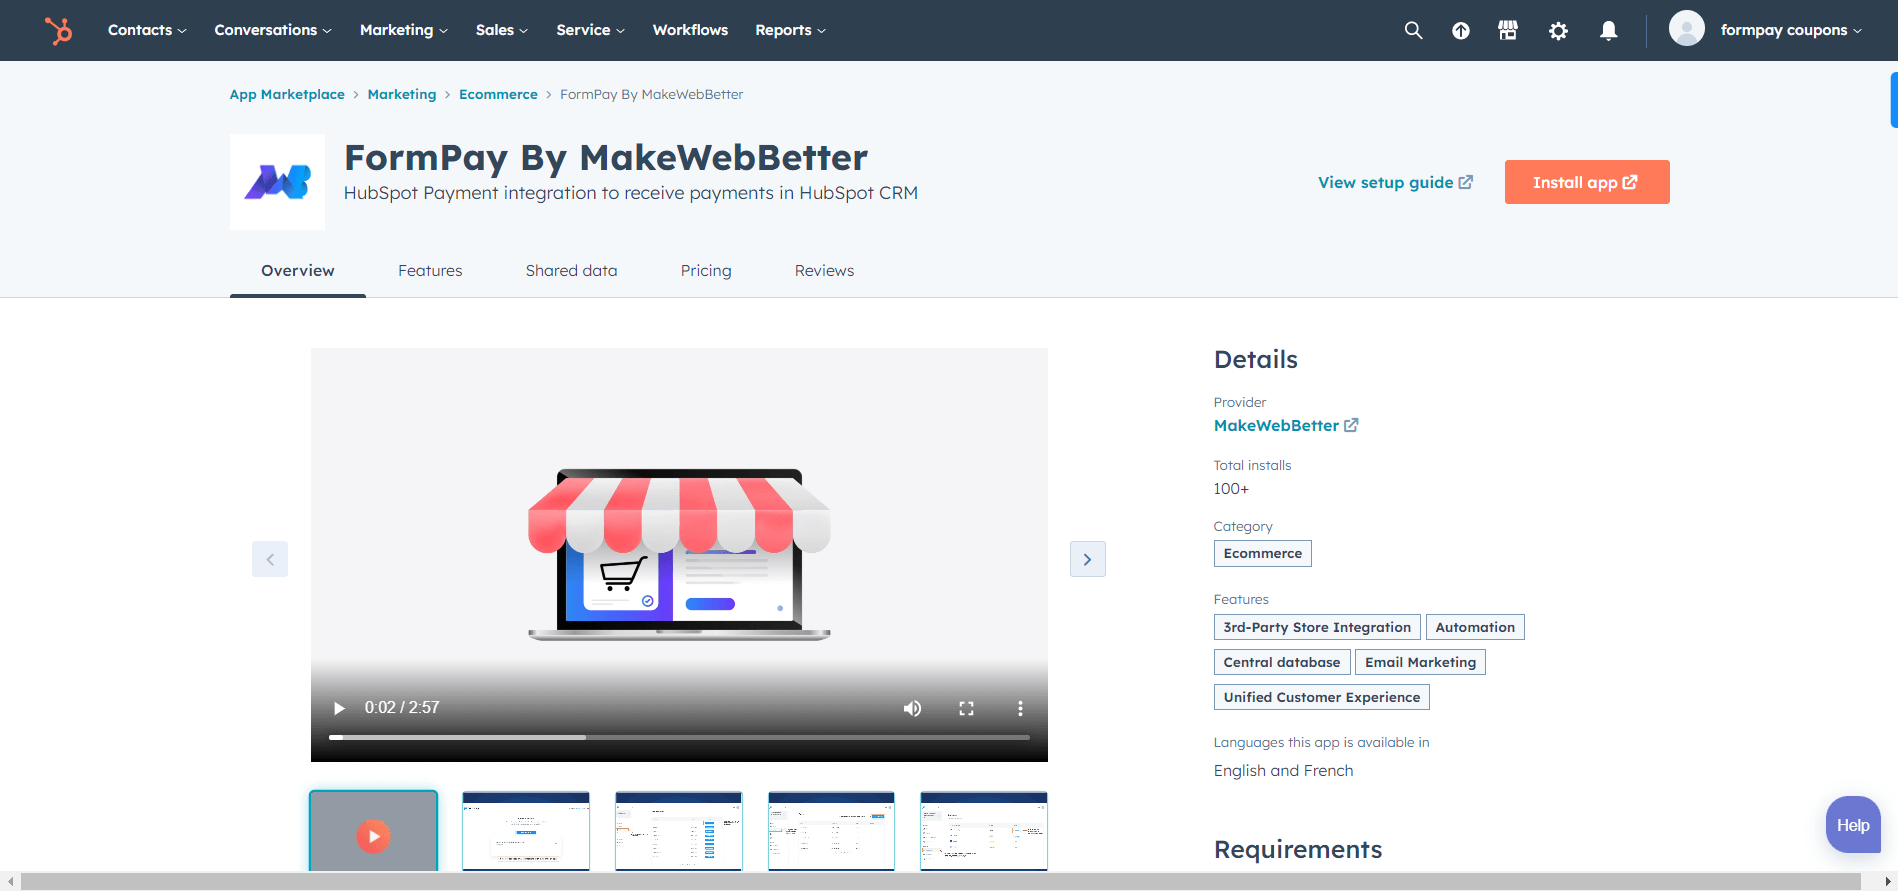
- Sign up for the app and connect to the HubSpot portal you want to sync data in.
- Once connected, login to the app and go to Products from the left sidebar.
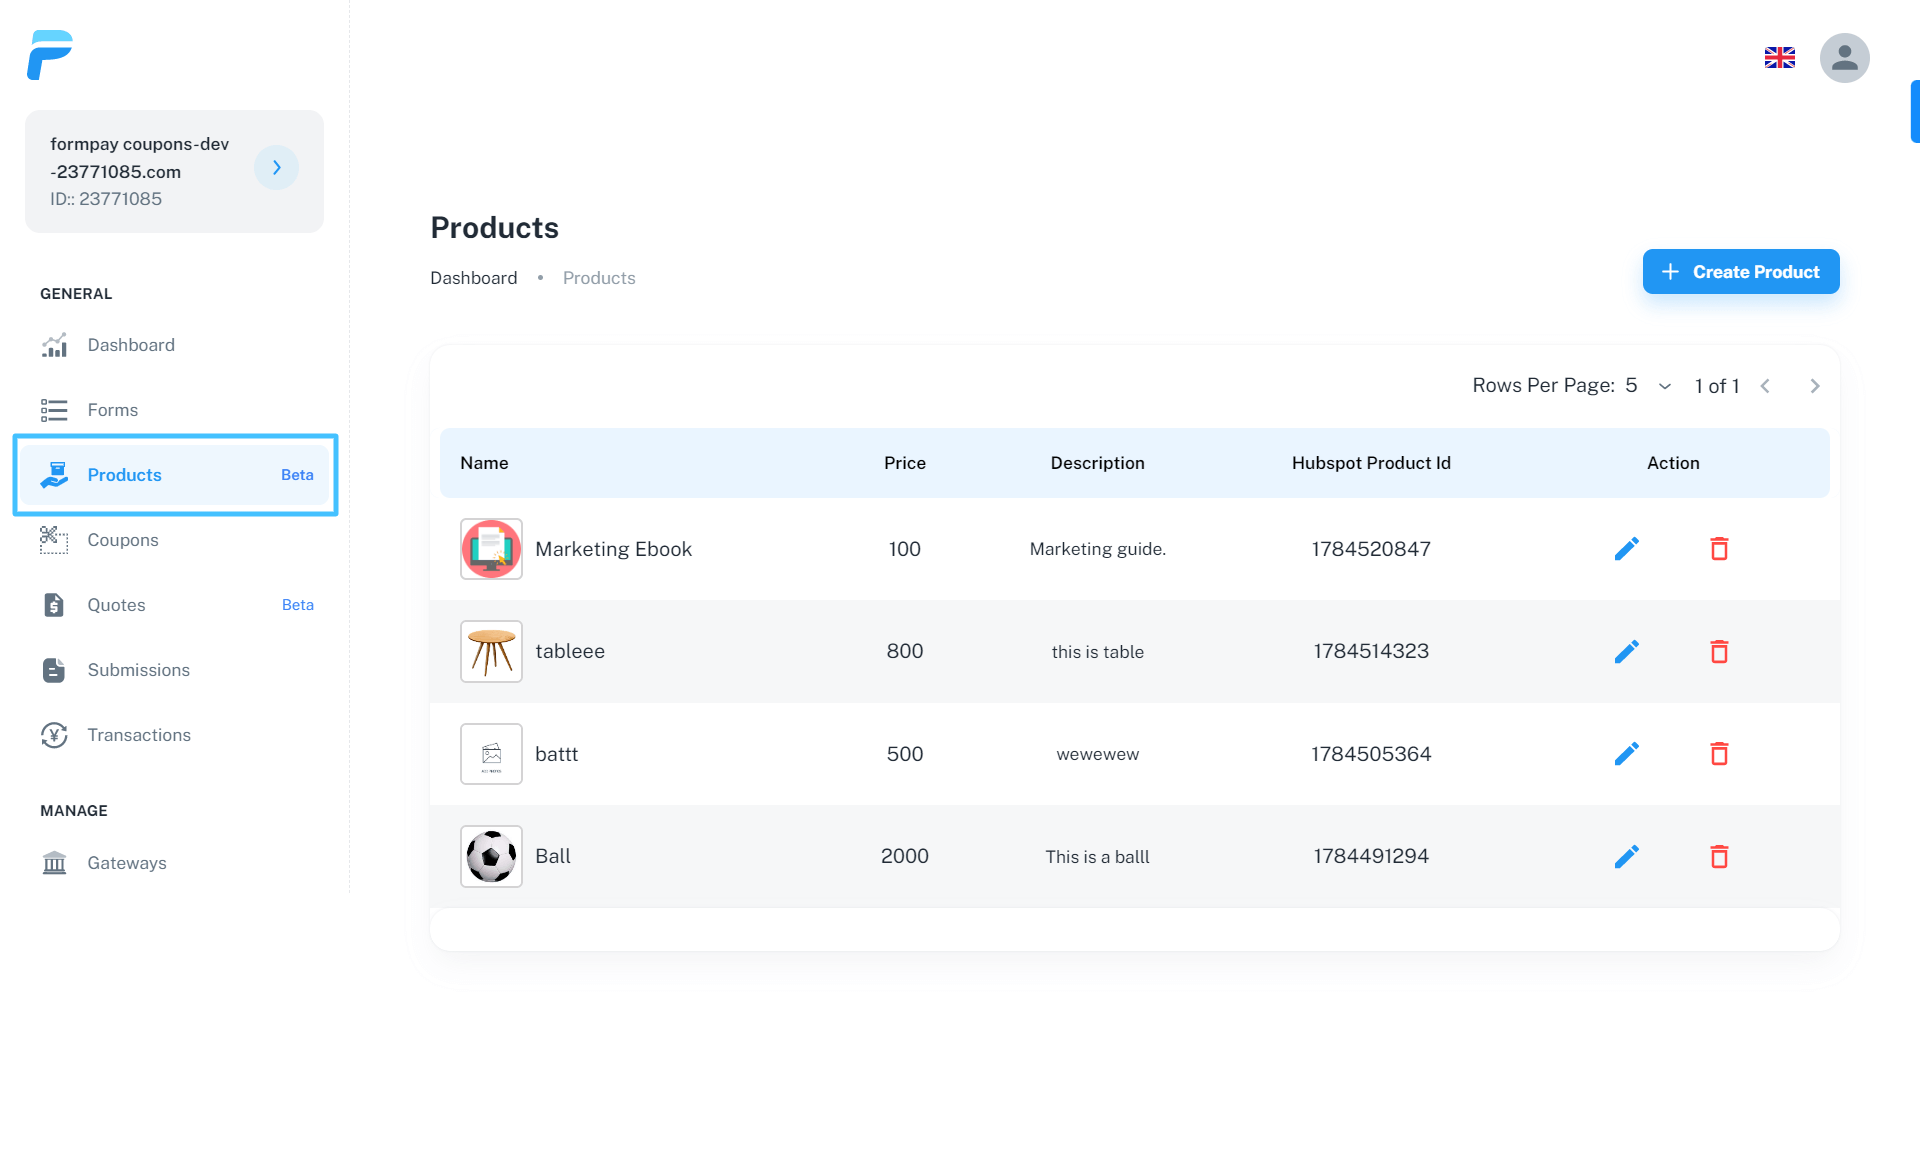
- Click on Create product button on the top right.
- Add Product Name, Price, Description, etc. Also, select the product you created in your HubSpot CRM in the earlier step from the HubSpot Product ID dropdown.
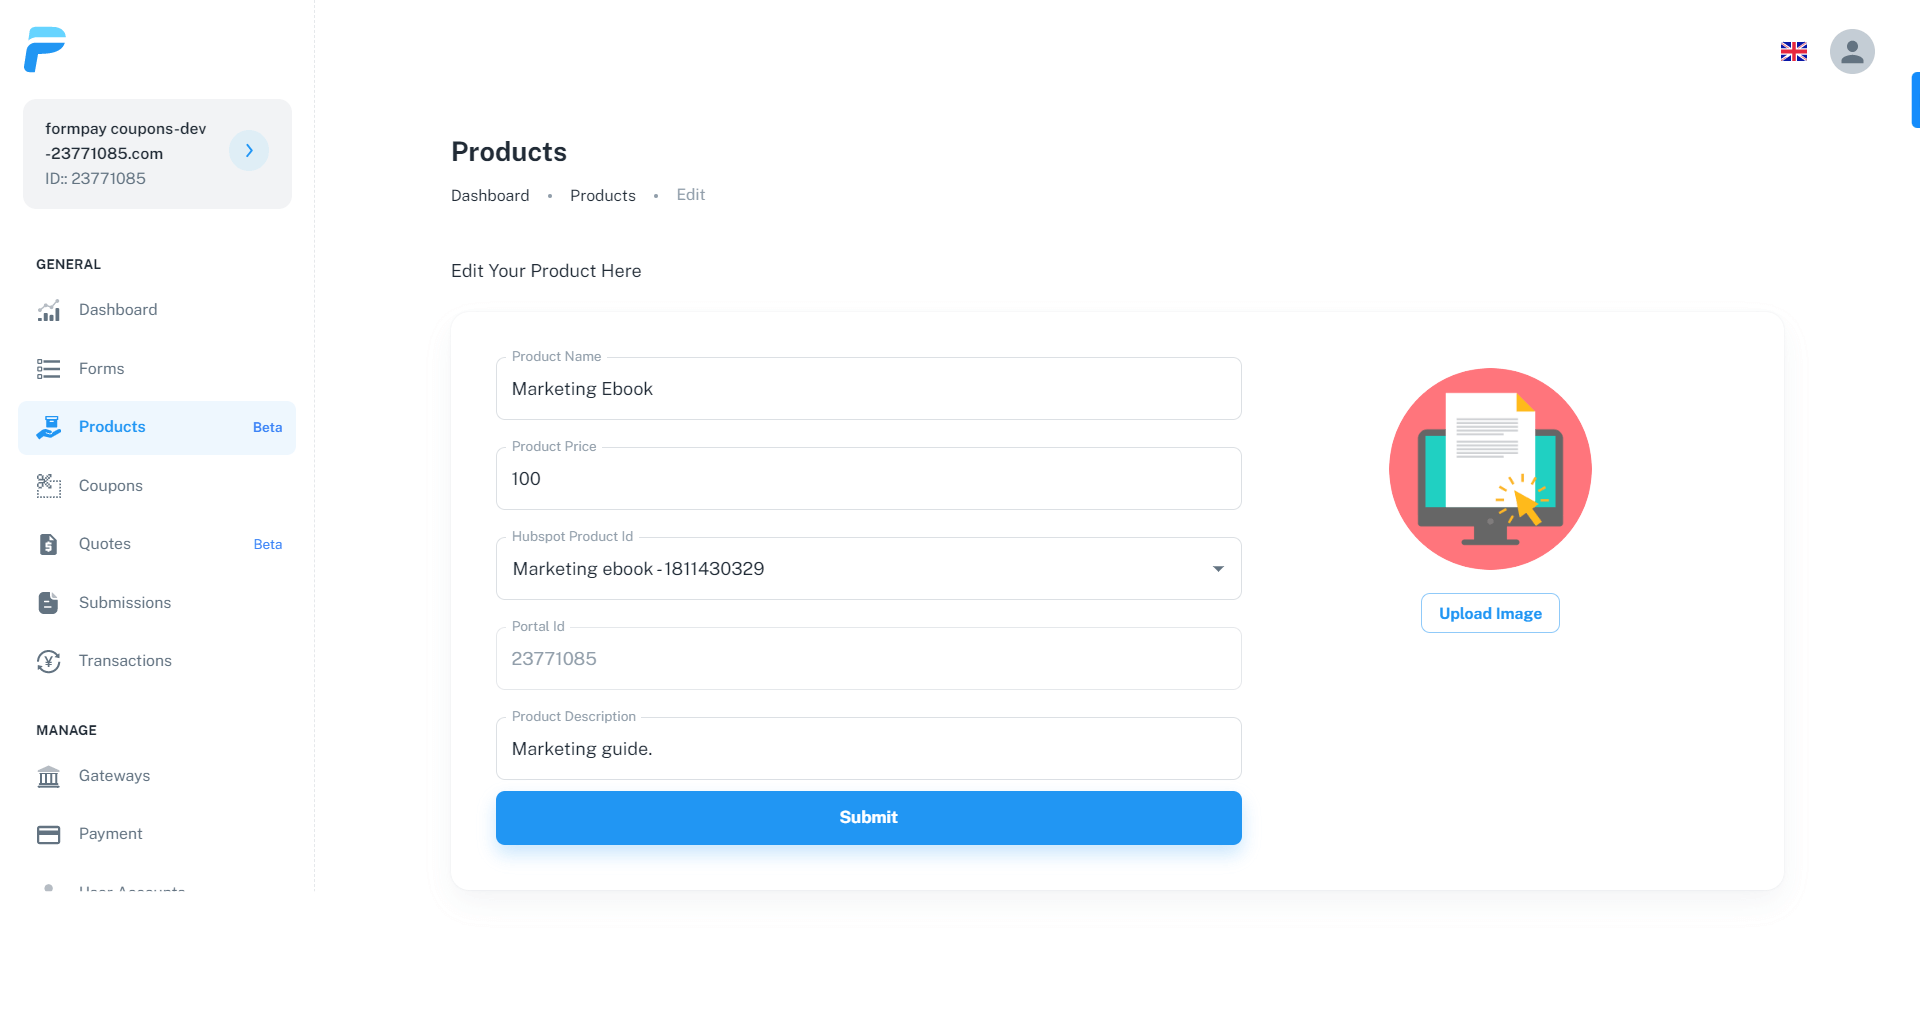
- Once done, click the Submit button.
- Now go to Forms and click on Create New Form.
- Go to the Products option and add the product in the form you created in this app earlier.

- Then click on the Forms option, fill in the required details and click on Publish Form button.
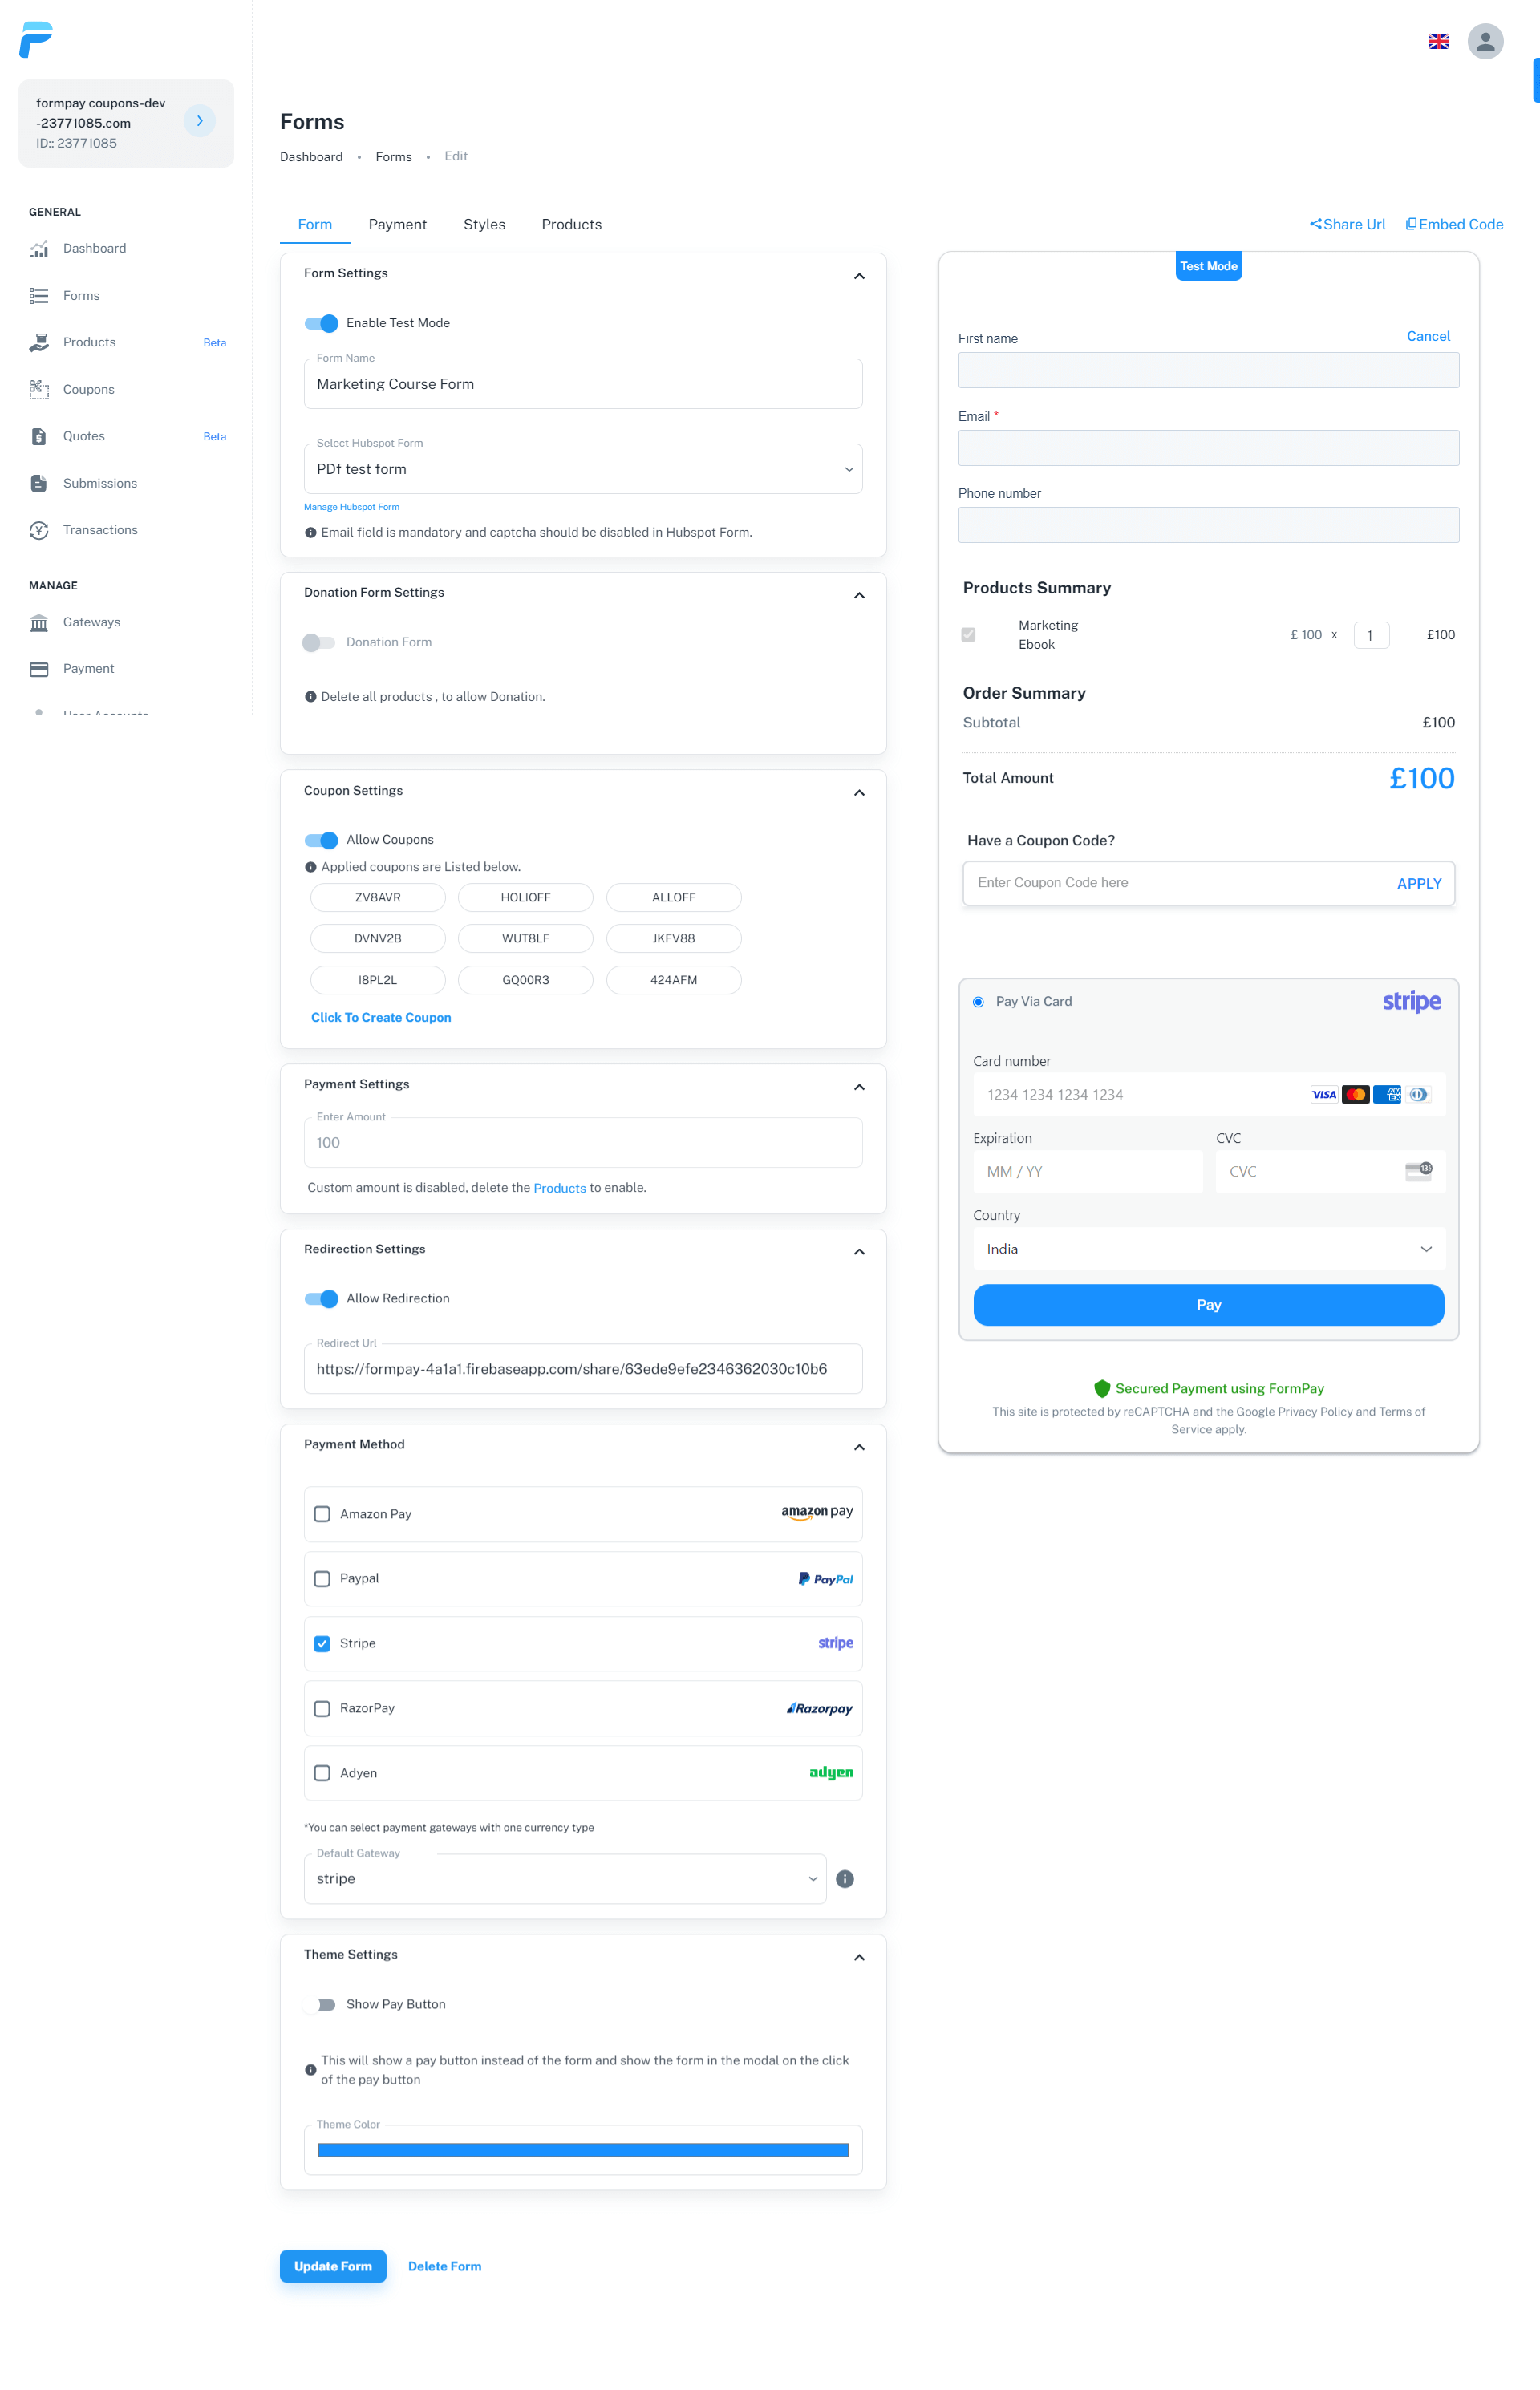
Your course payment form is successfully created. Well done! After you publish the form, you get a Form URL and Embed code above the form preview.
Use the embed code to embed the form on your course landing page. You can also share the form with the customers without embedding it on any page using the Form URL.

Collect payments in HubSpot. Anywhere! Any gateway!
Our Formpay app helps you receive payments in HubSpot with your favorite gateway.
Create A Workflow to Deliver Your Course
After you’re ready with your payment form, you can create a workflow in your HubSpot CRM to deliver your course automatically.
You can follow these steps to create your course delivery workflow:
- Go to your HubSpot account and navigate to Workflows.
- Click on Create Workflow and select From Scratch.
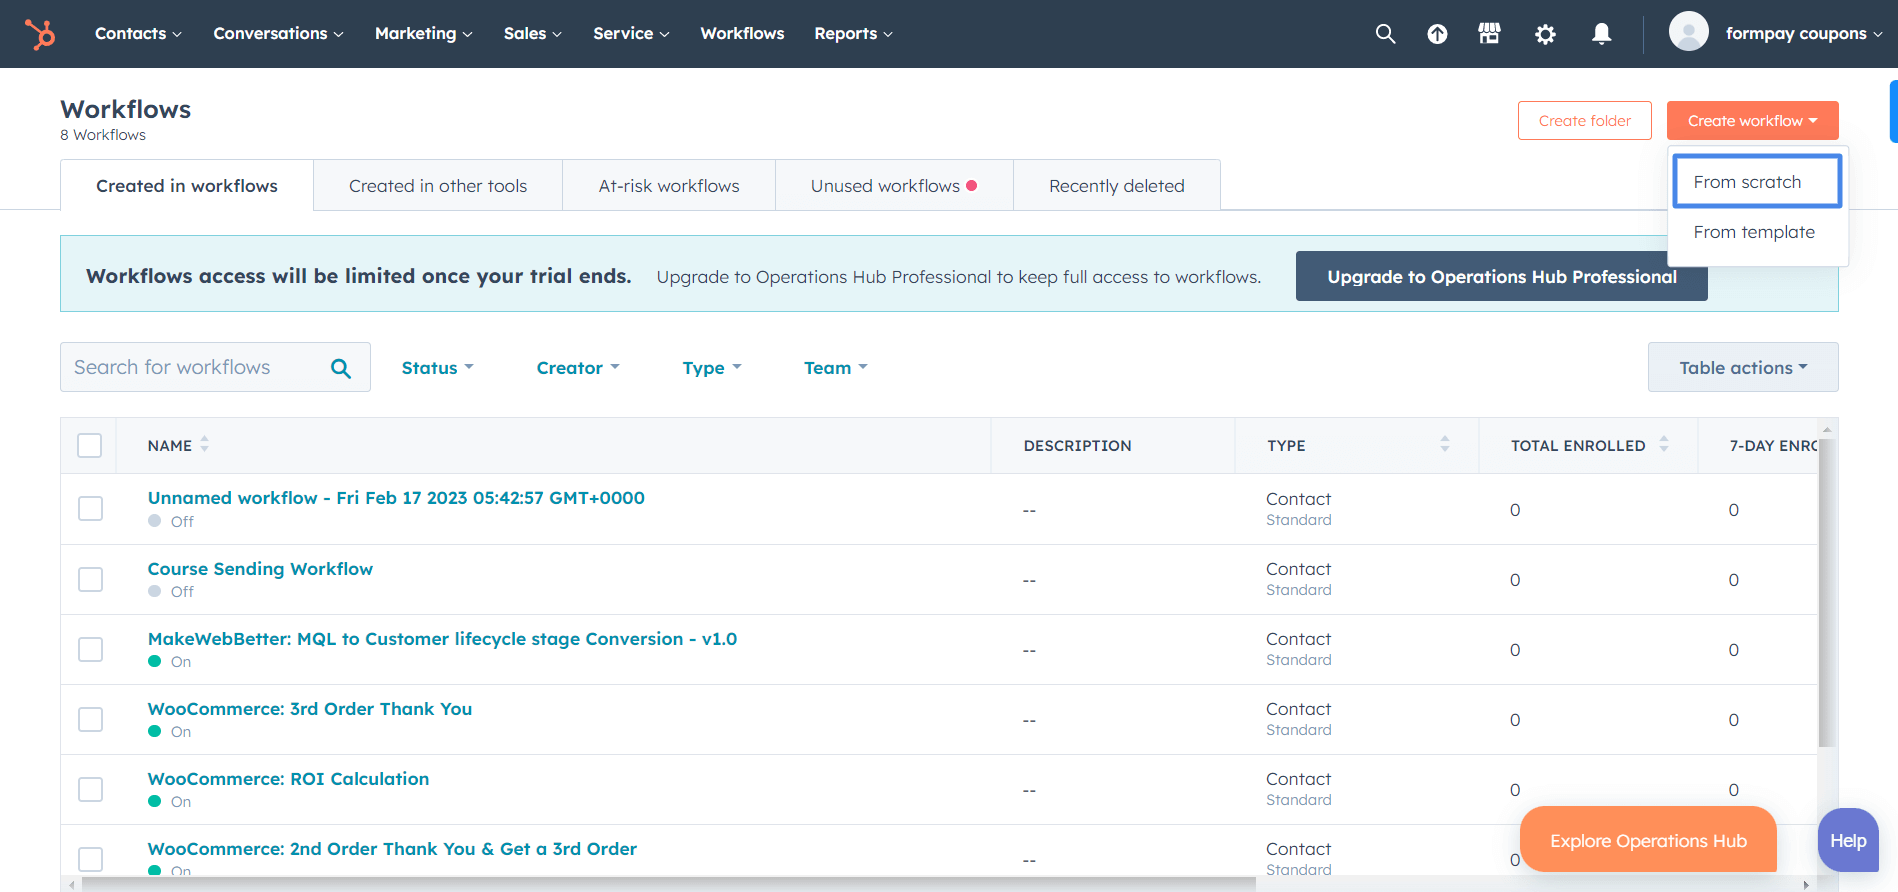
- Now select Blank Workflow and click Next to proceed.

- Click on Set up triggers to set enrollment triggers for your workflow. These enrollment triggers are the conditions that will start your workflow.
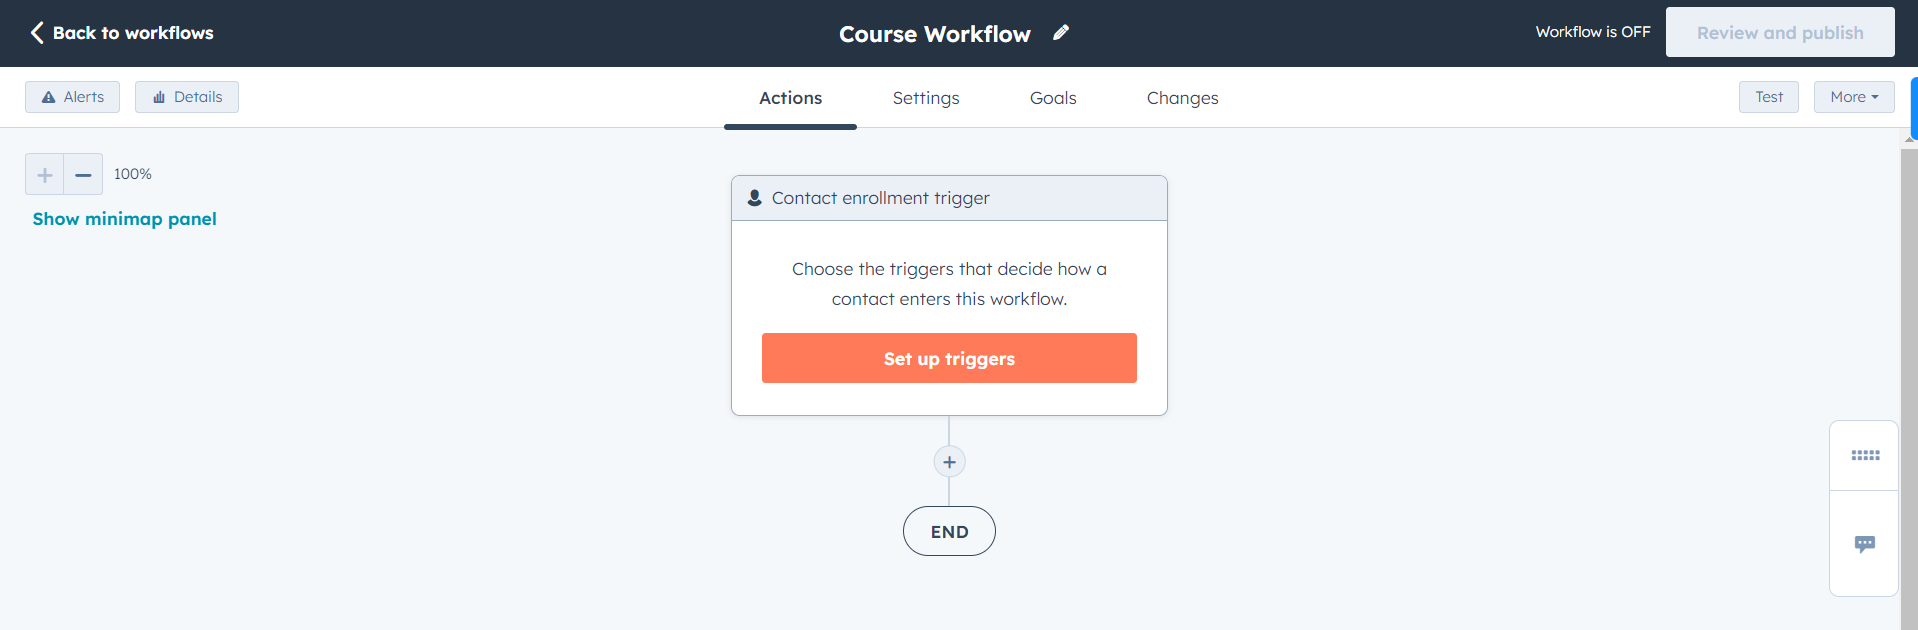
- Now select Form Submissions. Then select the form you created on HubSpot and converted into the payment form using Formpay. In the “Contact has filled out form on” dropdown, select Any Page. Then click on Apply Filter to apply this condition.
- Now add a new condition to check if the payment was successful.
- For this, click AND. Select Contact Properties, look for the Last Payment Status property and select Success.
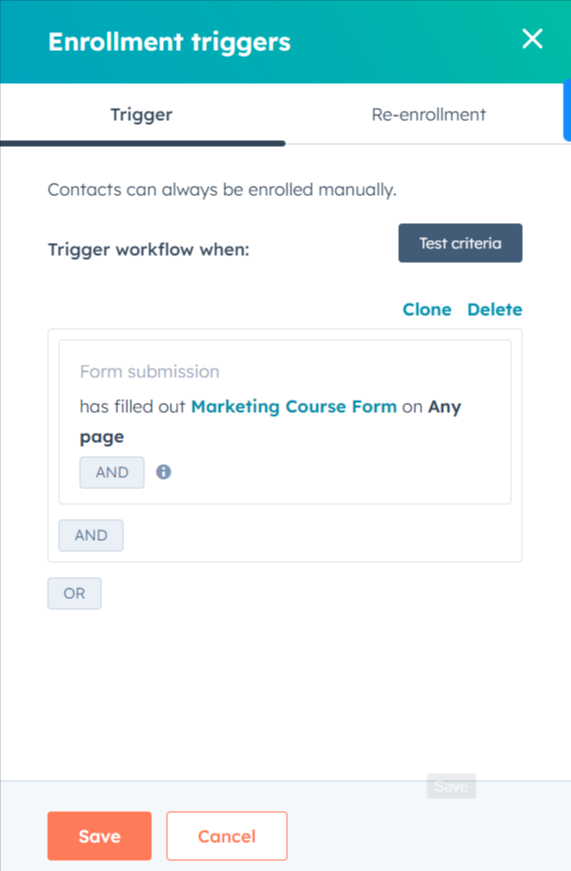
- Hit the Apply Filter button and save the changes.
- Now you’ve set your Enrollment Triggers successfully.
- Click on + button and select Send Email.
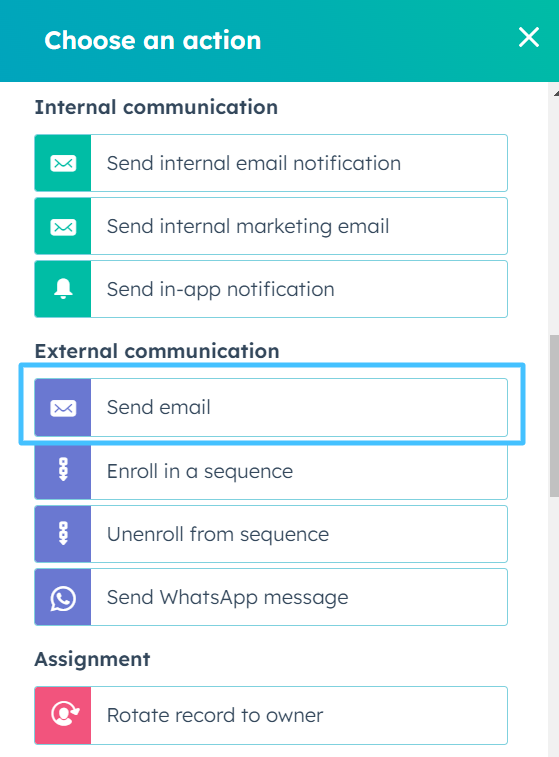
- Choose the email you’ll send after a successful form submission. For example, a Thank you mail.
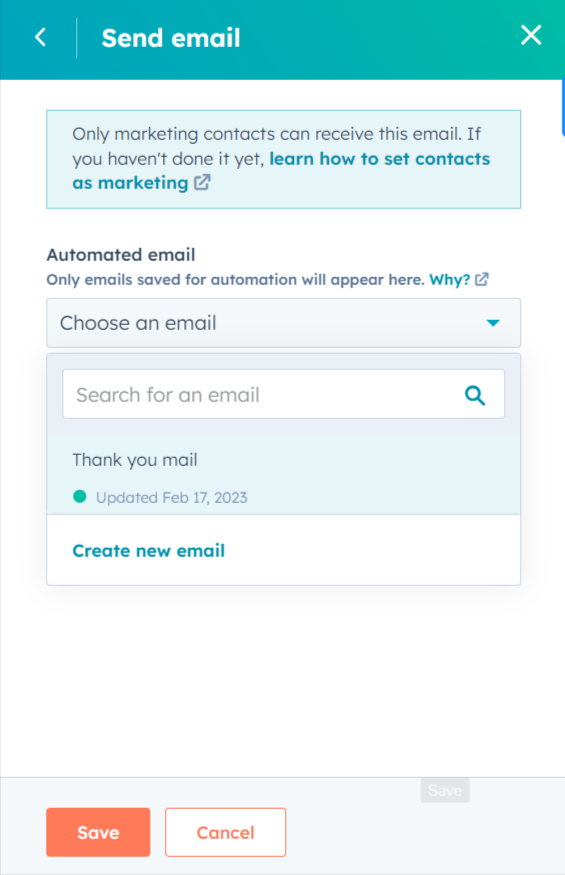
- Now click Save and your workflow will be ready.
Once you’re satisfied with the workflow, click Review and Publish to make the workflow live. Your live workflow may look like this.
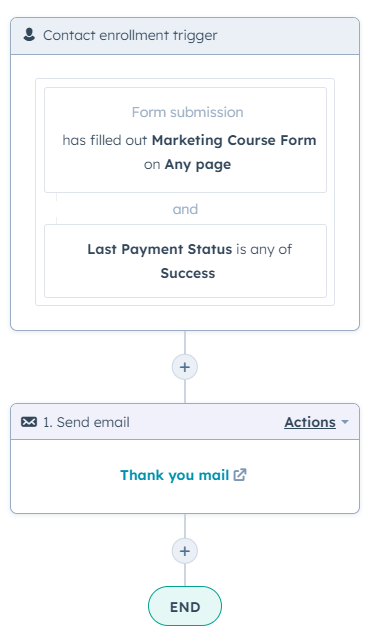
And you’re done. You’ve successfully created your course landing page, payment form, and the workflow.
Now users can submit the payment form on your course landing page. Once they do that, they’ll receive an email with the course link. They can access your course from the email and learn what you’re teaching.
Squeeze Every Drop of Value From HubSpot
Audit your HubSpot to find out the loopholes and fix your HubSpot CRM to get more value.
Over to you
Selling online courses with HubSpot backs you at every step of your business.
You can reach a wider audience, attract quality leads, and turn them into paid customers. With HubSpot’s comprehensive set of marketing and sales tools, you can create a seamless and effective customer journey, from the initial point of contact to post-sales follow-up.
By following the steps outlined in this blog, you can create a strong foundation for your online course business and use HubSpot to drive growth and profitability.
Remember, HubSpot is just a tool that will assist you in growing your business. But everything boils down to the quality of your courses.
You have to create high quality courses to provide real value to your customers. And then combining those valuable courses with HubSpot is what makes your business thrive faster.